
-
Home

-
Maintenance Kit Instructions
-
Lexmark T650 T652 T654
- Installing the fuser Lexmark T650 T652 T654
Installing the fuser Lexmark T650 T652 T654
1. Turn off and unplug the printer; and allow time for the fuser to cool.
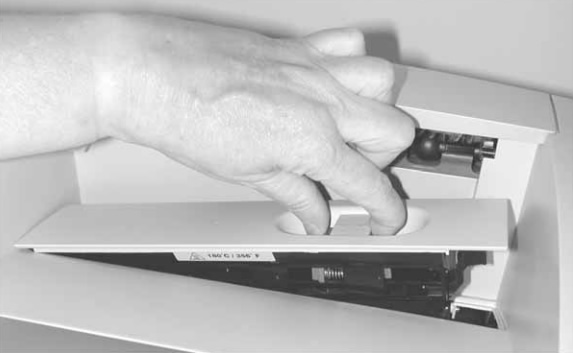
2. The fuser wiper cover is on the top of the printer, where the paper stacks up as it leaves the printer. Squeeze the button as shown in picture below and pull up to remove this cover.
3. Slightly open the rear door at the back of the printer. There will be a door strap which secures the door; twist that door strap left or right until it is vertically aligned in its slot, and then pull the door strap free from its slot. Next you can lower the door assembly to a 45 degree angle as shown in picture below. Finally, remove the door assembly.
4. Next open the fuser access door at the rear of the printer.
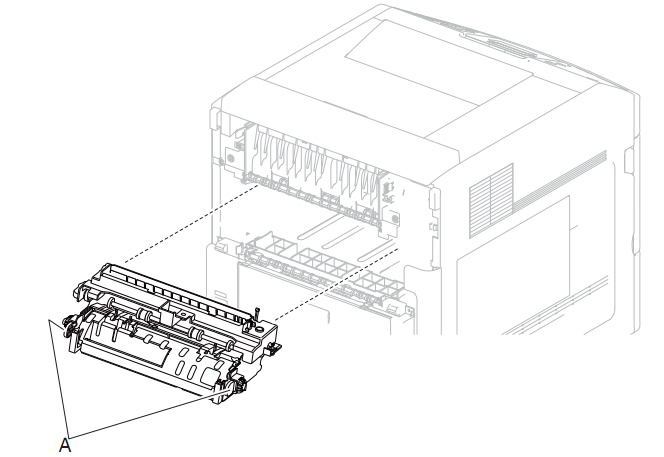
5. Press the 2 buttons (labeled callout "A" in picture below) to release the fuser from the machine. While pressing the 2 buttons, pull the fuser assembly out of the printer.
6. The new fuser will have some black or orange plastic wedges that need to be removed before installing. Remove those wedges, and install the new fuser in reverse order of these steps. Make sure the fuser buttons lock into place and the fuser is securely installed.
7. If you purchased your new fuser at the exchange price, don't forget to send back your used fuser to PrinterTechs as a core exchange. Re-use the original box and packaging for safe shipping.
Other Steps in Lexmark T650 T652 T654
Tech Support
Featured Articles

