
-
Home

-
Maintenance Kit Instructions
-
HP LaserJet CM2320
- Removing the Covers LaserJet CM2320
Removing the Covers to Access the Fuser, HP LaserJet CM2320 series

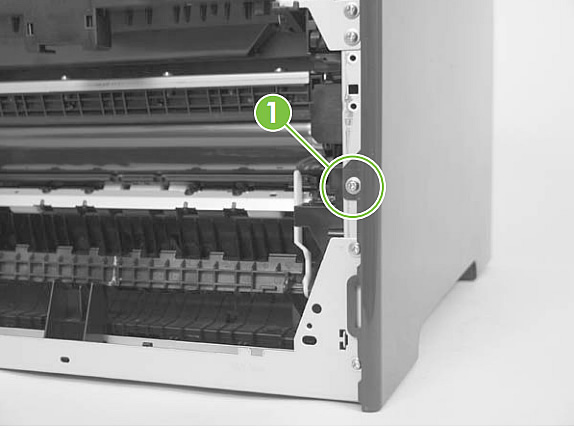
Removing the Right Cover
1. Open the rear door.
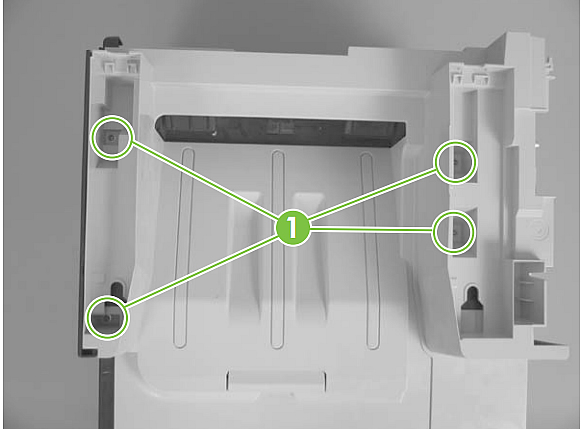
2. Remove 3 screws from the right cover, marked as callout 1 in picture below.
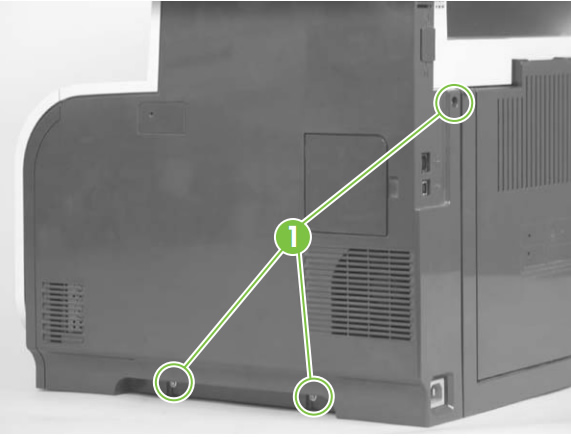
3. Slide the right cover towards the back of the printer.
4. Remove the right cover from the printer.

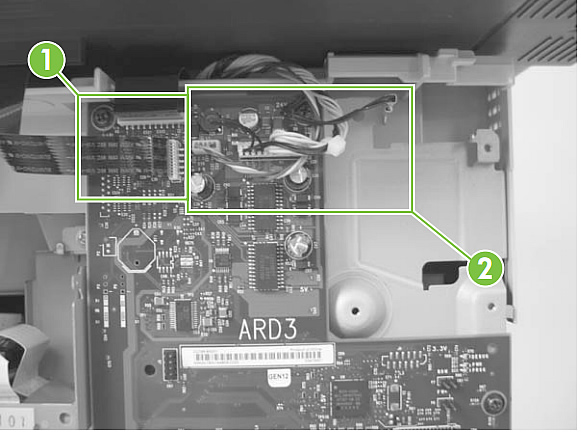
Removing the Scanner Assembly
1. Disconnect 3 ribbon cables (callout 1 in picture below) and three plugs (see callout 2 in picture below). Note -- the base model CM2320 will only have 2 ribbon cables, the other models have 3.
2. Remove 4 screws from the back of the scanner assembly, see callout 3 in picture below.
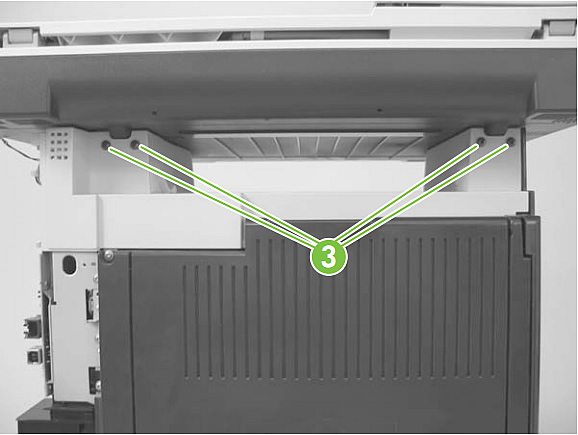
3. Slightly lift up the back of the scanner, and then slide it towards the front of the printer.
4. Lift the scanner straight up and away from the printer.

***** NOTE : There are 2 versions of this printer, duplexing models (CM2320fxi) and non-duplexing models (CM2320n or CM2320nf). The 2 versions have different rear covers on the back of the printer, so there will be different steps for removing the rear covers depending on your model. Follow the directions below, and watch for any directions specific to your version of the printer. ******
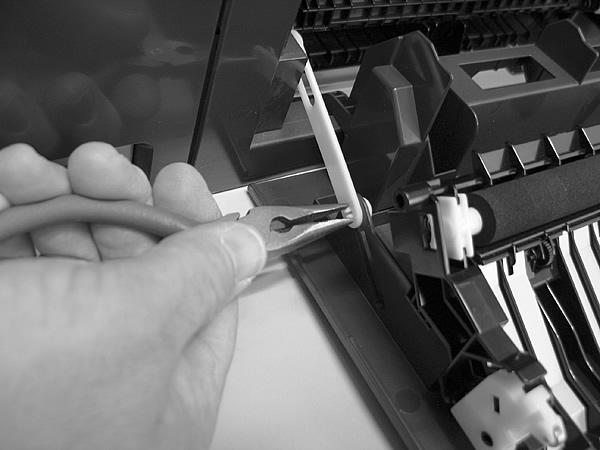
If you have a duplex model printer (CM2320fxi) skip to the next step. If you have a simplex model printer (CM2320n or CM2320nf): Open the rear door, and use a pair of needle-nose pliers to squeeze the small tabs in picture below to release the link cap.
If you have a duplex model printer (CM2320fxi) skip to the next step. Users with simplex model printers (CM2320n or CM2320nf): Remove the four screws shown in picture below from the rear door.

If you have a duplex model printer (CM2320fxi) skip to the next step. Users with simplex model printers (CM2320n or CM2320nf): Notice the alignment pins on the door (see picture below), you will refer to those again later when re-installing the door.
If you have a duplex model printer (CM2320fxi) skip to the next step. Users with simplex model printers (CM2320n CM2320nf): Remove the rear door from the printer.
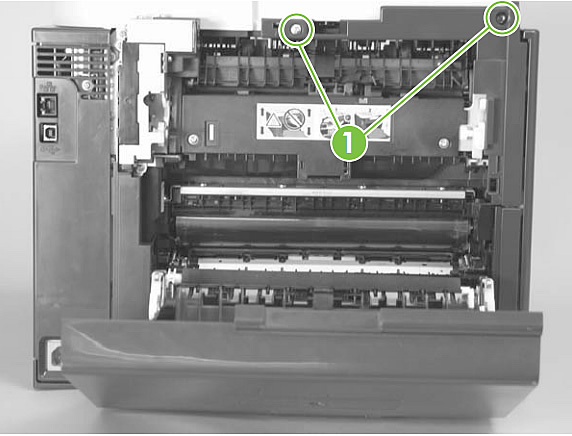
If you have a non-duplex model printer (CM2320n & CM2320nf) skip to the next step. Users with duplex model printers (CM232020fxi): Open the rear door, and remove two screws from the upper rear cover as shown in picture below.
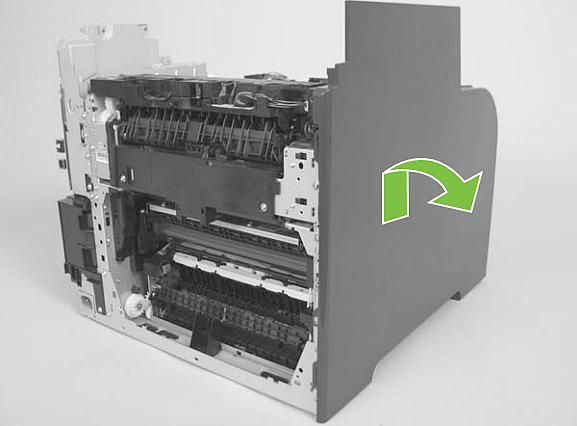
If you have a non-duplex model printer (CM2320n & CM2320nf) skip to the next step. Users with duplex model printers (CM232020fxi): Slightly pull to separate the upper rear cover from the printer, and then rotate the upper cover down and away to remove it.

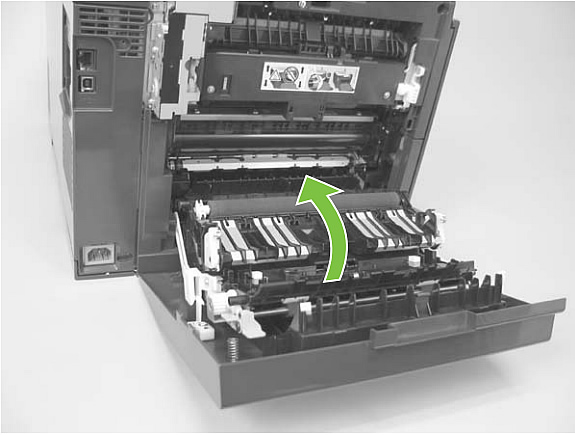
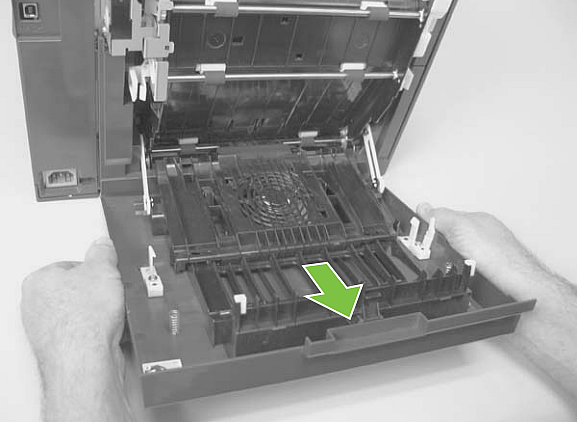
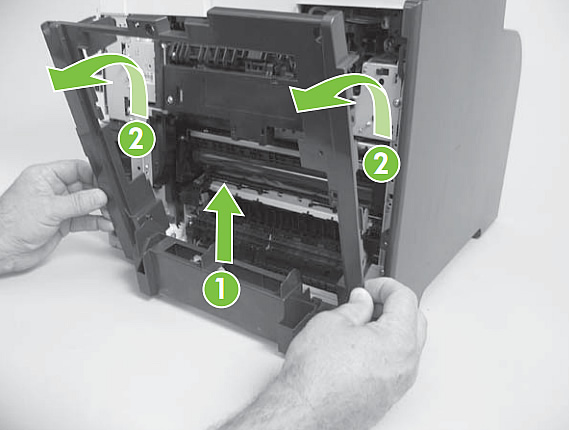
If you have a non-duplex model printer (CM2320n & CM2320nf) skip to the next step. Users with duplex model printers (CM232020fxi): Open the rear door, and use the green handle to close the duplex-feed assembly, see picture below.
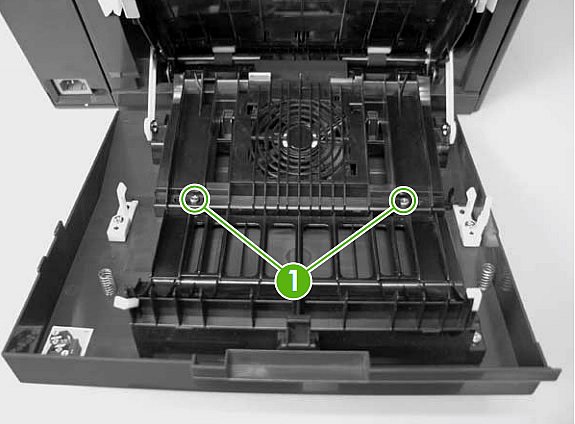
If you have a non-duplex model printer (CM2320n & CM2320nf) skip to the next step. Users with duplex model printers (CM232020fxi): Remove two screws, see picture below.
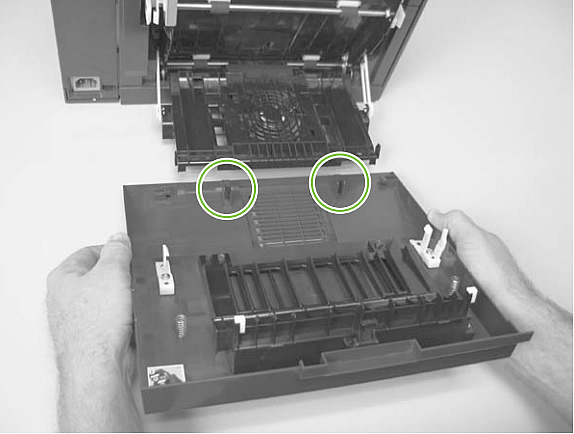
If you have a non-duplex model printer (CM2320n & CM2320nf) skip to the next step. Users with duplex model printers (CM232020fxi): See picture below, notice the mounting tabs at the bottom of the rear door, you'll want to line those up when you re-install the rear door.
If you have a non-duplex model printer (CM2320n & CM2320nf) skip to the next step. Users with duplex model printers (CM232020fxi): Slide the door away from the printer to release the 2 tabs, and then remove the door.
If you have a duplex model printer (CM2320fxi) skip to the next step. Users with simplex model printers (CM2320n CM2320nf): Carefully release the link guide from the pivot pin on the feed guide, see picture below.
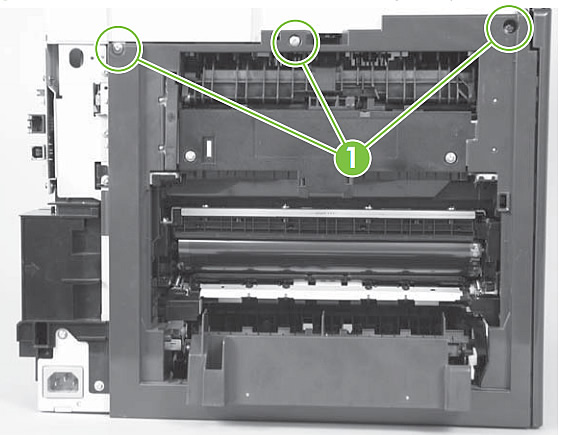
If you have a duplex model printer (CM2320fxi) skip to the next step. Users with simplex model printers (CM2320n CM2320nf): Remove three screws circled below, at the top of the rear cover.
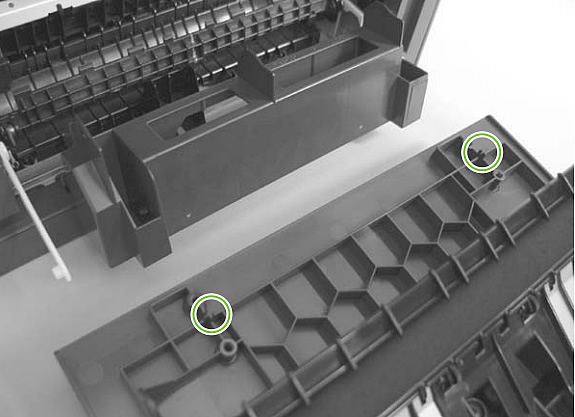
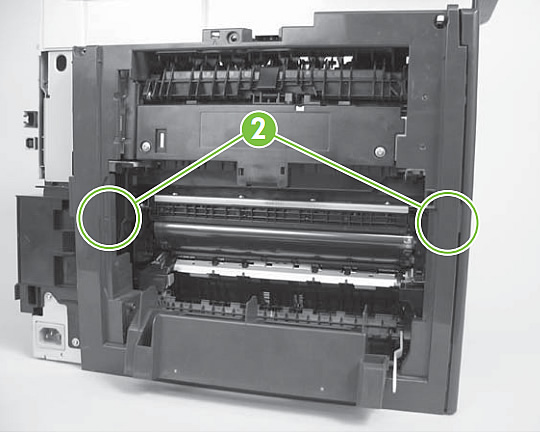
If you have a duplex model printer (CM2320fxi) skip to the next step. Users with simplex model printers (CM2320n CM2320nf): Release the 2 tabs circled below.
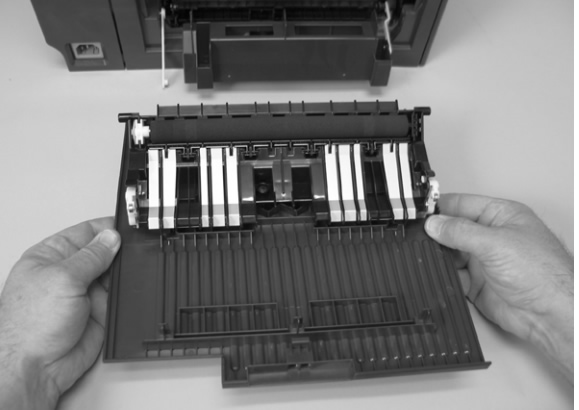
If you have a duplex model printer (CM2320fxi) skip to the next step. Users with simplex model printers (CM2320n CM2320nf): Carefully lift the cover up, and then rotate it away from the printer to remove it.
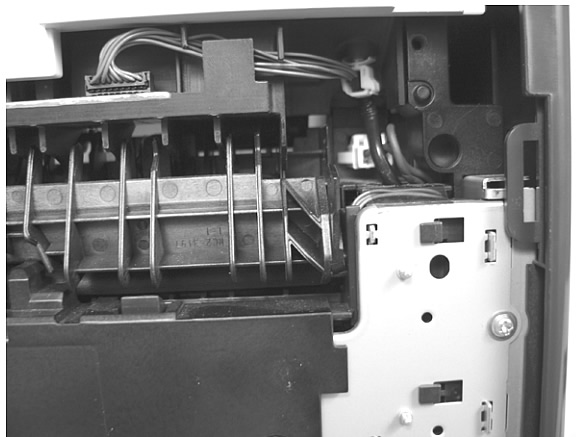
If you have a duplex model printer (CM2320fxi) skip to the next step. Users with simplex model printers (CM2320n CM2320nf): Reinstall tip to remember later when re-assembling --> See picture below. Make sure the wire harnesses at the top of the printer near the left side cover are correctly retained, so the wires won't be pinched when you reinstall the rear cover.
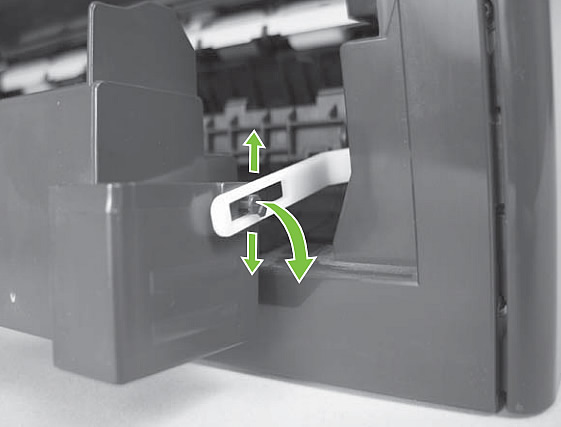
If you have a non-duplex model printer (CM2320n & CM2320nf) skip to the next step. Users with duplex model printers (CM232020fxi): Use a pair of needle-nose pliers to release 2 tabs as shown below, and then remove the rear-door link cap. Repeat this step for the remaining rear-door link cap.

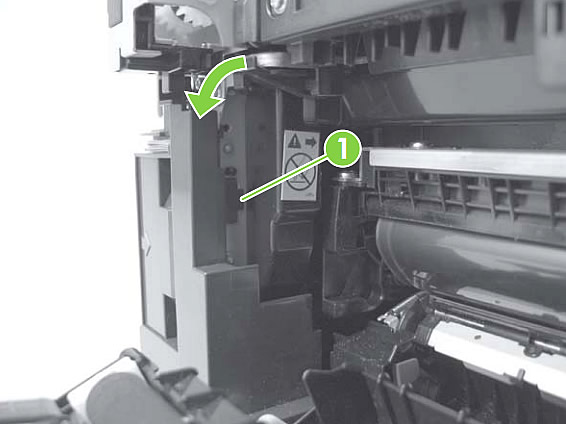
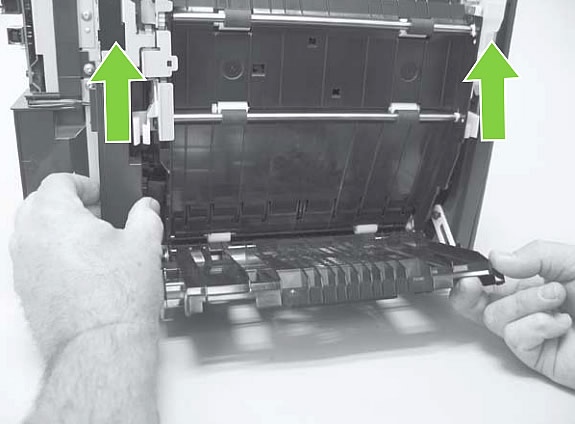
If you have a non-duplex model printer (CM2320n & CM2320nf) skip to the next step. Users with duplex model printers (CM232020fxi): Open the duplex feed assembly. Release one tab (see callout 1 in picture below) and slightly pull one side of the cover free from the printer.
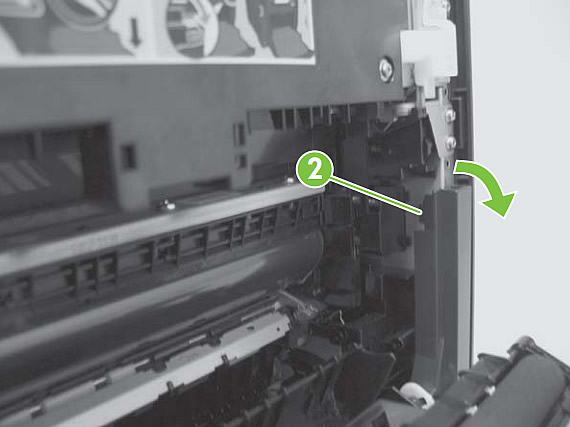
If you have a non-duplex model printer (CM2320n & CM2320nf) skip to the next step. Users with duplex model printers (CM232020fxi): Release the other tab (see callout 2 in picture below) and slightly pull to separate the other side of the cover from the printer.
If you have a non-duplex model printer (CM2320n & CM2320nf) skip to the next step. Users with duplex model printers (CM232020fxi): Close the duplex assembly, lift up on one side of the cover, and then lift up the other side of the cover to release it.
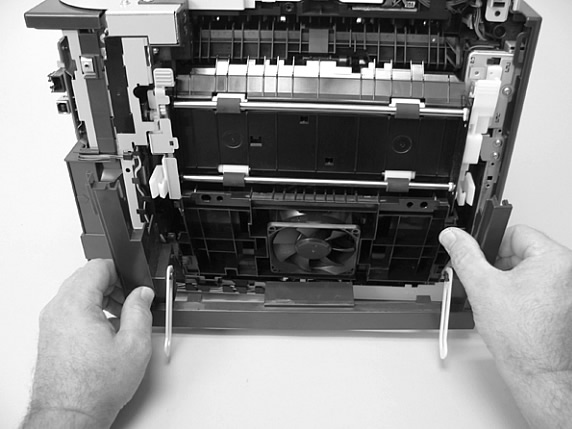
If you have a non-duplex model printer (CM2320n & CM2320nf) skip to the next step. Users with duplex model printers (CM232020fxi): Slightly lift up the rear-door rib assembly, and then carefully slide the cover away from the printer to remove it.
Removing the Upper Cover Assembly (all models)
Next, you will be removing the upper-cover assembly. Remove four screws as shown in picture below.
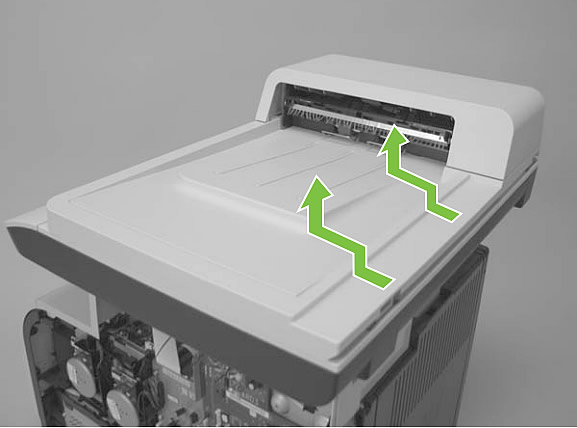
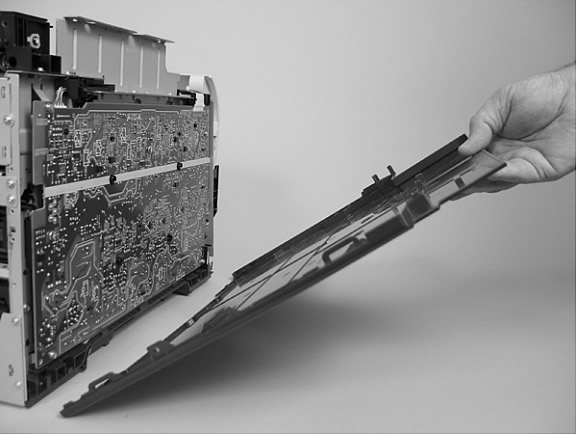
Slightly raise the back of the upper cover up and off the printer (see picture below).
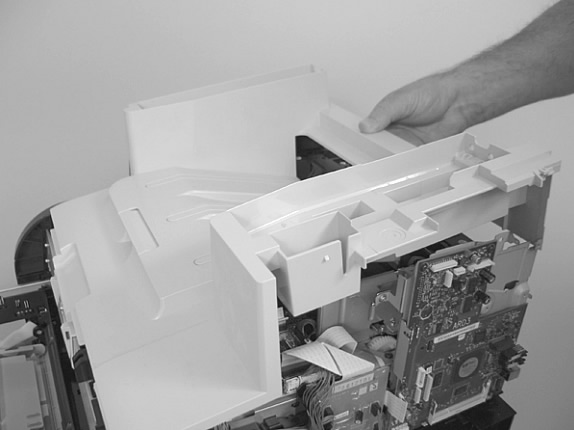
Slide the cover toward the back of the printer to remove it (see picture below).

Removing the Left cover (all models)
Remove 1 screw (callout 1 in picture below).
Remove a second screw (callout 2 in picture below).
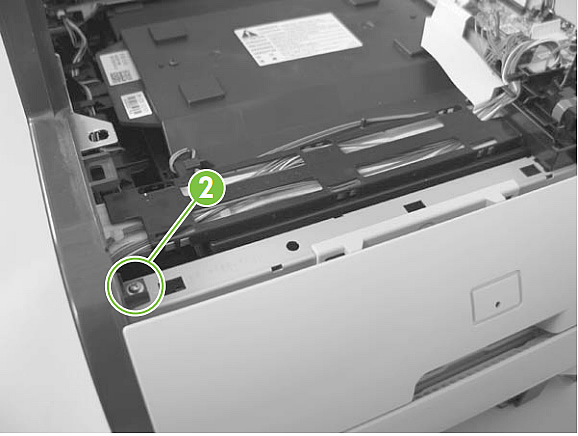
Slightly lift up on the cover, and rotate the top of the cover away from the printer.
Remove the left cover.
Other Steps in HP LaserJet CM2320
- Removing the Covers LaserJet CM2320
- Remove the Fuser LaserJet CM2320
Tech Support
Featured Articles

