
-
Home

-
Maintenance Kit Instructions
-
HP LaserJet 4240 4250
- HP LaserJet 4240 , 4250 cassette pickup, feed, and separation roller installation instructions
HP LaserJet 4240 , 4250 cassette pickup, feed, and separation roller installation instructions

Installing the cassette pickup , feed , and separation rollers.
 |
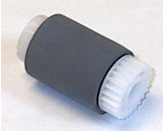 |
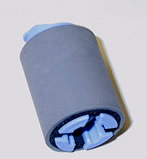
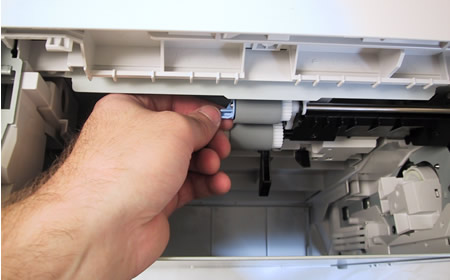
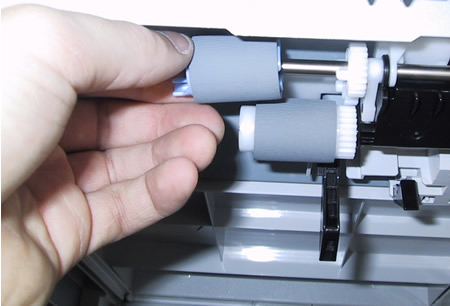
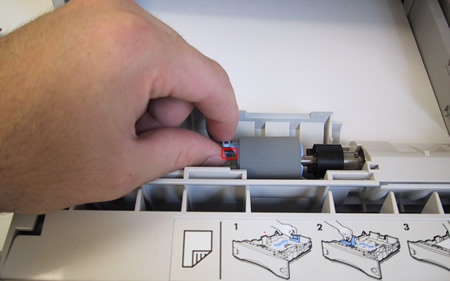
Pull the trays out of the printer and look up into the printer. Each lower tray has one feed roller (blue tabs) and one white pickup roller behind it. Locate the feed roller with the blue tab; simply pinch the tab on the left side of the roller and slide the roller out.
Push the replacement roller in place. If your kit came with the white paper pickup roller located behind the blue feed roller, replace that as well. Then move on to the remaining lower cassettes (if they are installed). The rollers will install in the same manner.
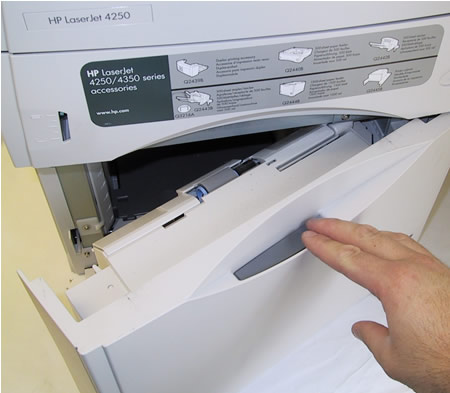
Installing the paper tray roller.
Place the paper tray in front of you and swing open the hinged cover. Pinch the tab on the roller and slide the roller out. Replace with a new roller. Repeat for each tray you have installed.
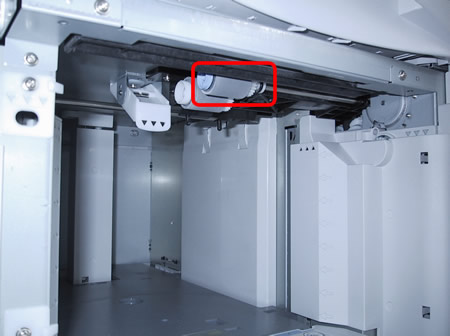
If you have an optional 1500-sheet lower cassette attached, you will find two more rollers to replace, as shown in the pictures below.
Locate this roller on the roof of the optional lower cassette. Pinch the tab on the inside roller and slide it away to the left. Repeat the process with the white pickup roller behind it.
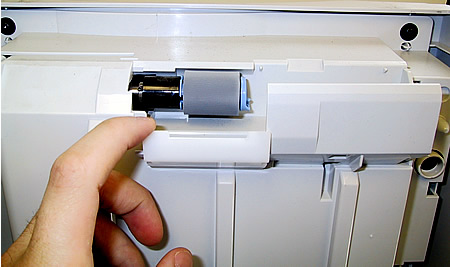
This roller is on the door to the optional lower cassette--lift open the hinged cover to access and replace the roller.
Other Steps in HP LaserJet 4240 , 4250
- HP LaserJet 4240 , 4250 fuser installation instructions
- HP LaserJet 4240 , 4250 transfer roller installation instructions
- HP LaserJet 4240 , 4250 tray 1 pickup roller installation instructions
- HP LaserJet 4240 , 4250 tray 1 separation pad installation instructions
- HP LaserJet 4240 , 4250 cassette pickup, feed, and separation roller installation instructions
- HP LaserJet 4240 , 4250 reset maintenance count instructions
Tech Support
Featured Articles

