
-
Home

-
Maintenance Kit Instructions
-
HP LaserJet 4V, 4MV
- HP LaserJet 4V, 4MV Tray 1 pickup roller , separation pad installation instructions
HP LaserJet 4V, 4MV Tray 1 (multi-purpose tray) pickup roller , separation pad installation instructions

Installing the Tray 1 pickup roller and separation pad.
|
|
 |
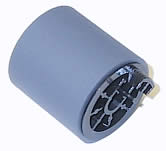
Remove the pickup roller by pinching its tab and sliding it away to the left. Replace with the new roller, sliding it onto the bar until it locks in place.

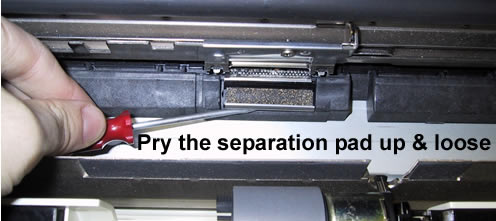
Before installing the new roller, you'll need to remove & replace the separation pad which sits below the roller assembly.
Next take a small flat head screwdriver and pry the separation pad up and loose.
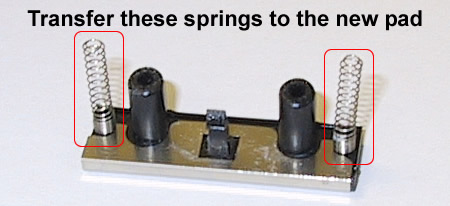
Transfer the springs from the old pad onto the new pad for re-use.
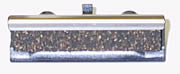
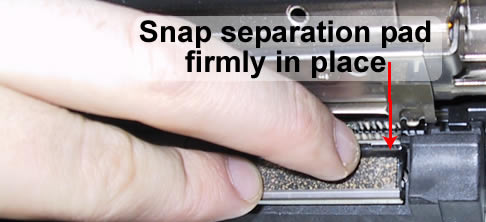
The metal edge of the separation pad should face you when you're re-installing (see picture below). Press firmly on the new pad when installing until it clicks and locks in place.
Now you can install the new pickup roller -- slide it onto its shaft until it clicks in place.
Other Steps in HP LaserJet 4V, 4MV
- HP LaserJet 4V, 4MV fuser installation instructions
- HP LaserJet 4V, 4MV Tray 1 pickup roller , separation pad installation instructions
- HP LaserJet 4V, 4MV cassette pickup roller installation instructions
Tech Support
Featured Articles

