
-
Home

-
Maintenance Kit Instructions
-
HP LaserJet 5 5M 5N
- HP LaserJet 5, 5M, 5N fuser installation instructions
HP LaserJet 5, 5M, 5N fuser installation instructions

Installing the fuser.
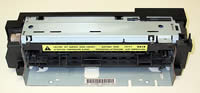
Turn the printer off and unplug the printer. If the printer has been running allow the fuser to cool for 30 minutes before replacing.
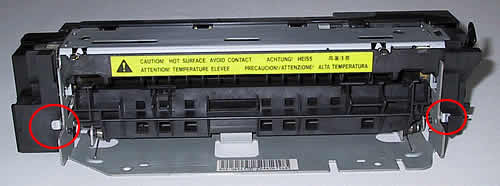
Open the rear cover and remove the two screws circled below.

Lift the fuser slightly (a few millimeters) while pulling straight back to clear the two small nipples located next to the two screws you just removed. Pull the fuser straight out to prevent the sensor lever on the right side of the fuser from catching in the printer.
Side note: Before installing the replacement fuser, be aware that some LaserJet 4, 4 plus, and 5 fusers have pressure release levers. These need to be in the down position in order for the fuser to work properly.
Most fusers don't have these tabs installed because they are not neccessary. The fuser below has no tabs installed.
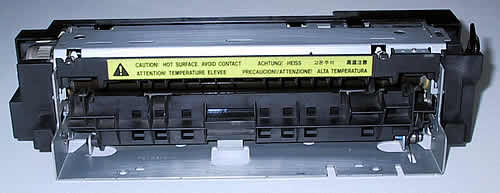
The fuser below does have tabs, and they are in the up position. This is the position that the tabs are usually in during shipping.

The fuser below has the tabs in the down position. This is the correct position the tabs should be in when you install the fuser in the printer.
Insert the replacement fuser and tighten the two screws.
Special note: If after replacing the fuser, the display panel reads 50 FUSER ERROR, CYCLE POWER, turn the printer off for 15 minutes. This allows the capacitor that is responsible for signaling this error to discharge. If you don't wait 15 minutes you will continue to get this error even if you have replaced the fuser.
That's it for the fuser! Remember to send your fuser back to us if you purchased your maintenance kit on exchange. Ship it back in the box we sent if you still have it.
Other Steps in HP LaserJet 5, 5M, 5N
- HP LaserJet 5, 5M, 5N fuser installation instructions
- HP LaserJet 5, 5M, 5N transfer roller installation instructions
- HP LaserJet 5, 5M, 5N Tray 1 pickup roller , separation pad installation instructions
- HP LaserJet 5, 5M, 5N cassette pickup roller installation instructions
- HP LaserJet 5, 5M, 5N optional cassette pickup roller installation instructions
Tech Support
Featured Articles

