
-
Home

-
Maintenance Kit Instructions
-
HP LaserJet P3005
- HP LaserJet P3005 Tray 1 pickup roller , separation pad installation instructions
HP LaserJet P3005 Tray 1 pickup roller, separation pad installation instructions

Tray 1 is the manual feed tray that folds down in front. Also know as the Multi-Purpose (MP) tray.
Open the toner cartridge door. You will find the tray 1 pickup roller and separation pad directly in the center.
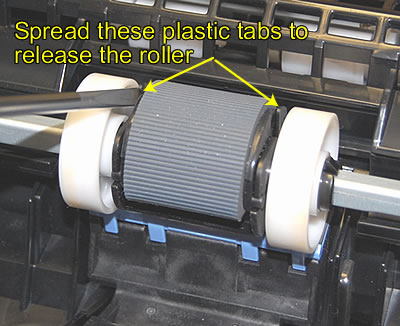
Release the pickup roller by spreading the small plastic retaining tabs, as pictured here.
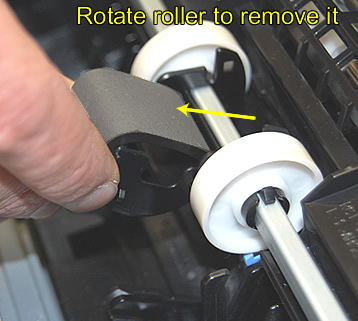
Rotate the pickup roller towards you to remove it from its base.
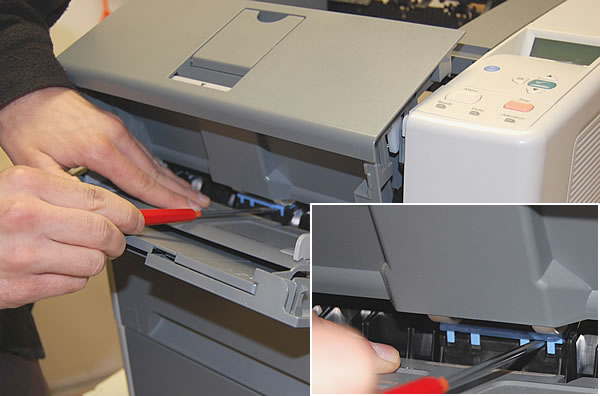
Next open the MP tray, and use the opening to insert a flat blade screwdriver underneath the separation pad. As pictured below, use the flat blade screwdriver as a lever to pry the pad up and free (one side at a time) from its base. This is important, don't try to pry the pad up from the center. It is much easier to pry up one end and then the other end of the pad, and you reduce the chances of breaking the tabs on the pad. Once the pad is loose, remove it from the printer.
Now re-open the toner door and insert the new separation pad onto the base. Our picture shows a blue pad, sometimes they are black. Press down firmly on one end of the pad until it locks into place and then press the other end of the pad down. You really have to push down hard to get the pad to install. Seriously, I'll repeat this, you have to push down harder than you think to get the pad to lock into place. A flat blade screwdriver may be needed to push it down from the top. Again it may help to press one side of the pad down at a time. Pressing down from the center may be impossible. Press down on one end and then the other end.

On the side of the pickup roller, you will notice a small round peg, and also a small notch.
Line up the round peg with its hole. The notch will click into place as you apply pressure.

Other Steps in HP LaserJet P3005
- HP LaserJet P3005 transfer roller installation instructions
- HP LaserJet P3005 Tray 2 Pickup roller installation instructions
- HP LaserJet P3005 Tray 2 separation pad installation instructions
- HP LaserJet P3005 Tray 1 pickup roller , separation pad installation instructions
- HP LaserJet P3005 fuser installation instructions
- HP LaserJet P3005 fuser drive gear installation instructions
- HP LaserJet P3005 Resetting the maintenance count
Tech Support
Featured Articles

