
-
Home

-
Other instructions
-
Replacing the Swing Plate Gear - Short Method (Recommended)
- Install the new metal gear and black spacer disc
Step 3: Install the new metal gear and black spacer disc
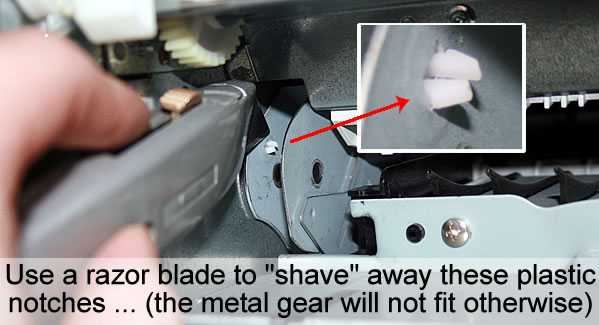
To make room for the new metal gear, you will need to shave off the small plastic notches on the side of the swing plate assembly. Use a razor blade or knife to shave these notches away.
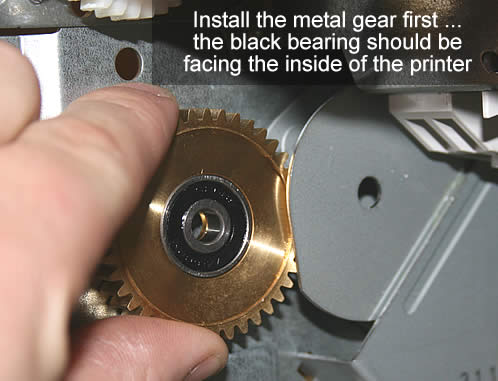
Slide the metal gear into the assembly. When you replace the gear, make sure its black bearing (located in the middle of the metal gear) faces to the right, towards the inside of the printer.
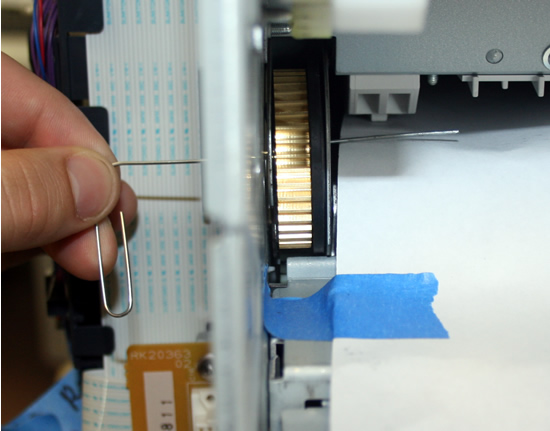
Stick a strong paperclip or a thin screwdriver through the empty screw hole on the printer's side panel. Use the "tool" to line up the metal gear as it is being replaced. Rotate the gear until the tool slides all the way through the hole in the middle of the gear and holds the gear in place.

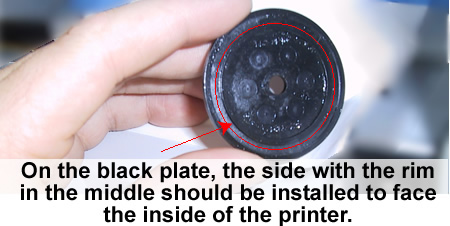
Once the metal gear is held in place by the tool, install the black disc to the right of the metal gear. The black disc has a slightly raised rim or ring on one side, the other side of the disc is flat (see below). The rim side should face the right, that is the center of the printer.
Again, use your screwdriver or paperclip as a tool to help line up the black plate, and then slide your tool all the way through so it is holding both the gear and the plate in place.
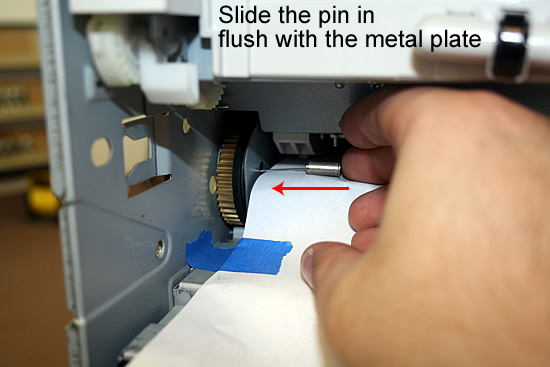
Replacing the pin and screw:
Carefully put the pin on the tip of your paperclip/screwdriver, and slide the pin and paperclip back through the hole, until the head of the pin rests flush on the metal plate. You may have to "wiggle" the gear and spacer to force the holes to line up perfectly.
Reattach the screw that holds the pin in place.
Replace the formatter with its support screws. Then replace the plastic side cover which hides the formatter.
Other Steps in Replacing the Swing Plate Gear - Short Method
- Take the spacer from the New Assembly and Remove Formatter
- Remove the old black plastic gear and spacer
- Install the new metal gear and black spacer disc
- Replace the fuser gear
Tech Support
Featured Articles

