
-
Home

-
Troubleshooting
- 51.00.10 Error on HP LaserJet M601 M602 M603
51.00.10 Error on HP LaserJet M601 M602 M603
On the HP LaserJet M601 M602 M603 series printers, this 51.00.10 error code may be temporary. Try turning the printer off and back on to see if the error clears. If the error comes back repeatedly, you have a failing laser scanner assembly which requires replacement.
Fortunately, replacing the laser scanner is not a difficult procedure on this printer model. You will need to remove the top cover and side panels, and from that point you can unscrew & unplug the laser scanner and install a new one. Average repair time would be 30 minutes. If you decide to purchase the laser scanner assembly we can provide a set of installation instructions for this repair.
Click here to purchase a replacement laser scanner assembly for the M601 M602 M603 series
If you have any questions, give us a call @ 866-352-7108.
How to Replace the Laser Scanner Assembly HP LaserJet M600 M601 M602 M603 series
Turn the printer off.
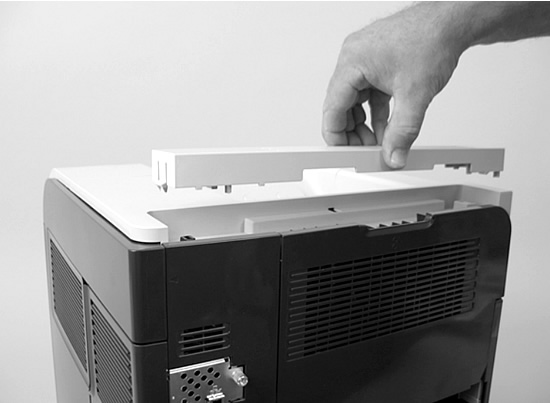
Remove the top accessory cover as show in picture below.
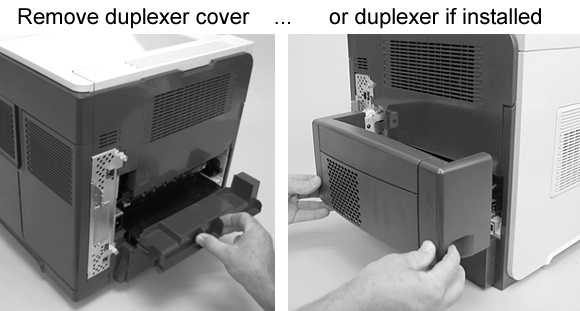
Next, pull and remove the duplexer cover from the rear of the printer (or remove the duplexer if it is installed, see picture below.)
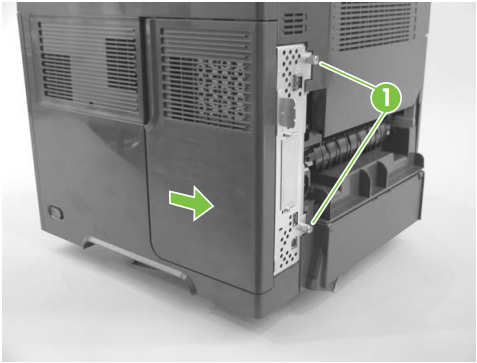
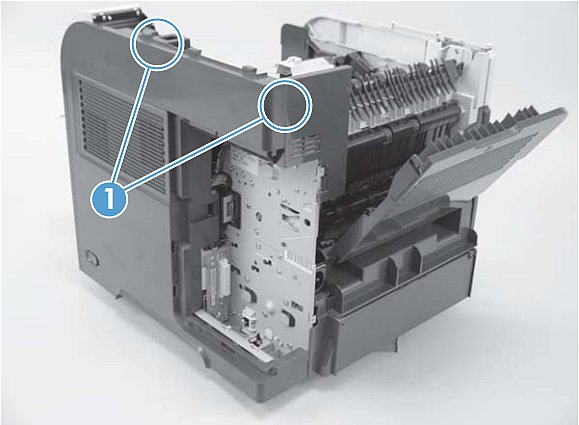
Remove the formatter cover (slide it away from the rear of the printer as shown in picture below.) Then loosen the 2 thumb screws shown in picture below, which secure the formatter cage.
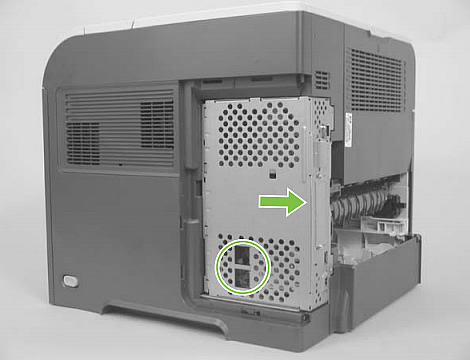
With the thumb screws loosened, slide the formatter cage away from the printer to remove it.
Next you will remove the top cover. Start by folding open the rear-output bin, lifting open the toner cartridge access door, and opening the front cover. (If you have the optional stapler/stacker accessory installed on top of the printer, lift it straight up and away to remove it.)
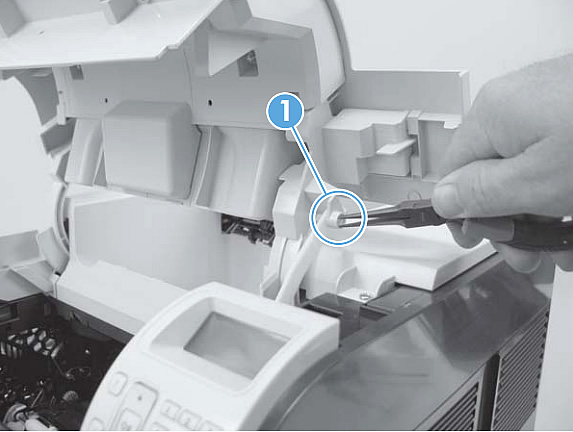
Use a pair of needle-nose pliers to pinch and free the tabs which lock the plastic drive-arm to the toner access lid. (see picture below) Then push the drive-arm down into the printer so it will be out of the way and won't snag when you remove the top cover.
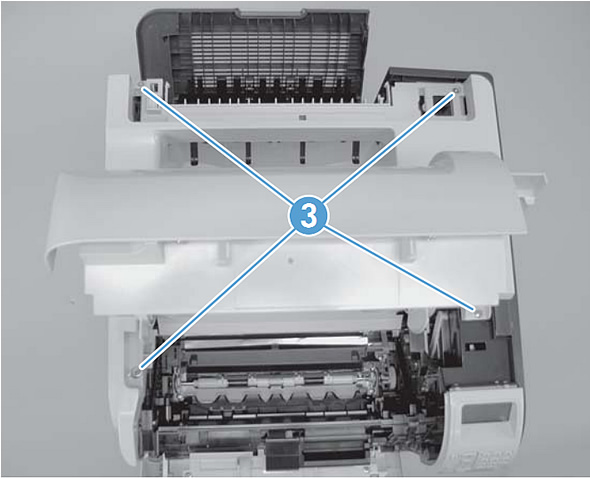
Remove four screws from the top cover as shown below.
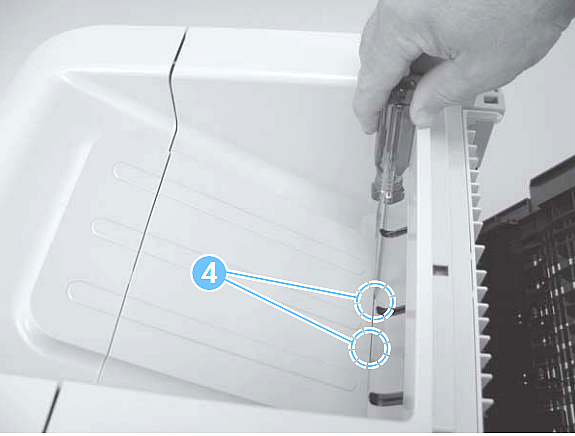
Partially close the toner access door, and use a small flat-blade screwdriver to release the 2 hidden tabs circled in the picture below.
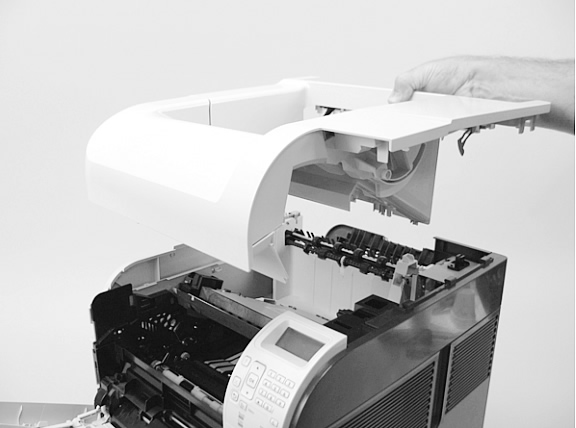
Lift the top cover up and away to remove it from the printer.
Next you will remove the right side cover.
Release the two tabs which hold the right side cover, as shown below.
Carefully pry near the control panel, to separate the right side cover from the printer. See picture below.
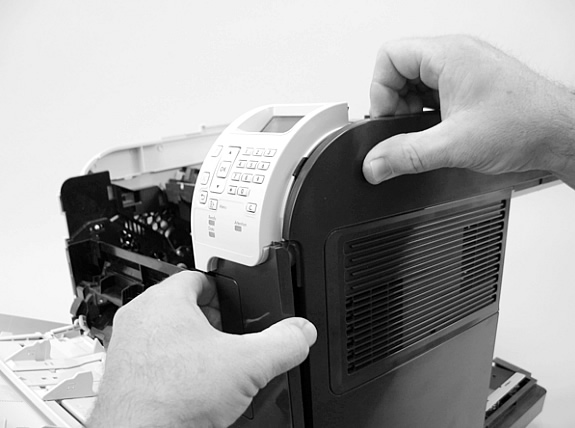
Rotate the top of the right side cover away from the printer, and then lift it up and free.
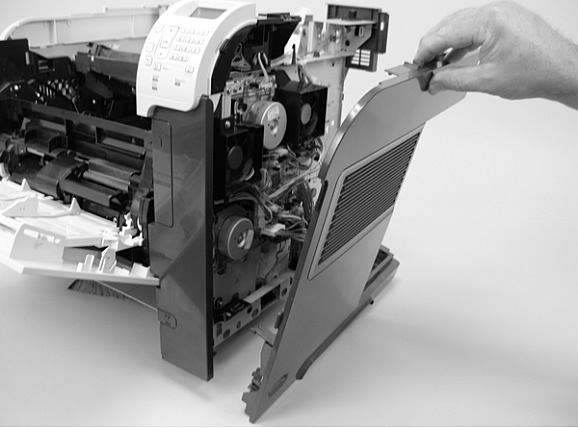
Now you will have access to the laser scanner assembly.
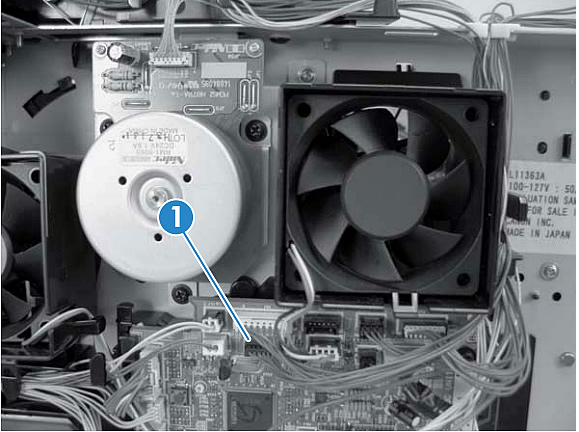
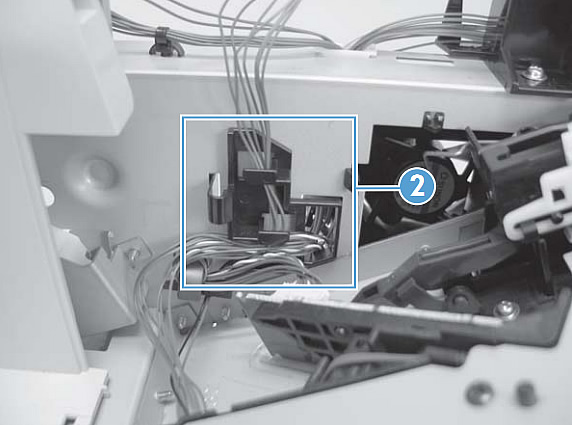
Unplug the laser scanner's wire harness from the DC controller PCA. (see photo.)
Next, remove the laser scanner's wire harness from the wire guide shown in the picture below.
Remove 4 screws from the areas circled in picture below, and also remove the attached grounding clips.

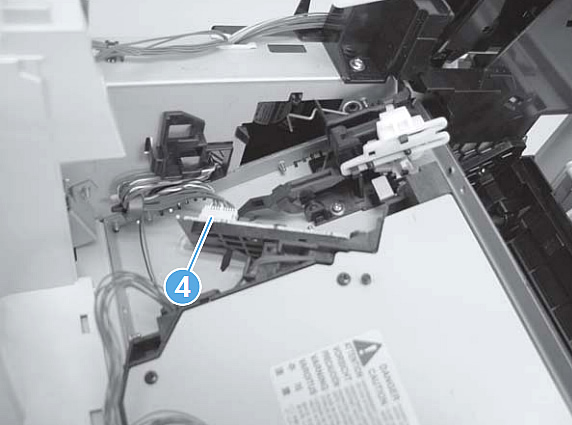
Disconnect the wire harness from the laser scanner PCA board, see picture below.
Now, carefully lift the laser scanner up and out of the printer. Make sure it doesn't catch or snag on any wires as you remove it.
Install the new laser scanner, and route the wires through the correct cable guides.
Tech Support
Featured Articles

