
-
Home

-
Maintenance Kit Instructions
-
HP LaserJet 1200
- HP LaserJet 1200 fuser installation instructions
HP LaserJet 1200 fuser installation instructions

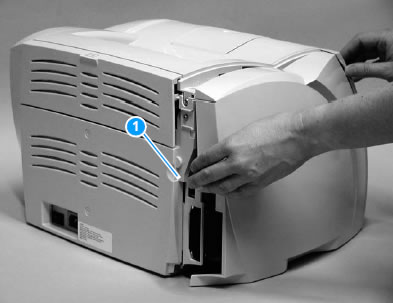
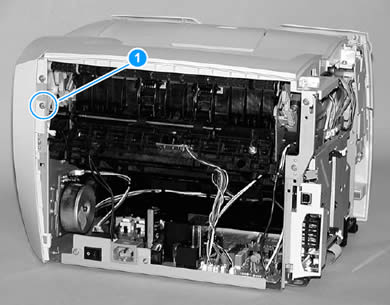
Remove the left side cover:
1. Pull out on the notch at the back of the left side cover (shown near callout 1 in picture below).
2. Rotate the left side cover away from the printer.
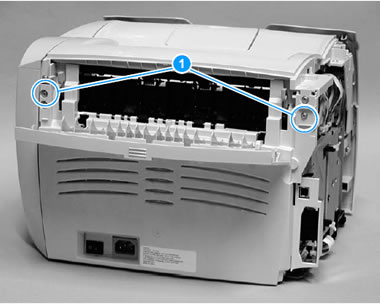
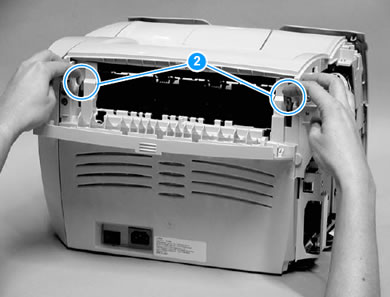
Remove the back cover:
1. Fold open the straight-through output door located at the back of the machine.
2. Remove two screws from the back of the printer (shown as callout 1 in picture below).
3. Press down and hold the two release levers (see callout 2 in picture below) and pull the back cover off of the printer.
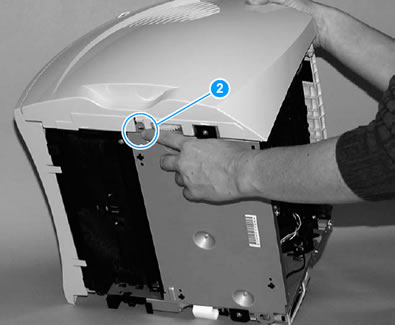
Next remove the right side cover:
1. Open the toner cartridge door.
2. Remove one screw on the back of the printer (circled in callout 1 of picture below).
3. Lift the right side of the printer and release the tab on the bottom of the right side cover (shown as callout 2 in picture below).
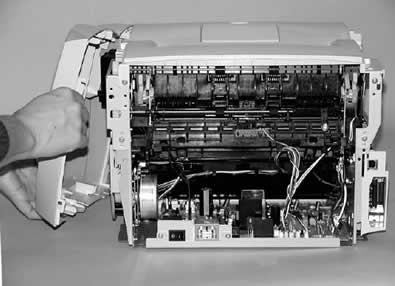
4. While continuing to press the release tab, grasp the top of the cover and rotate it away from the printer, as shown below.
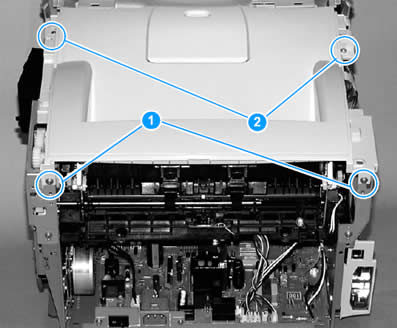
Remove the top cover:
1. Open the toner cartridge door.
2. Loosen the two screws (shown as callout 1 in picture below) at the back of the printer.
3. Remove the two screws (shown as callout 2 in picture below) on the top of the printer.
4. Lift the top cover off of the printer.
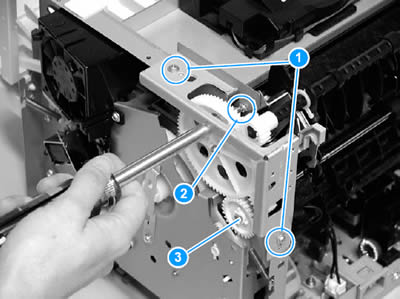
Remove the right side metal bracket:
1. Remove two screws from the metal bracket shown below (two screws are shown as callout 1 in picture below.)
2. Remove a third screw from behind the large white gear (shown as callout 2 in picture below). You can access this screw by inserting your screwdriver through the holes in the large white gear. You may need to realign the large gear so that the gear holes line up with the screw; to realign the large gear you must first remove the adjoining smaller gear (callout 3 below). To remove this smaller gear and free up the larger gear, release the tab on the smaller gear and pull the small gear from the printer.
3. With all three screws are removed, you can remove the right metal bracket.
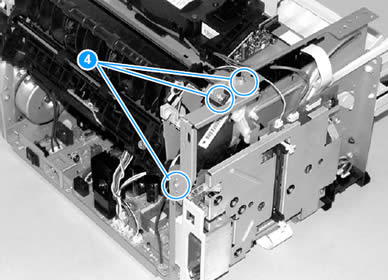
Remove the left side metal bracket:
1. Remove three screws from the left side metal bracket (three screws are shown as callout 4 in picture below).
2. Remove the left side metal bracket.
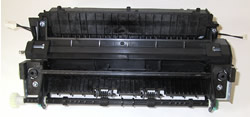
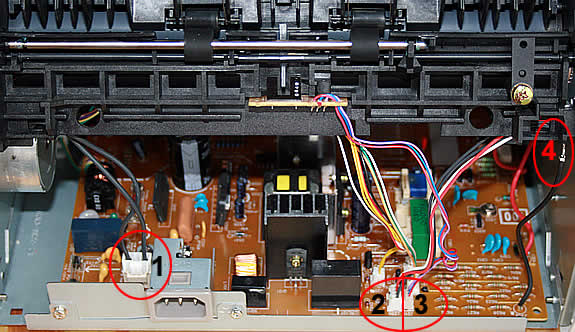
Removing the fuser:
1. Remove two screws, one from each side of the printer (one of the side screws is shown as callout 5 in picture below).

2. Unplug the fuser's power connector by pressing and releasing the tab on the back of the connector (see callout 1 in picture below).
3. Unplug the black-red-and-white fuser cable connector and unwind the cable from the other cables (see callout 2 in picture below).
4. Unplug the connector for the paper delivery sensor wire (see callout 3 below)
5. Unplug the "spade" connector (see callout 4 below).
6. Finally, as you attempt to gently lift the fuser out of the printer, pry outward on each side of the printer frame to release the fuser from the catches which hold the fuser in place.
NOTE: Save the largest gear on your old fuser assembly--you will reuse this gear later with the new fuser. First, install the new fuser without the large gear--if the large gear is already on the fuser when you try to install it, the fuser will not fit properly. Once you have the new fuser in the printer, then transfer the large gear from your old fuser onto your new fuser. See picture below.
![]()
Continue with reinstallation by reversing the previous removal steps: re-plug the four connectors, replace the screws, and reinstall the panels and covers.
That's it for the fuser! Remember to send your fuser back to us if you purchased your maintenance kit on exchange. Ship it back in the box we sent if you still have it.
Other Steps in HP LaserJet 1200
- HP LaserJet 1200 transfer roller installation instructions
- HP LaserJet 1200 pickup roller installation instructions
- HP LaserJet 1200 separation pad installation instructions
- HP LaserJet 1200 fuser installation instructions
Tech Support
Featured Articles

