
-
Home

-
Maintenance Kit Instructions
-
HP LaserJet M401
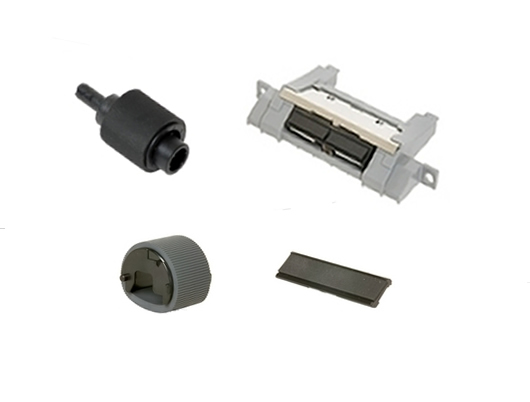
- HP LaserJet M401 roller kit installation instructions
HP LaserJet M401 roller kit installation instructions

Step 1, Remove the Multipurpose tray pickup roller
1. Open the toner cartridge door and remove the toner cartridge.
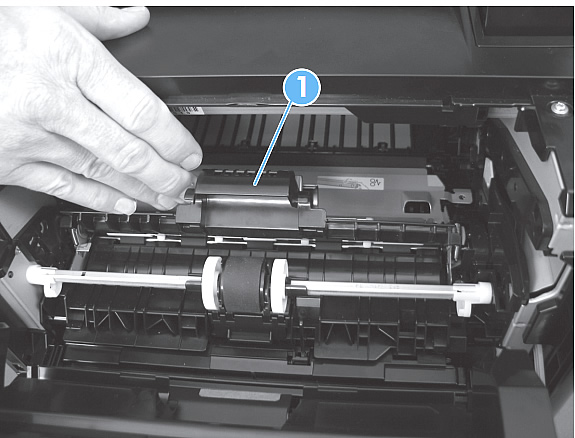
2. Pull back and hold the pickup roller cover (see callout 1 in picture below). You will need to hold this cover open with your knuckles (or insert an object to keep it open) while you use fingers from both hands for the next step.
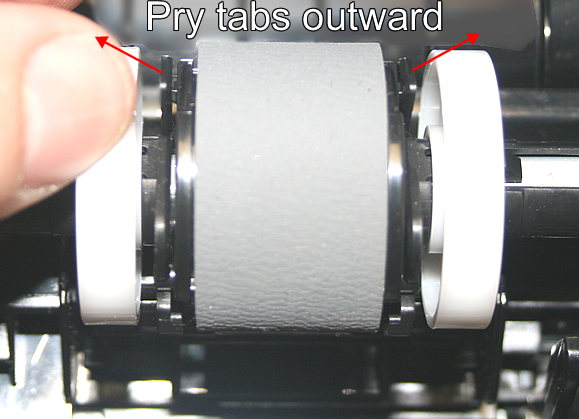
3. Use your fingernails or 2 flatblade screwdrivers to spread the plastic tabs shown in picture below; these are located near the top on both sides of the pickup roller. Spreading these tabs outward should cause the pickup roller to "pop" upwards, and you can then free and remove the pickup roller.
4. Don't install the new pickup roller yet-- first you need to replace the separation pad underneath it.
Step 2, Replace the Multipurpose Tray Separation Pad , then Install New Multipurpose Tray Pickup Roller
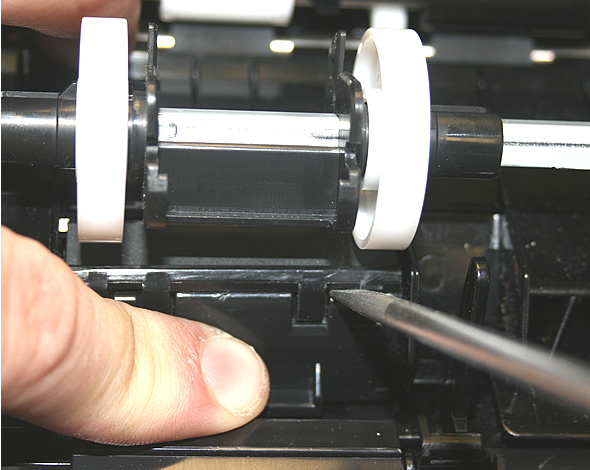
1. Use your finger to press down the plastic separation pad holder in the picture below; this gives you a small gap of space above the separation pad. Insert a flatblade screwdriver into one of the slots underneath the pad and pry the pad upwards; repeat this prying for both left and right sides of the pad until it is free from the base. See picture below.
2. Once the separation pad is pried loose from its base, drag the pad out and free. (See picture below.)
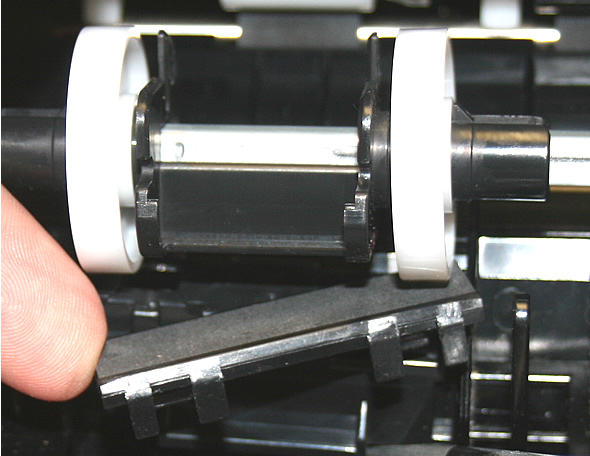
3. Push down again on the separation pad's plastic base to give you space to work, and insert the new separation pad. The "teeth" of the new separation pad should face out towards you. Use your flatblade screwdriver to lay flush against the top of the pad and press down firmly on one side, then the other, to make sure both sides of the pad lock down.
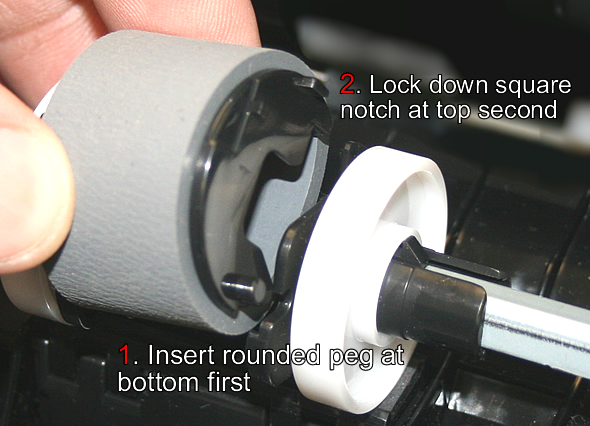
5. Now you can install the new Multipurpose tray pickup roller above the separation pad. Insert the rounded pegs first at the bottom of the roller assembly, then rotate the top of the roller towards the printer to lock the square notches at the top. See photo below.
Step 3: Replace the Cassette Pickup Roller (Tray 2)
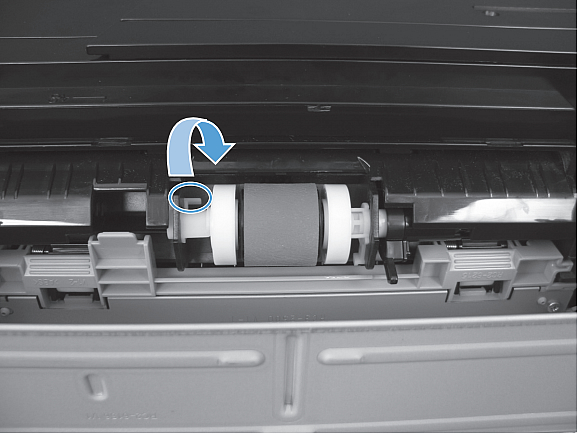
1. Pull Tray 2 completely out of the printer and look up into the cavity at the pickup roller. On the left side of the pickup roller, you will see a white swivel clip: release that clip and turn/swivel it away from you as shown in the picture below.
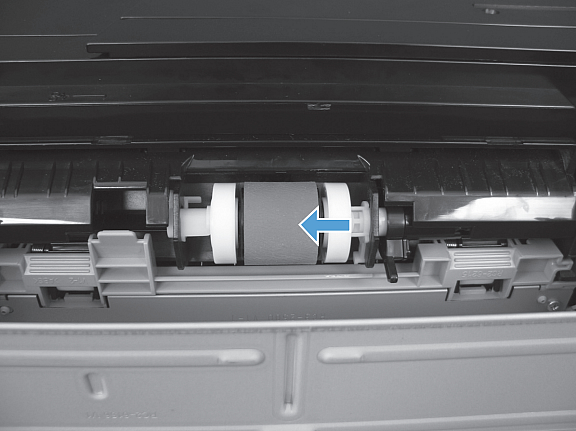
2. Next push the pickup roller to the left to release the right side of the roller, and rotate the right side of the roller downwards and free to remove the roller from the printer.
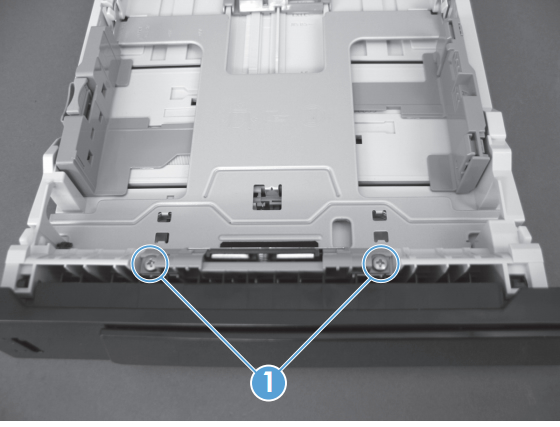
Step 4: Replace the Cassette Separation pad (Tray 2)
1. Pull Tray 2 completely out of the printer.
2. Locate the separation pad at the front of the tray. On the separation pad, remove two screws and then remove the pad from the tray cassette.
3. Install the new separation pad and attach 2 screws.
Other Steps in HP LaserJet M401
- HP LaserJet M401 roller kit installation instructions
- HP LaserJet M401 transfer roller installation instructions
Tech Support
Featured Articles

