
-
Home

-
Maintenance Kit Instructions
-
HP LaserJet 2300
- HP LaserJet 2300 fuser installation instructions
HP LaserJet 2300 fuser installation instructions

Turn the power off and unplug the printer. Wait 15 minutes for the printer to cool.
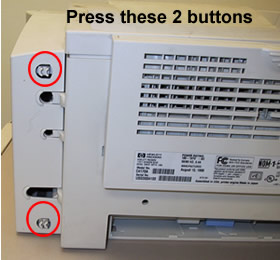
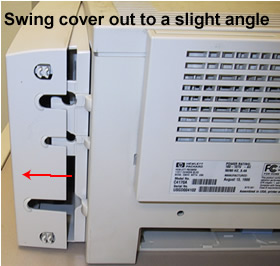
At the back of the printer press the two release buttons on the DIMM cover (circled in red below). Then swing the back cover out slightly away from the printer.
 |
 |
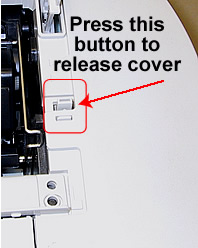
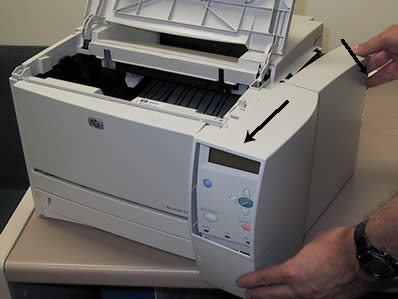
Next open the toner cartridge door and press the release button located on the right hand side. Grasp the front and rear of the DIMM cover and swing it out slightly at the back, away from the printer. Then slide the DIMM cover towards the front of the printer to release it from the printer frame.
 |
 |
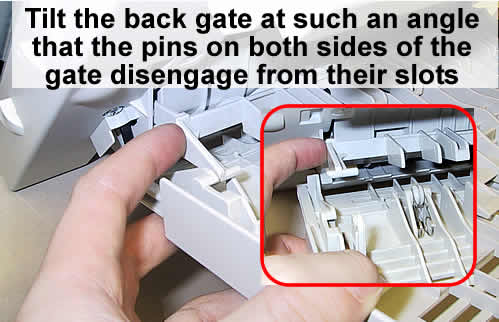
Next open the rear output bin (the back gate) and lift it to an angle that allows you to disengage the two pins on each side of the bin. With the pins disengaged, lower the rear output bin down to rest on the work surface.
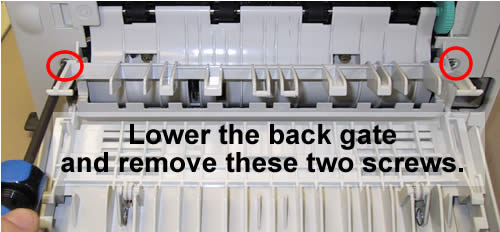
Remove the two screws circled in red below from the rear cover.
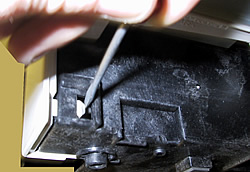
Looking inside the Tray 2 cavity, use a flatblade screwdriver to release the two tabs--one on each side of the rear cover.
 |
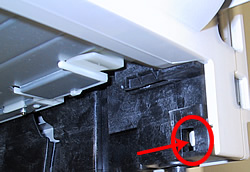 |
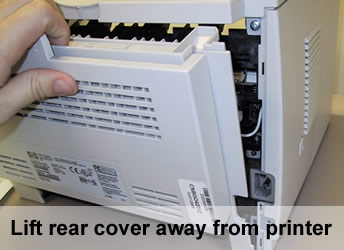
Next remove the rear cover from the printer.
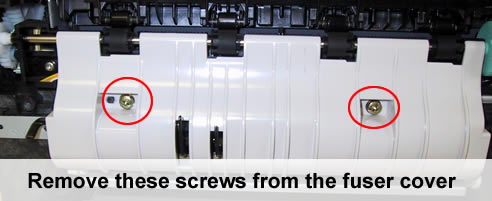
Remove these two screws circled in red below to free the plastic fuser cover.
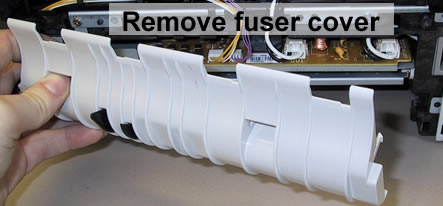
Now remove the fuser cover from the printer.
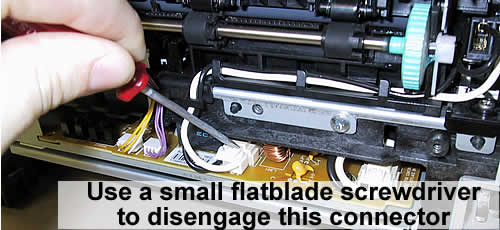
Use a small flatblade screwdriver to disengage the tab on the connector shown below and unplug the connector.
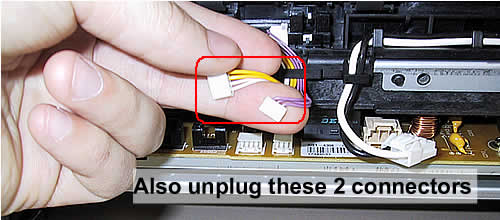
Next unplug the two connectors shown below.
Now remove the two screws holding the fuser in place (circled in red below).
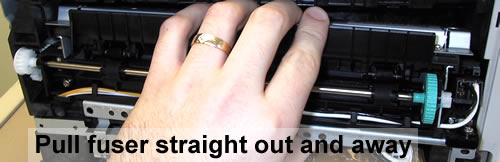
Install the new fuser and replace the two fuser screws. Re-plug the three connectors. Reinstall the fuser cover with its 2 screws, then install the back gate and the DIMM cover.
That's it for the fuser! Remember to send your fuser back to us if you purchased your maintenance kit on exchange. Ship it back in the box we sent if you still have it.
Other Steps in HP LaserJet 2300
- HP LaserJet 2300 transfer roller installation instructions
- HP LaserJet 2300 Tray 2 Pickup roller installation instructions
- HP LaserJet 2300 fuser installation instructions
- HP LaserJet 2300 Tray 1 Pickup roller installation instructions
- HP LaserJet 2300 Tray 1 Separation pad installation instructions
- HP LaserJet 2300 Tray 2 Separation pad installation instructions
- HP LaserJet 2300 reset the maintenance count
Tech Support
Featured Articles

