
-
Home

-
Maintenance Kit Instructions
-
HP LaserJet 2300
- HP LaserJet 2300 Tray 2 Pickup roller installation instructions
HP LaserJet 2300 Tray 2 pickup roller installation instructions

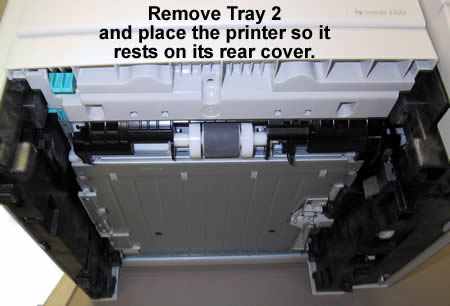
Remove Tray 2. Place the printer so that it rests on its rear cover and so you can easily see and access the tray 2 pickup roller.
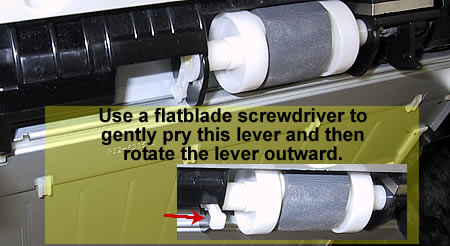
Use a flatblade screwdriver to gently pry and release the white plastic lever's tab on the left side of the tray 2 pickup roller, and then rotate the white plastic lever outwards.
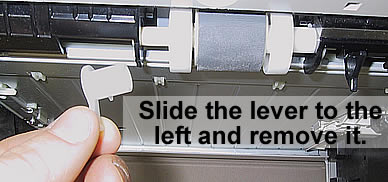
Slide the lever out to the left and remove it.
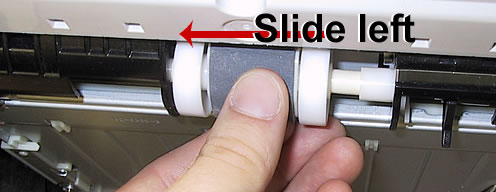
Next slide the pickup roller itself towards the left side of the printer.
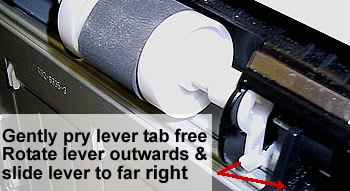
Use a flatblade screwdriver to pry the tab on the lever (shown below) on the right side of the pickup roller. Rotate the lever outwards, and then slide the lever towards the right side of the printer. Sliding this lever releases the pickup roller shaft.
 .
.
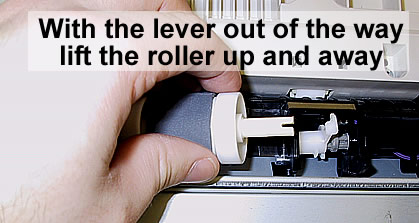
Lift the pickup roller out of the printer.
Remove the two white rollers from the old pickup roller and place the two white rollers on the ends of the new pickup roller.

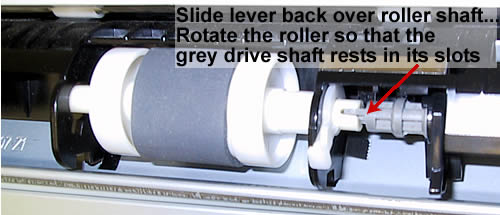
Slide the slotted end of the pickup roller through the white lever. Rotate the roller as you are sliding it to the right so that the grey drive shaft connects to the slotted end of the pickup roller. The lever on the left side will not fit properly unless the grey drive shaft is properly connected to the white pickup roller.
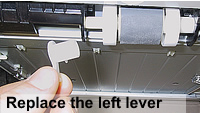
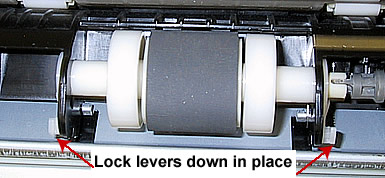
Replace the left lever, and then rotate both levers downwards until they lock in place.
 |
 |
Other Steps in HP LaserJet 2300
- HP LaserJet 2300 transfer roller installation instructions
- HP LaserJet 2300 Tray 2 Pickup roller installation instructions
- HP LaserJet 2300 fuser installation instructions
- HP LaserJet 2300 Tray 1 Pickup roller installation instructions
- HP LaserJet 2300 Tray 1 Separation pad installation instructions
- HP LaserJet 2300 Tray 2 Separation pad installation instructions
- HP LaserJet 2300 reset the maintenance count
Tech Support
Featured Articles

