HP LaserJet 2400 Tray 1 pickup roller , separation pad installation instructions
Open the toner cartridge door and locate the Tray 1 pickup roller. Spread the pickup-roller locks (black tabs pictured below) and rotate the roller forward to completely free the roller.
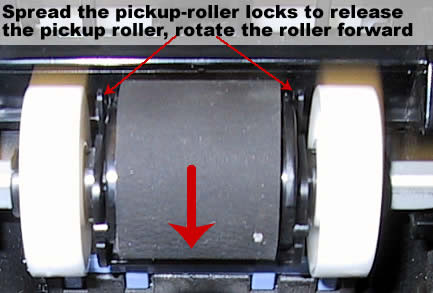
Rotate and remove the pickup roller -- don't install the new pickup roller yet.
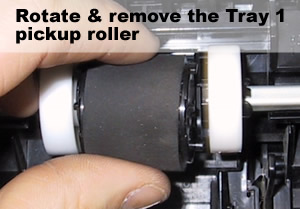
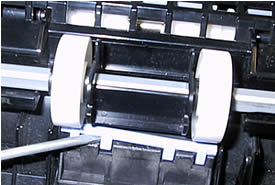
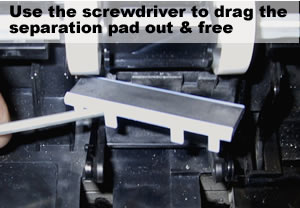
Before you install the new pickup roller, the separation pad which sits underneath it must be removed and replaced. Use a flatblade screwdriver to pry the blue separation pad up & loose; pry the pad on both sides and in the middle until it snaps loose from its base.
 |
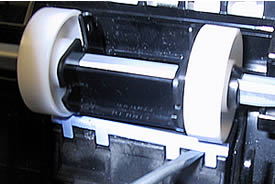 |
Use the screwdriver to drag the separation pad out & free from its base.
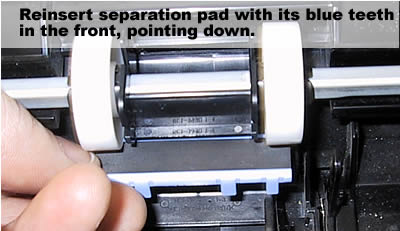
Realign the new separation pad with its blue teeth in the front, pointing down. Use the flathead screwdriver to secure it.
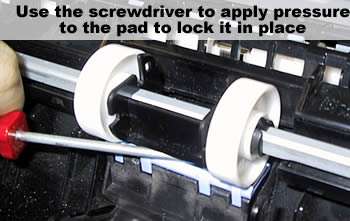
Use a flathead screwdriver to apply pressure to the separation pad, locking it firmly in place.
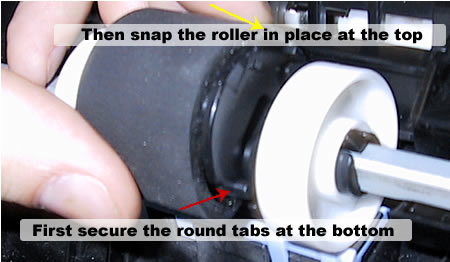
Now install the new pickup roller onto the metal shaft.
Other Steps in HP LaserJet 2400 2410 2420 2430
- HP LaserJet 2400 transfer roller installation instructions
- HP LaserJet 2400 Tray 2 Tray 3 Pickup roller installation instructions
- HP LaserJet 2400 fuser installation instructions
- HP LaserJet 2400 fuser drive gear installation instructions
- HP LaserJet 2400 Tray 1 Pickup roller , separation pad installation instructions
- HP LaserJet 2400 Tray 2 Tray 3 Separation pad installation instructions
- HP LaserJet 2400 Resetting the maintenance count


