
-
Home

-
Maintenance Kit Instructions
-
HP LaserJet 3000
- HP Color LaserJet 3000 manual feed separation pad and pickup roller installation instructions
HP Color LaserJet 3000 manual feed tray separation pad and pickup roller installation instructions

 |
 |
Open the front door and fold down the transfer assembly.
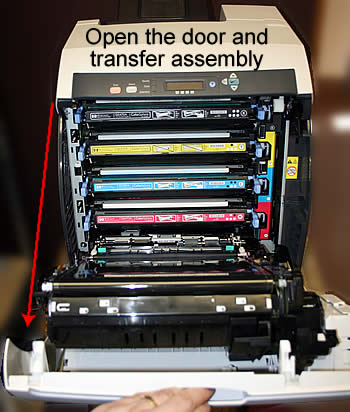
You will find a small grey roller near the bottom of the transfer belt assembly. You will need to remove the transfer belt assembly before being able to work with this roller and its accompanying separation pad.

To remove the transfer belt assembly, pinch the small holding tabs on either side of the assembly (shown below), and simultaneously slide the belt assembly away from the printer to remove it.
![]()
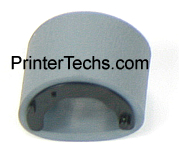
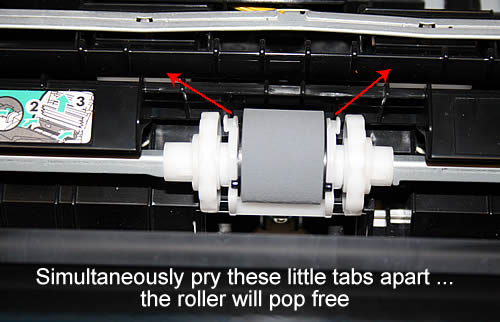
Next you will remove the manual feed pickup roller from its holder. As you simultaneously pry the small white tabs of the holder apart (shown below), the roller will pop free and you can remove it.
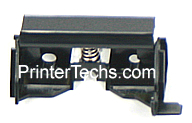
NOTE: Before installing the new pickup roller, you'll need to remove and replace the separation pad which sits beneath it.
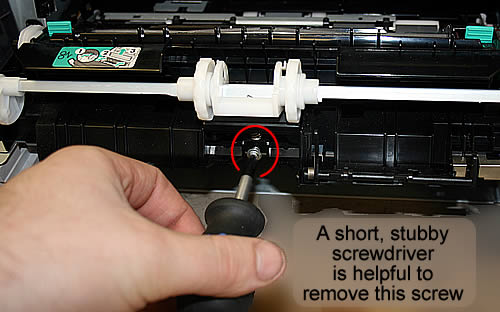
A short stubby screwdriver will be helpful when removing the separation pad's screw -- this area is a tight space to access. Remove the sep pad screw, then slide the pad assembly out as shown in the second picture below.
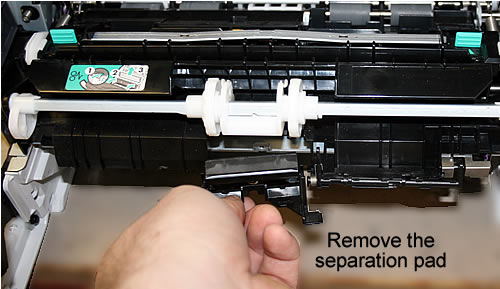
Install the new separation pad in reverse order of these steps. Reinstall the screw to secure the separation pad.
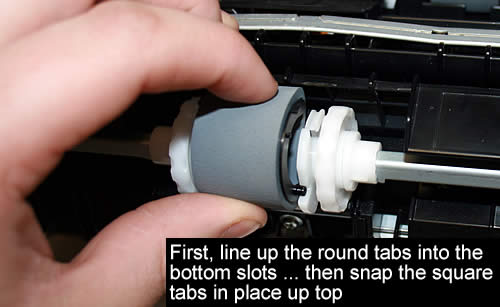
Now you can install the new pickup roller.
First, line up the round tabs into the bottom slots, then follow by snapping the square tabs into place up top.
Other Steps in HP LaserJet 3000
- HP Color LaserJet 3000 fuser installation instructions
- HP Color LaserJet 3000 manual feed separation pad and pickup roller installation instructions
- HP Color LaserJet 3000 cassette separation pad and pickup roller installation instructions
Tech Support
Featured Articles

