HP Color LaserJet 3500 fuser installation instructions

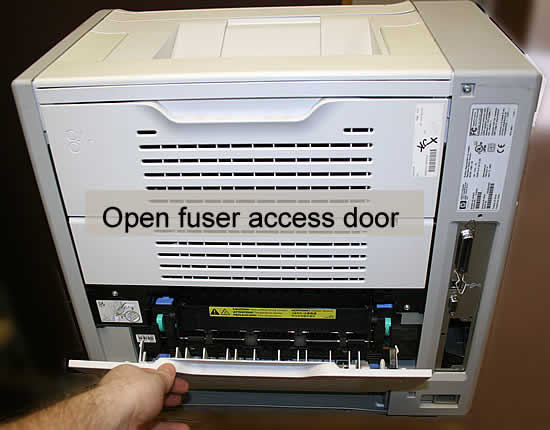
At the back of the printer, open the fuser access door (pictured below).

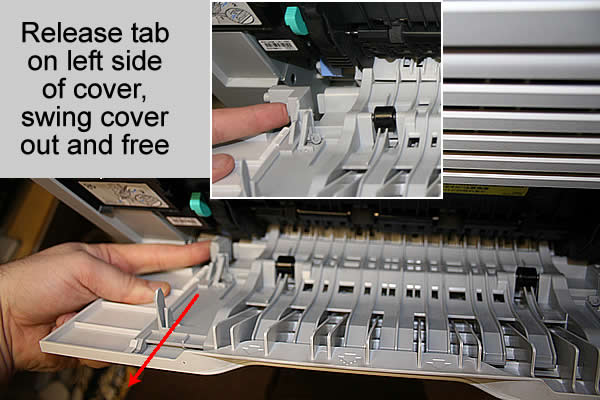
To access the fuser, this plastic door will need to be removed. On the left side of the door there is a flexible hinge--- press this tab (pictured below) to release the hinge from its hole. Gently swing the door out and away from the printer to free the right side hinge.

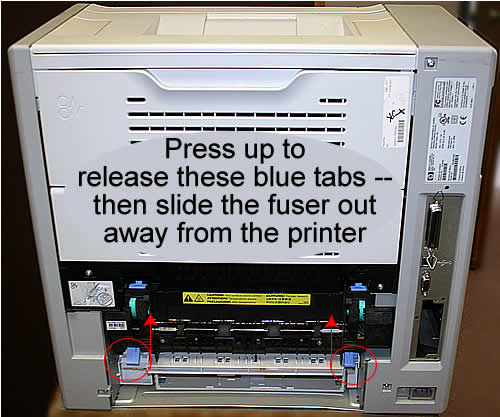
Now you can access and remove the fuser. Press upwards on the two blue levers near the bottom of the fuser (pictured below); as you press up on these tabs, slide the fuser away from the printer.

Insert the new fuser into the empty slot, making sure it firmly locks into place. (There are guide pegs on the back of the fuser to help you align it correctly).
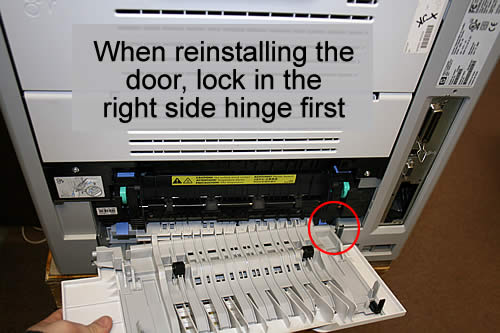
When reinstalling the plastic door, lock in the right side hinge first. Then follow by locking in the flexible left side hinge.

Other Steps in HP LaserJet 3500
- HP Color LaserJet 3500 fuser installation instructions
- HP Color LaserJet 3500 manual feed pickup roller & separation pad
- HP Color LaserJet 3500 cassette pickup roller & separation pad
- HP Color LaserJet 3500 resetting fuser count


