
-
Home

-
Maintenance Kit Instructions
-
HP LaserJet 4100
- HP LaserJet 4100 D-shaped pickup rollers installation instructions
HP LaserJet 4100 'D'-shaped cassette pickup rollers installation instructions

'D' shaped pickup roller replacement for trays 2 and 3.
Each lower paper tray in the LaserJet 4100 series printers has 4 'D-shaped' pickup rollers. These rollers do not wear out as quickly as the feed and separation rollers. If you replace the rollers please read the instructions carefully. It is a fairly simple procedure if you are patient and careful.
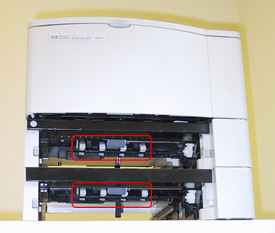
Four rollers are located above each paper tray as shown below.
| Single Tray models | 2-Tray models |
 |
 |
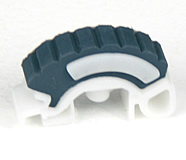
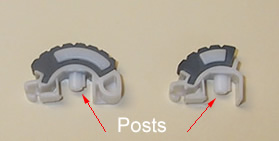
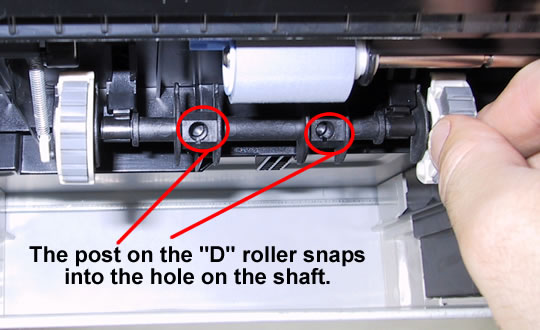
There are two versions of this pickup roller. One is about half the size of the other. Both perform equally well. The rollers have a post that fits in the hole on the pickup assembly shaft.
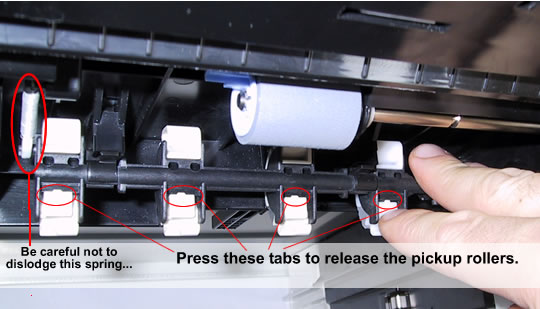
You can remove the rollers without moving the printer but it's a little awkward and hard to see up into the printer. We find it's easiest to first unplug all cables from the printer and remove the toner cartridge and any accessories (envelope feeder, duplexer, optional lower trays). Carefully rock the printer on to its back to get a better view of the rollers. The pickup roller shaft rotates in either direction. DO NOT remove the shaft and BE VERY CAREFUL not to dislodge the spring on the left! (see picture below). If you remove the spring it's a real pain in the neck to put back on. (See note at the bottom of this page for help if the spring is accidentally removed.)
Each "D" roller clips onto the shaft with a little locking tab (tabs circled in red below). Remove the rollers by pressing on their locking tabs and pull each roller straight off the shaft.
An easy way to install the replacement "D" rollers is to rotate the shaft and so the holes are facing you and push the roller straight on to the shaft. The roller will only fit one way so you don't need to worry about installing it backwards.
Repeat this procedure for all paper trays. If you dislodged the spring, see below for details on fixing it.
Re-attaching the Spring on the 'D' Roller Bar:
If you aren't careful the spring which restrains the pickup roller shaft may come loose while you are replacing the rollers. Re-attaching this spring can be tricky and will require your patience.
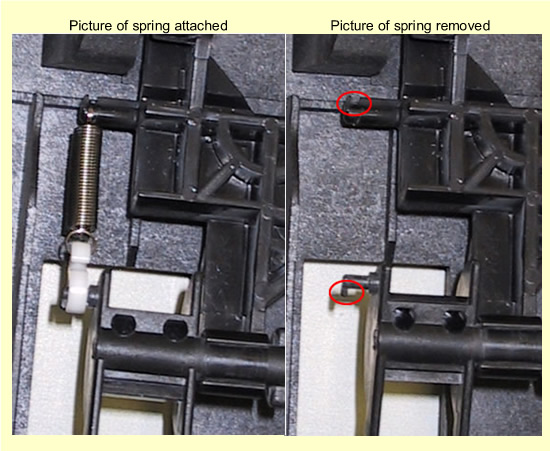
Notice the notches circled in red above, where the spring needs to be re-attached.
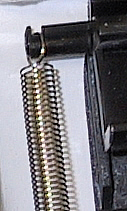
I find it's easiest to first hook the top of the spring over the notch then repeat with the white hook on the other end. You can remove the bottom plate of the printer to get better access.
Other Steps in HP LaserJet 4100
- HP LaserJet 4100 fuser installation instructions
- HP LaserJet 4100 transfer roller installation instructions
- HP LaserJet 4100 Tray 1 pickup roller installation instructions
- HP LaserJet 4100 Tray 1 separation pad installation instructions
- HP LaserJet 4100 feed and separation roller installation instructions
- HP LaserJet 4100 D-shaped pickup rollers installation instructions
- HP LaserJet 4100 reset maintenance count instructions
Tech Support
Featured Articles

