
-
Home

-
Maintenance Kit Instructions
-
HP LaserJet 4550
- HP LaserJet 4550 fuser installation instructions
HP Color LaserJet 4550 fuser installation instructions

Installing the fuser.
Turn the printer off and unplug the power cord. The fuser might be hot if you have been using the printer. As a safety precaution wait 30 minutes for the fuser to cool before proceeding.
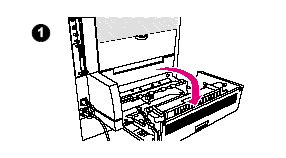
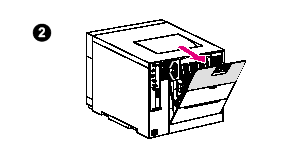
| Step 1 - If you have a duplexer unit installed as shown in picture 1 below, open the upper-rear door of the duplexer. | Step 2 - Next, open the upper-rear door of the printer as shown in picture 2. |
 |
 |
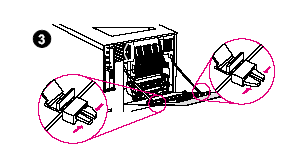
| Step 3 - Release the straps from the rear door by squeezing the latches on the straps at the point where the latches connect to the rear door. | Step 4 - Inside the back of the printer, near the bottom, locate the two blue latches on the fuser. |
 |
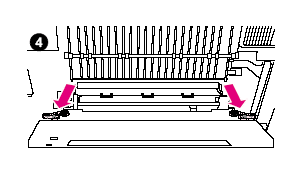 |
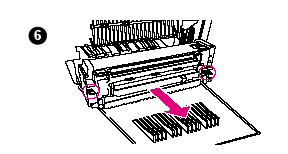
| Step 5 - Rotate the blue latches upward 90 degrees to "unlock" the fuser. | Step 6 - Grasp the finger holds on the fuser and pull the used fuser out of the printer. |
 |
 |
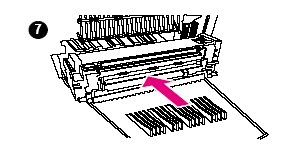
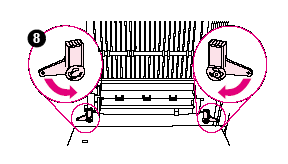
| Step 7 - Holding the new fuser by the same finger holds, slide the new fuser into the printer. | Step 8 - The blue latches will lock only when the fuser is fully and correctly seated in the printer--do not force these tabs. Lock the fuser in place by rotating the two blue latches down. Reconnect the support straps to the upper rear door. |
 |
 |
That's it for the fuser! Remember to send your used fuser back to us if you purchased your maintenance kit on exchange. Ship it back in the box we sent if you still have it.
Other Steps in HP LaserJet 4550
- HP LaserJet 4550 fuser installation instructions
- HP LaserJet 4550 cassette rollers installation instructions
- HP LaserJet 4550 changing the air filters instructions
Tech Support
Featured Articles

