
-
Home

-
Maintenance Kit Instructions
-
HP LaserJet 4V, 4MV
- HP LaserJet 4V, 4MV cassette pickup roller installation instructions
HP LaserJet 4V, 4MV cassette pickup rollers installation instructions

Installing the Tray 2 (cassette) pickup rollers.
 |
|
Remove the toner cartridge if it hasn't already been removed.
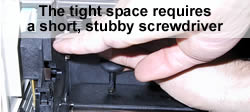
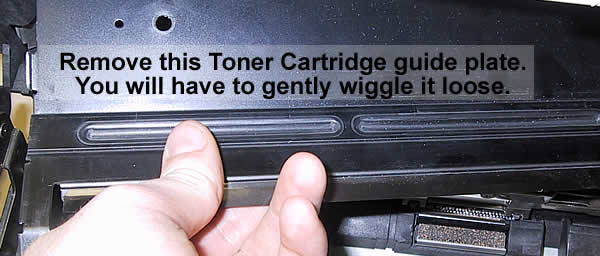
| Next you will remove the black Toner Guide plate. You will need to use a short, stubby screwdriver to remove the screws holding this black plate in place. |
|
With both screws removed, the black plate can now be removed. It is wedged fairly tightly in place so it will take some wiggling and probably some steady force to get it up and out.
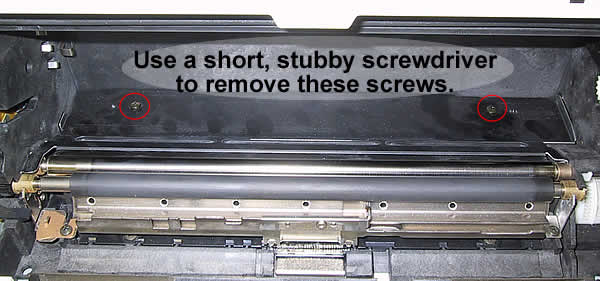
Remove the two screws (shown below circled in red) to free the cassette roller bar.

|
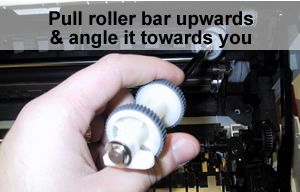
Although it is possible to change out the entire cassette roller, there is an easier process. The most practical maintenance involves leaving the roller assembly intact and simply swapping out the worn rubber. (The plastic roller itself is very durable and should last the lifetime of the machine, but the rubber tire wears out.) With the two screws removed, pull the roller bar upwards and tilt it at an angle to face you for easy access to the rubber tires. |
 |
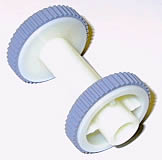
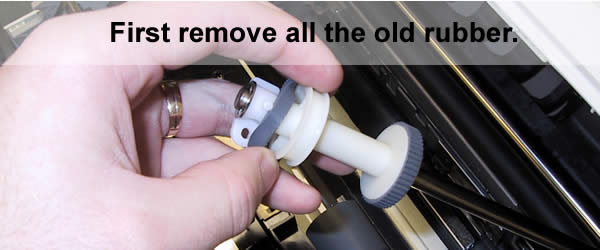
Remove all the old rubber.
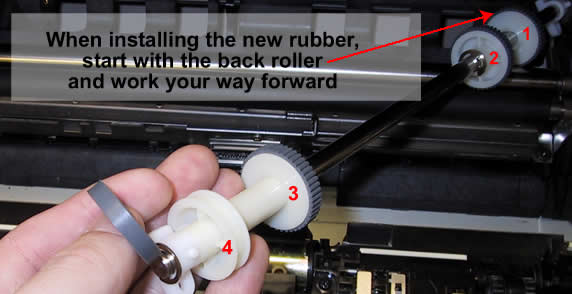
When all the rubber is removed, begin installing the new rubber. It is easiest to replace the back rubber first and work your way forward, as shown below.
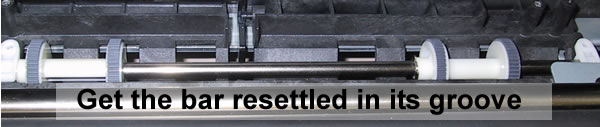
| With the rubber replaced, the bar needs to be re-secured. Begin by angling both of the white collars (the collars where the screws were removed) with their tabs pointing downwards. Line these tabs up with their corresponding holes and settle the bar down in its groove. | 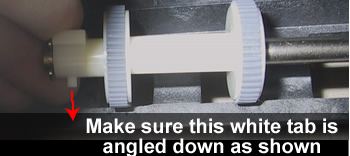 |
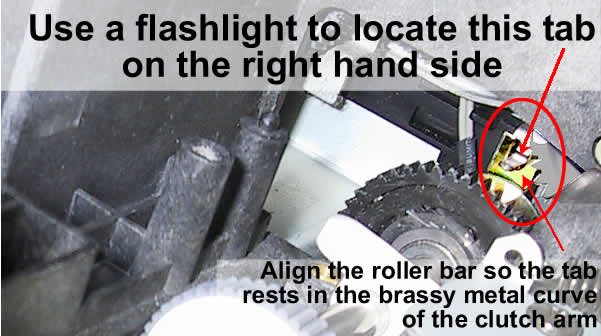
With the bar somewhat in place, use a flashlight to inspect the right hand side. Locate the metal tab shown below and wiggle/rotate the bar so that the metal tab rests in the curve of the brassy-colored clutch arm.
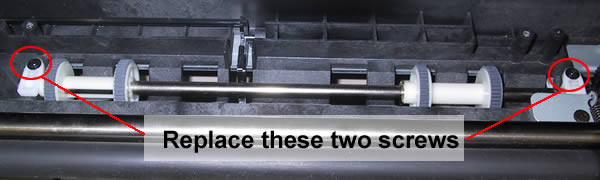
With the white collars aligned properly, the entire bar fitted in its groove, and the metal tab resting in the brassy curve on the right hand side, you can now replace the screws to hold the roller bar in place.
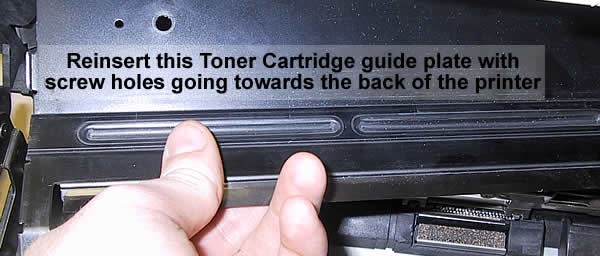
Next reinsert the toner cartridge guide plate, screw holes towards the back of the printer. Then replace the two screws previously removed.
Reinstall the toner cartridge and you're done! Don't forget to mail back your old fuser if you purchased this kit on exchange.
Other Steps in HP LaserJet 4V, 4MV
- HP LaserJet 4V, 4MV fuser installation instructions
- HP LaserJet 4V, 4MV Tray 1 pickup roller , separation pad installation instructions
- HP LaserJet 4V, 4MV cassette pickup roller installation instructions
Tech Support
Featured Articles

