HP LaserJet 8100 , 8150 Tray 1 pickup roller and separation pad installation instructions
Installing the Tray 1 pickup roller and separation pad.
 |
 |
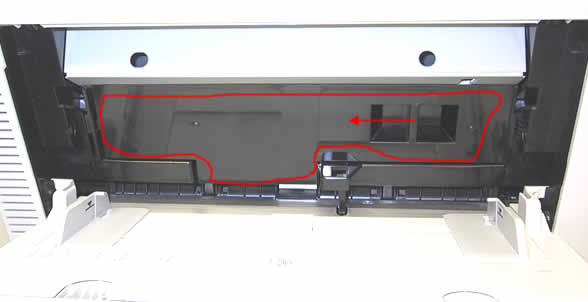
Open Tray 1 (the manual feed tray) and remove the black plastic cover if it is installed. Grab at the arrow pictured below with your thumb and index finger, slide to the left and pull out.

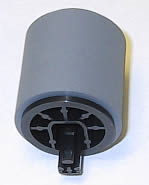
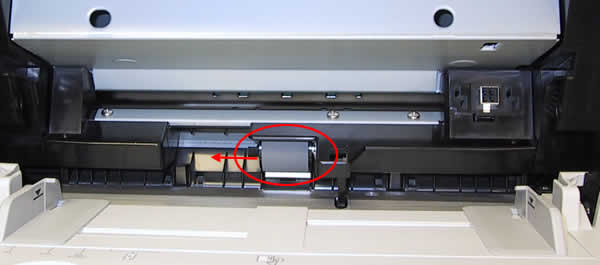
Remove the pick-up roller by pinching the tabs on the end of the roller and pulling the roller to the left off of the shaft.

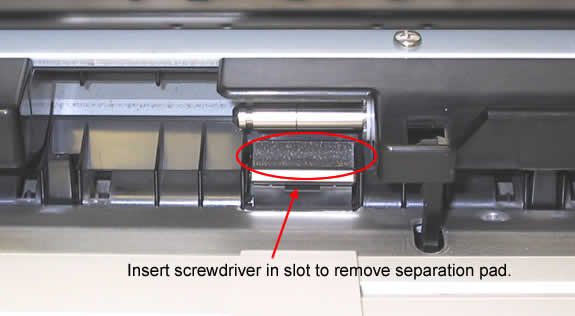
Insert a small flat-head screwdriver into the slot below the separation pad and pry off the separation pad (pictured below).

Install the new separation pad making sure the metallic edge is facing forward. Install the pickup roller by sliding it all the way to the right. Replace the black plastic cover and close the tray 1 door.
Other Steps in HP LaserJet 8100, 8150
- HP LaserJet 8100 8150 fuser installation instructions
- HP LaserJet 8100 8150 transfer roller installation instructions
- HP LaserJet 8100 8150 Cassette rollers installation instructions
- HP LaserJet 8100 8150 Tray 1 pickup roller and separation pad installation instructions
- HP LaserJet 8100 8150 Reset the maintenance count


