
-
Home

-
Maintenance Kit Instructions
-
HP LaserJet 9000 9040 9050
- HP LaserJet 9000 9040 9050 Cassette rollers installation instructions
HP LaserJet 9000 , 9040 , 9050 Cassette feed roller and separation roller installation instructions

Installing the Cassette pickup rollers and feed / separation rollers
 |
 |
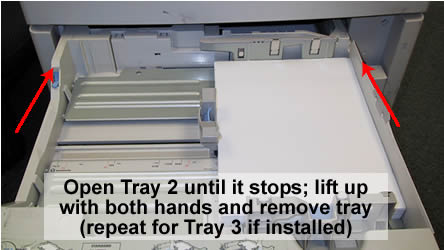
Open Tray 2 and pull it out until it stops. Remove the tray by lifting up on the outer edges while pulling the tray free from the printer. Repeat these steps to remove Tray 3.
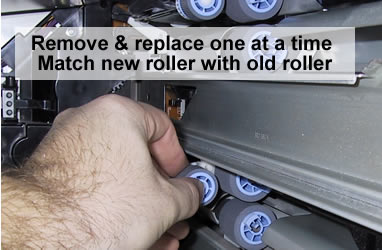
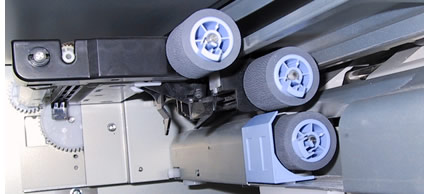
As you look into the printer on the right hand side, you will see three rollers per tray.
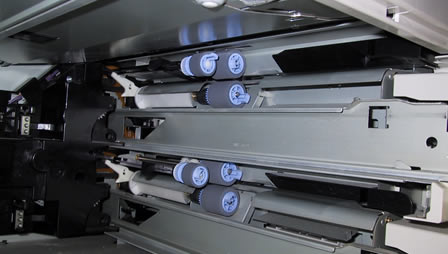
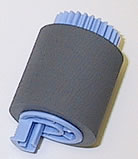
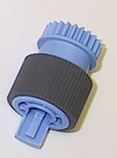
Begin removing and replacing the rollers, one at a time. Press and hold the light blue tab on each roller to release it and slide the roller off its bar. Slide the corresponding new roller onto each shaft until they lock in place (one small roller per tray & two large rollers per tray).
Reinstall Trays 2 and 3.
If you have the optional Tray 4 installed (2000-sheet Tray), follow install instructions below. If you don't have a Tray 4, proceed to the next step.
If you have an optional Tray 4 (2000-sheet Tray) installed ...
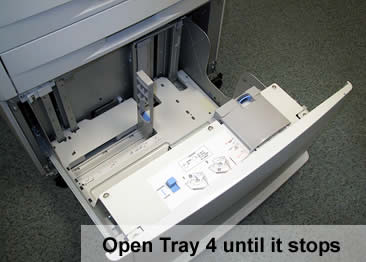
1. Pull Tray 4 out until it catches and stops.
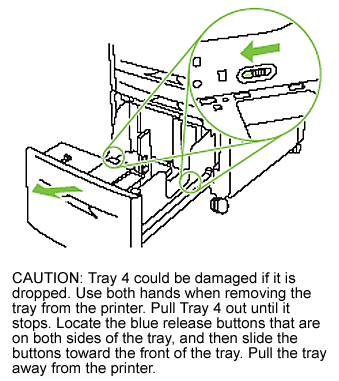
2. Carefully remove Tray 4 as shown in the diagram below.
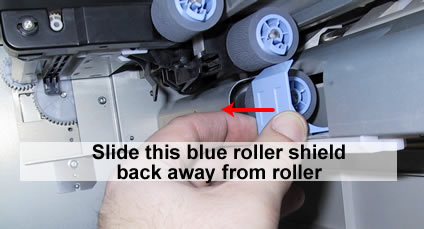
3. To gain access to the separation roller, slide the blue roller shield away from the roller toward the back of the printer, as shown below.
4. Pinch the tab on the end of each roller and slide the rollers off the shaft. Replace the three rollers and then return the blue roller shield to its position.
5. Use both hands to reinstall Tray 4.
Other Steps in HP LaserJet 9000, 9040, 9050
- HP LaserJet 9000 9040 9050 fuser installation instructions
- HP LaserJet 9000 9040 9050 transfer roller installation instructions
- HP LaserJet 9000 9040 9050 Cassette rollers installation instructions
- HP LaserJet 9000 9040 9050 Tray 1 pickup roller and separation pad installation instructions
- HP LaserJet 9000 9040 9050 Reset the maintenance count
Tech Support
Featured Articles

