
-
Home

-
Other instructions
-
Replacing Laser Scanner Assemblies HP LaserJet printers
- Replacing the Laser Scanner Assembly HP LaserJet M601 M602 M603
Replacing the Laser Scanner Assembly HP LaserJet M601 M602 M603
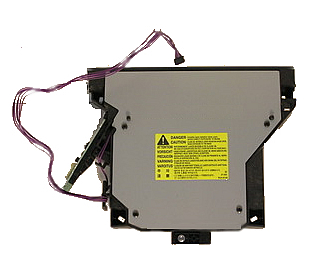
 The laser scanner assembly is a fairly common part to fail on the HP LaserJet M601, M602, M603 models. If you are seeing repeated error codes of 51.10 or similar, you should replace the laser scanner. Instructions for replacing this assembly begin below.
How to Replace the Laser Scanner Assembly HP LaserJet M601 M602 M603
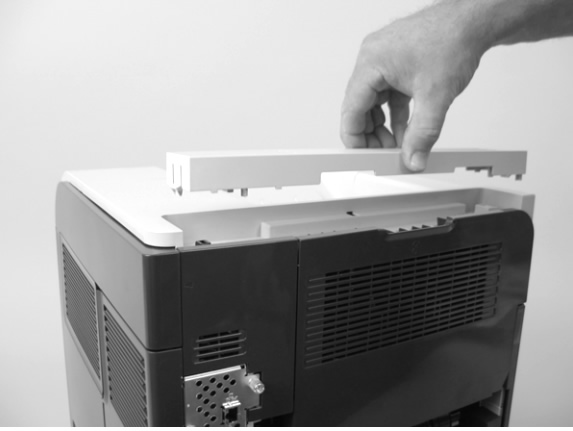
1. Lift the top accessory cover up and off the printer, see picture below.
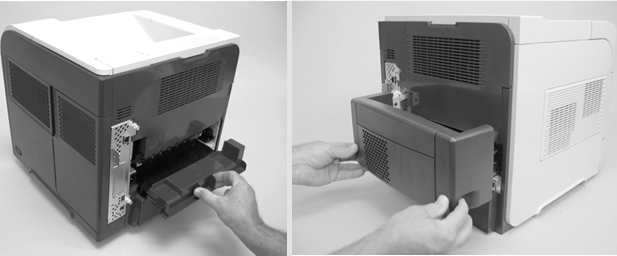
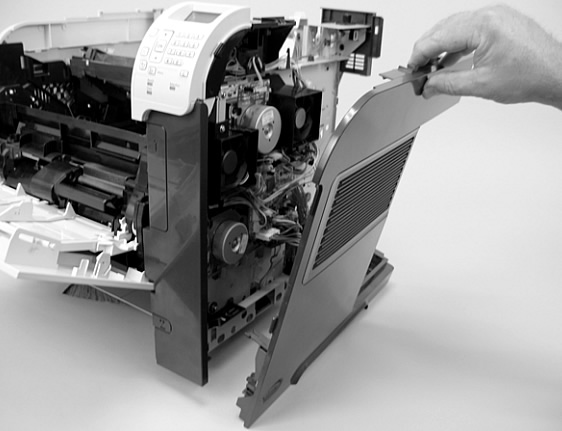
2. See picture below -- remove the duplexer cover, or if a duplexer is installed remove the duplexer.
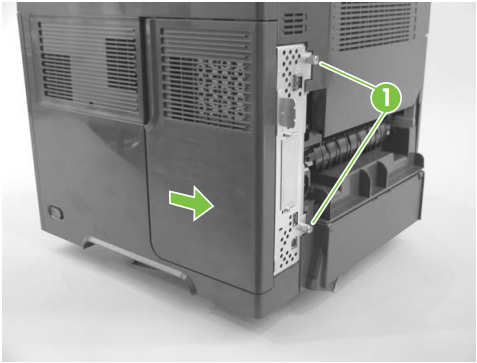
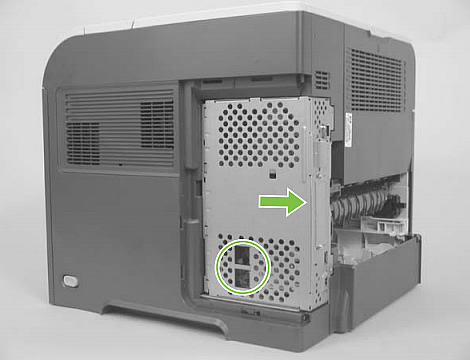
3. Pull the formatter cover straight back and away from the printer. Next unscrew the two thumb screws (callout 1 in picture below).
4. Hold the formatter cage by the finger holes (circled in picture below) and slide the entire cage towards the back of the printer to remove it.
5. Remove the toner cartridge. Open the rear output bin door, the toner access door, and the front cover, and leave these doors hanging open.
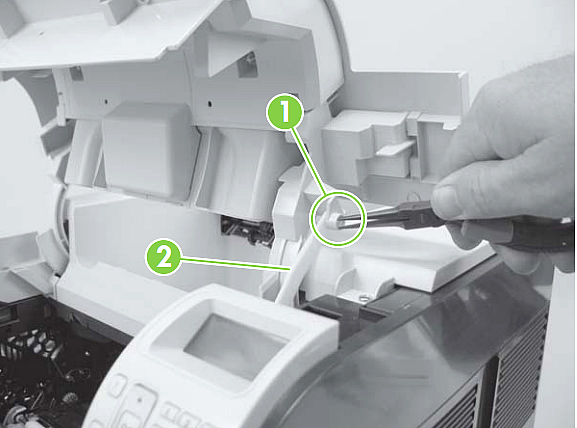
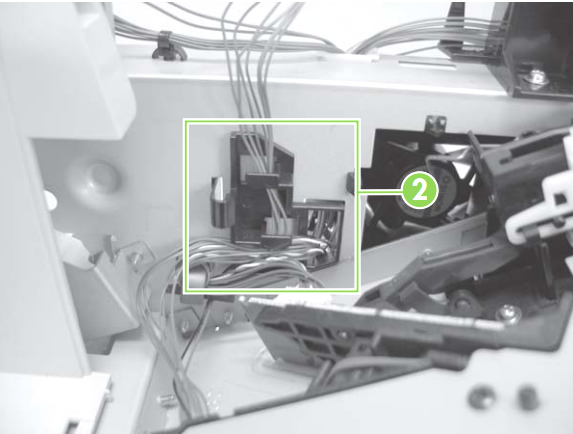
6. See picture below -- use needle-nose pliers (or a flatblade screwdriver) to release the tab (callout 1) which attaches this plastic arm (callout 2) to the toner access lid.
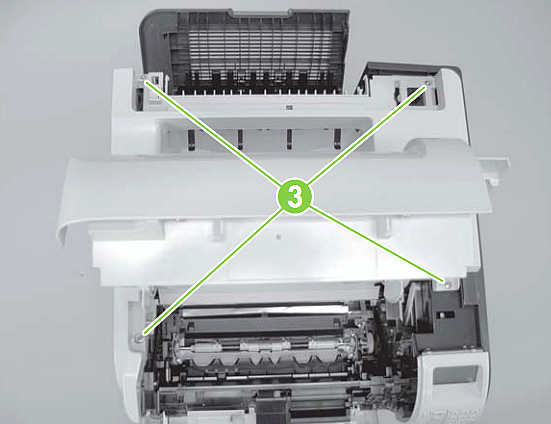
7. Remove 4 screws from the top cover (callout 3 in picture below)
8. Partially close the toner access door, and then use a small flat-blade screwdriver to release two holding tabs (circled callout 4 in picture below) at the rear center of the top cover.

9. Lift the top cover up and away from the printer to remove it.

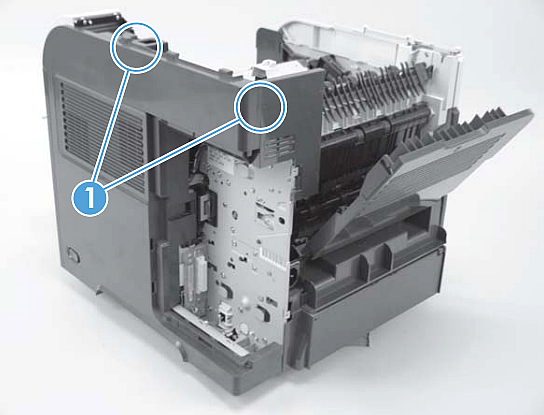
10. On the right side cover, release two holding tabs (tab locations labeled callout 1 in picture below).
11. Carefully separate the cover by gently/firmly pulling the cover free around the control panel.
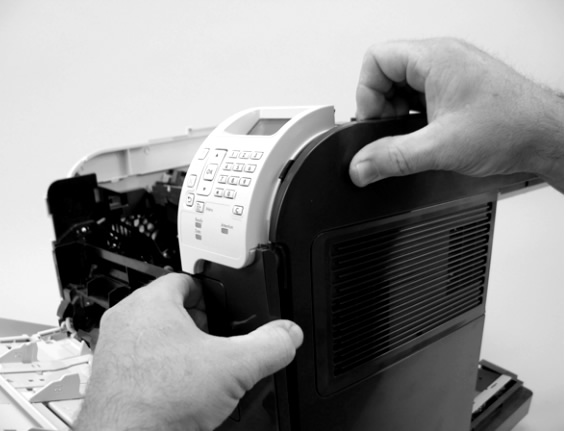
12. Rotate the top of the right side cover away from the printer, then lift the cover upwards to remove it.
13. Unplug the laser scanner wire-harness connector# J86 from the DC controller, the plug is labeled 1 in the picture below.
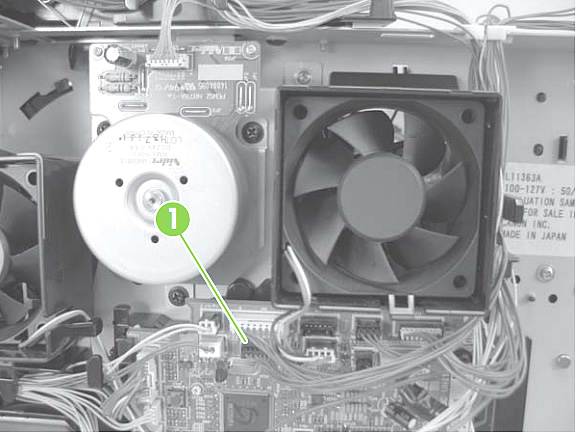
14. Unwind the wire-harness from the wire guide (see callout 2 in picture below).
15. Remove four screws and their attached grounding clips from the laser scanner assembly, circled as callout 3 in picture below.

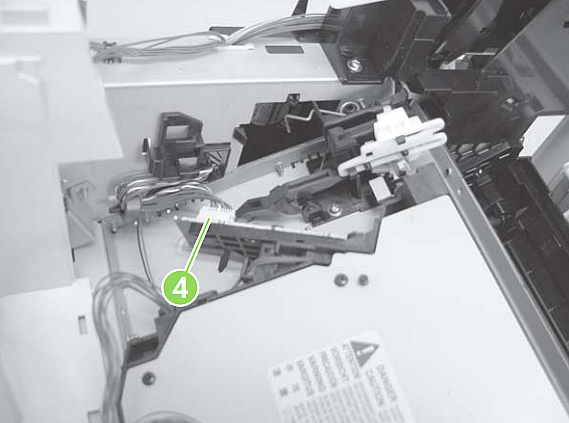
16. Disconnect the laser/scanner wire-harness (callout 4 in picture below) from the laser scanner PCA board.
17. Next, carefully lift the laser scanner assembly up and out of the printer. Make sure when you pull it out, it does not snag any wires.
18. After you install the new scanner, make sure you re-thread the wire harnesses through the cable guides. This will keep the wire harnesses properly out of the way and will prevent wire damage when you re-install the covers.
19. Additional Note: There is a hinged metal shutter on the laser scanner, be careful not to knock it out of place. You can make sure it is functioning properly -- when you touch it, the shutter should easily swivel up and down. If this shutter gets knocked out of place it can block the laser beam and you will get blank print.
Tech Support
Featured Articles

