
-
Home

-
Other instructions
-
Replacing Fuser Drive Gears HP LaserJet P4015 series
- Step 2: Removing the Fuser and Power Supply, HP LaserJet P4015
Removing the Fuser and Power Supply, HP LaserJet P4015


The next step in replacing the fuser drive gears on an HP LaserJet P4014, P4015, or P4515 is to remove the fuser and the power supply.
Removing the Fuser
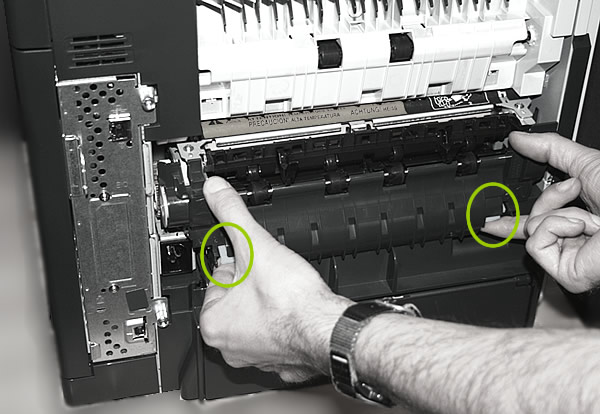
Careful, fusers can be hot within 30 minutes of last usage. Allow the printer to cool if necessary before removing the fuser. To remove the fuser, firmly pinch the blue levers on the fuser (circled in picture below), and pull the fuser towards you out of the machine.
Remove the power supply
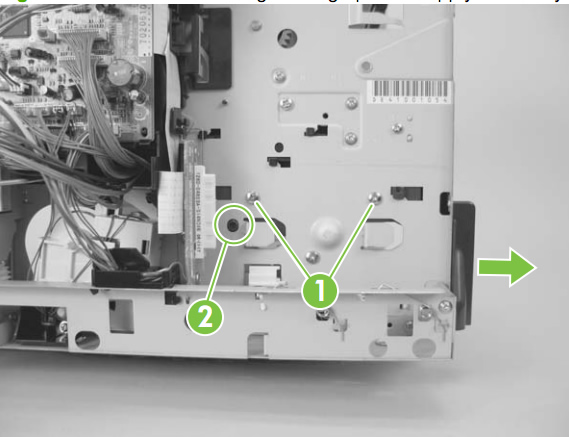
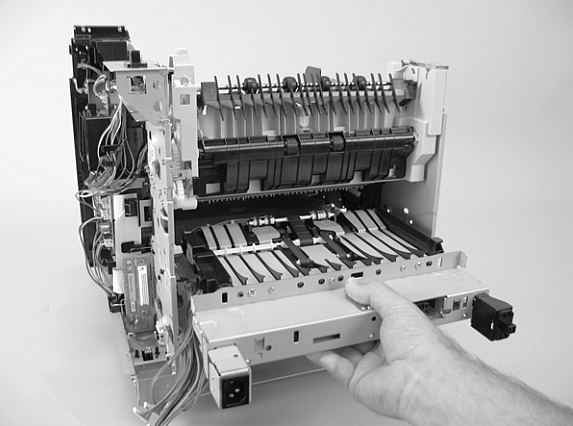
Remove two screws (callout 1 in picture below) and press to release one tab (callout 2 in picture below), then slide the plastic support guide towards the rear of the printer to remove it.
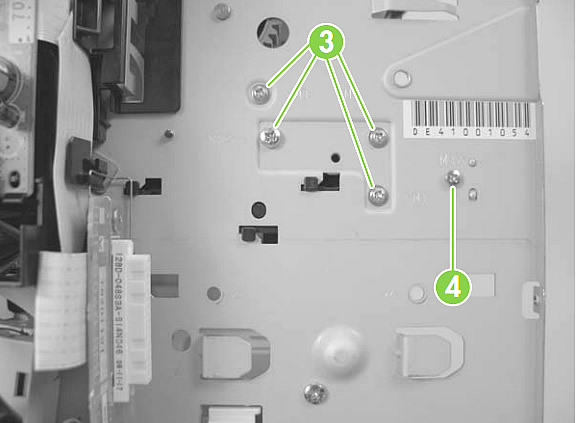
Next, remove 4 screws (see callout 3 in picture below) and remove 1 grounding screw (callout 4 in picture below).
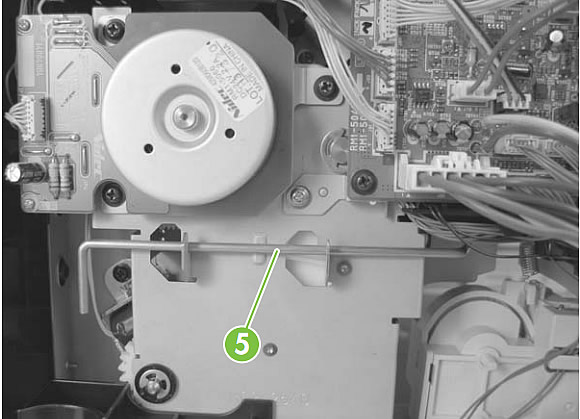
Unhook the power-switch arm (see callout 5 in picture below) from the support rests on the chassis. The switch arm will not be totally free, it remains attached to the power supply.
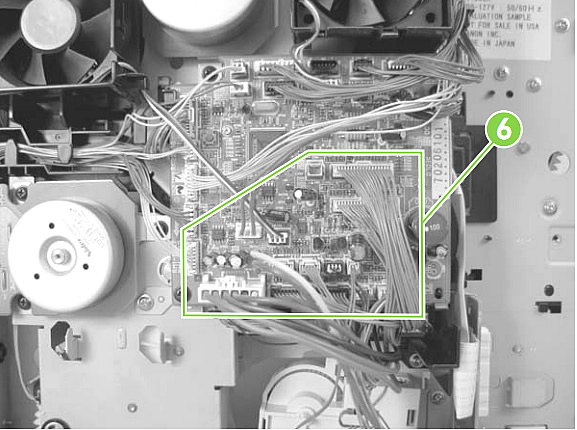
Disconnect five ware-harness connectors (see callout 6 in picture below, these are the plugs labeled J82, J84, J85, J95, and J96).
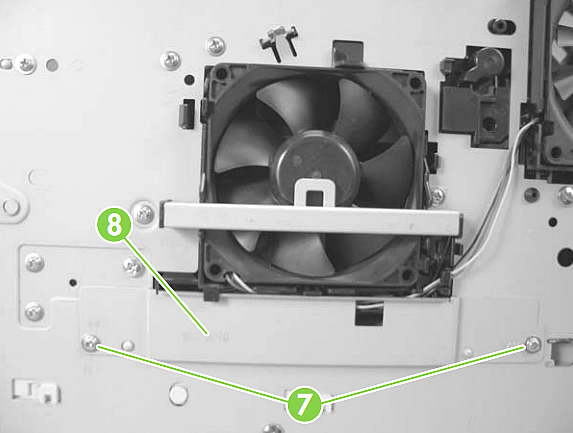
On the other side of the printer, unscrew 2 screws from the metal fan-cover plate (callout 7 in picture below) and then remove the plate.
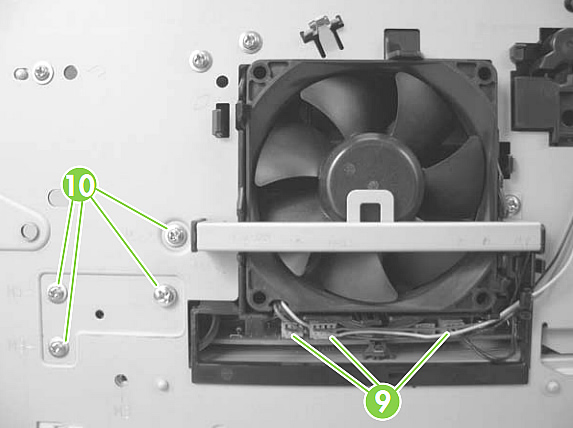
With the plate removed, carefully disconnect the three wire-harness connectors show as callout 9 in picture below, and then remove the four screws shown as callout 10 in picture below.
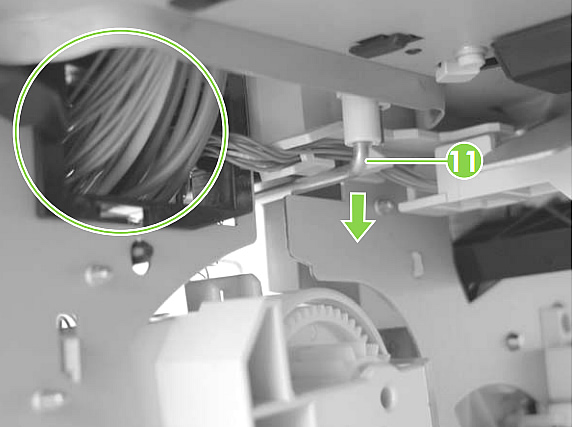
Next, looking underneath the printer through the paper tray cavity -- feed the cables that you disconnected earlier through the hole on the right side of the chassis (circled in picture below), and feed the cables out to sit under the power-supply assembly. Also, pull down on the power-switch connector arm (callout 11 in picture below) to free it out of its mounting socket, and remove the arm.
Grasp the power-supply assembly, and lift it up slightly. Pull the power supply straight out of the chassis. (Make sure the four rubber belts and plastic rollers on the feed assembly at the top of the power supply remain in place.)
That's it for the fuser and power supply. Proceed to the next step, Replace the Fuser Drive Gears.
Tech Support
Featured Articles

