
-
Home

-
Troubleshooting
- 50.9 Fuser error message HP LaserJet P4014 P4015 P4515
50.9 Fuser error message HP LaserJet P4014 P4015 P4515
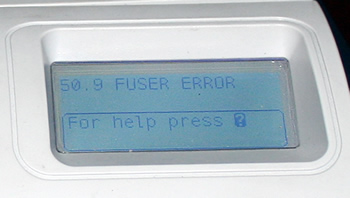
If you are seeing the message 50.9 Fuser Error on your HP LaserJet P4014, P4015, P4015 series printer, you have either a failing fuser or the wrong model fuser installed in your printer. (The fuser is the consumable part in your printer which heats up and bonds toner to the paper. Usually the fuser gets replaced several times over the life of these printers.)
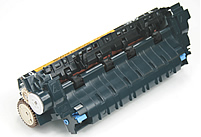
HP makes 2 different model fusers that look very similar -- the P4014/P4015/P4515 series fuser, and the M600 series fuser. Because of the similarities in appearance, sometimes the wrong fuser gets installed in the wrong model printer and triggers a 50.9 error.
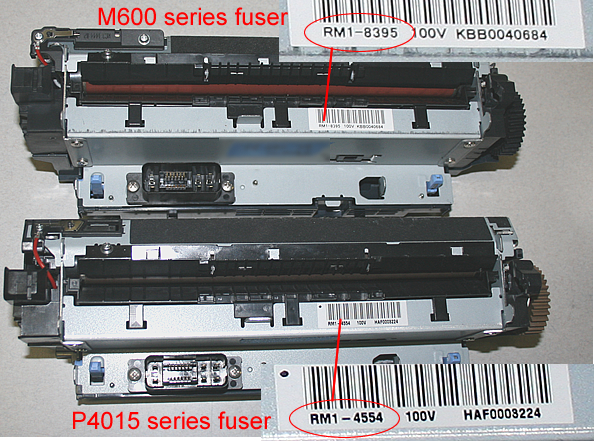
The easiest way to check which model fuser you have installed is to pull the fuser out of the printer and look at the fuser's barcode. It is easy to remove the fuser on these models; if you don't know how to remove your fuser see the removal instructions farther down this page.
Once you have the fuser removed from the printer, look at the barcode as shown below to determine which model fuser you have installed. For the P4014, P4015, P4515 series printers the fuser part# should read RM1-4554 as shown in the picture below.
Either way, whether you have a failing fuser or an incorrect fuser on your LaserJet P4014, P4015, or P4515, you can purchase a quality replacement fuser in the maintenance kit for the P4014, P4015, P4515 series. Click here to view our selection of fusers/maintenance kits. Call us with any questions toll-free 866-352-7108 or local 608-831-2396.
Removal instructions: How to remove the fuser from the printer
Turn the printer off and unplug the power cord. The fuser might be hot if you have been using the printer. As a safety precaution wait 30 minutes for the fuser to cool before proceeding.
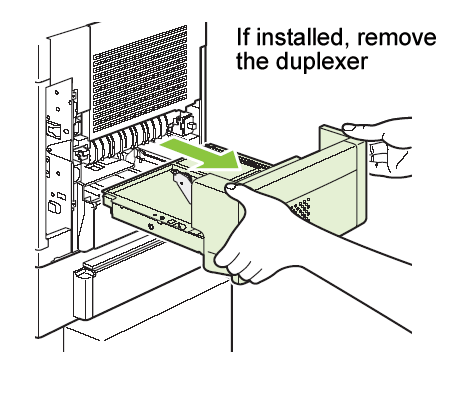
If a duplexer is installed, remove it from the back of the printer.
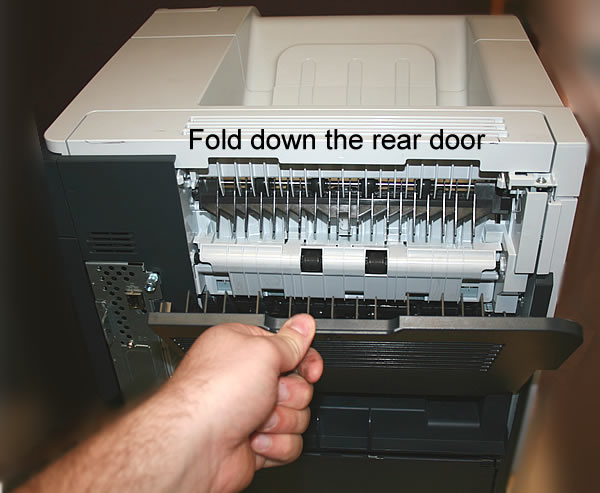
Next fold down the rear door.
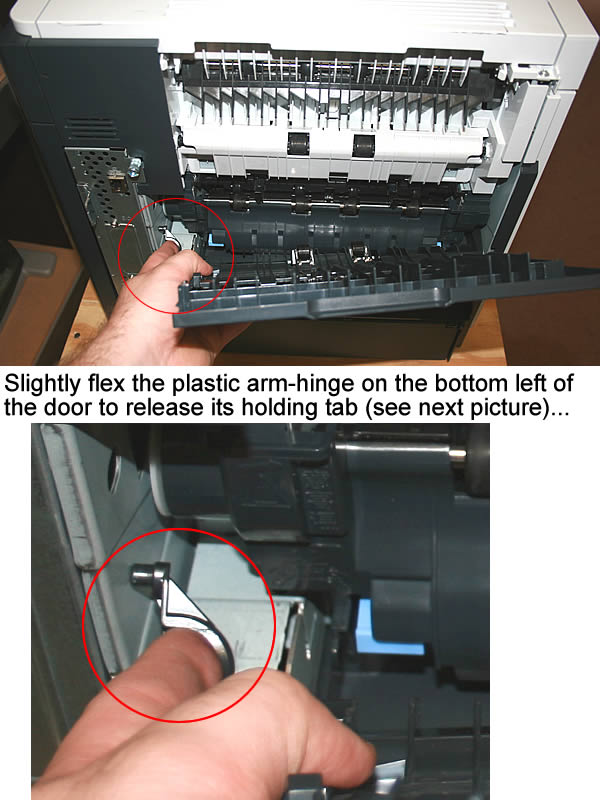
Flex the plastic arm-hinge (circled in red below) on the left bottom of the door . This will release the tab which holds the plastic arm in place, and will free the door.
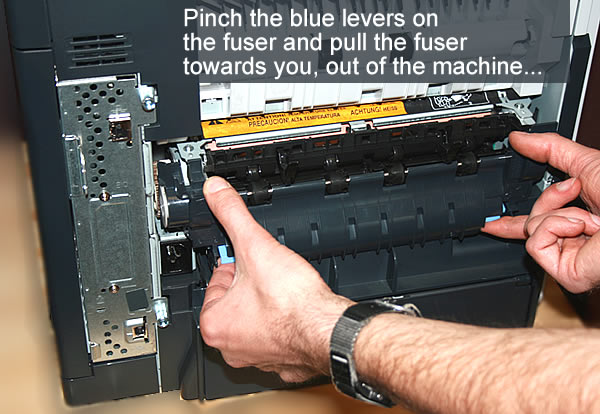
While grasping onto both sides of the fuser, push the blue levers upward and pull the fuser straight out.
After you order a replacement fuser and it arrives, you can install the fuser by inserting the fuser and aligning the left side first. Push the fuser firmly on the left side, then the right--listen for the sound of both blue levers clicking into place. If the fuser does not click into place you run the risk of wearing out both the fuser and the gears that drive the fuser prematurely. Re-install the plastic rear output bin and you are ready to print.
Tech Support
Featured Articles

