HP LaserJet 1200 separation pad installation instructions
Replacing the separation pad.

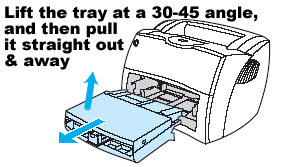
Remove the input tray by lifting upwards at a 30-45 degree angle, and then sliding the tray out and away. Next locate the separation pad -- you might need to push down the media lift plate to see the separation pad.
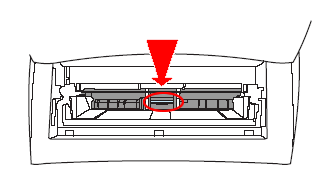
To pry the separation pad up from the spring-loaded base, insert a flat-edged screwdriver in the slot under the separation pad and twist the screwdriver until the tabs pop loose.
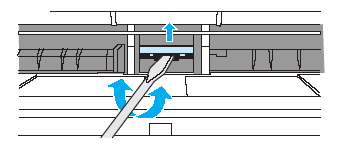
Reach in, push the spring-loaded base down with one hand, and pull the separation pad up and free with the other hand.
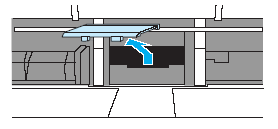
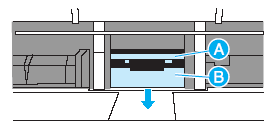
When installing the new pad, make sure the larger tab on the bottom of the pad is aligned to the right--this will help you position the separation pad correctly. With one hand, position the new separation pad in the slot of the previous pad (see "A" in picture below). With the other hand, reach through the input tray opening, and push the spring-loaded base down (see "B" in picture below).
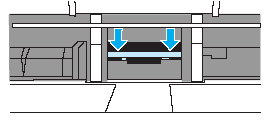
Snap both sides of the separation pad down firmly into place. Make sure that the separation pad is snapped in straight and that there is no space between the separation pad and its spring-loaded base. If the separation pad is not straight or if you see space on one bottom side, remove the separation pad, make sure the larger tab is on the right, and re-attempt to snap it in place.
Reinstall the input trays and you are done with the separation pad installation.
Other Steps in HP LaserJet 1200
- HP LaserJet 1200 transfer roller installation instructions
- HP LaserJet 1200 pickup roller installation instructions
- HP LaserJet 1200 separation pad installation instructions
- HP LaserJet 1200 fuser installation instructions


