
-
Home

-
Maintenance Kit Instructions
-
HP LaserJet 2200
- HP LaserJet 2200 Tray 1 Separation pad and pickup roller installation instructions
HP LaserJet 2200 Tray 1 separation pad and pickup roller installation instructions

 |
 |
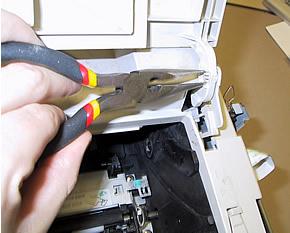
Open the toner cartridge door and use a pair of needle-nose pliers to pinch the head of the lever that supports the toner door. Pinch the head of the lever and push it through its hole, as shown below.
 |
 |
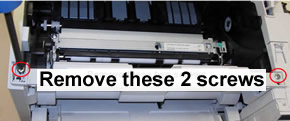
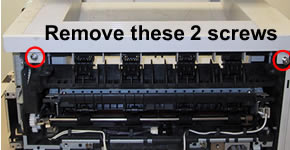
Remove the four screws holding the top cover in place, as shown in the two figures below (remove two from the front of the top cover, and two from the back of the top cover).
 |
 |
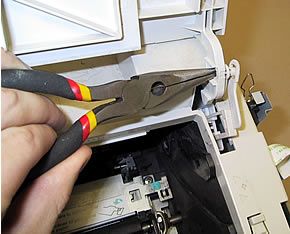
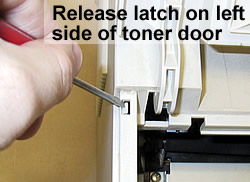
Use a flat blade screwdriver to release the latch on the left side of the toner door. Then lift the top cover straight up and away from the printer.
 |
 |
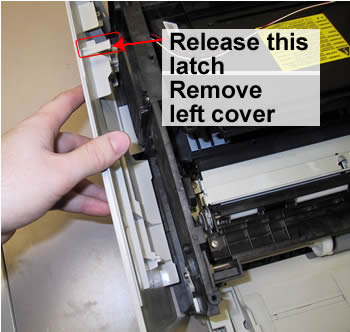
Now the left cover must be removed. Release the latch shown below, and simultaneously lift the cover up and outward to remove it.
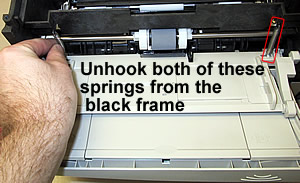
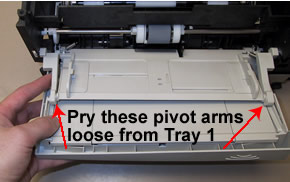
Next, unhook the two springs supporting Tray 1 from the black printer frame. Then, at the locations pointed to by red arrows below right, pry the pivot arms loose from Tray 1.
 |
 |
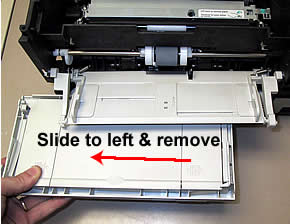
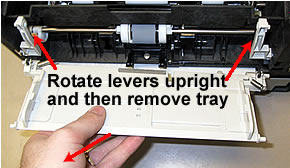
Slide the bottom of Tray 1 to the left to remove it. Then rotate the pivot arms (levers shown below right) upwards and remove the top of Tray 1.
 |
 |
|
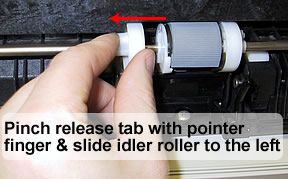
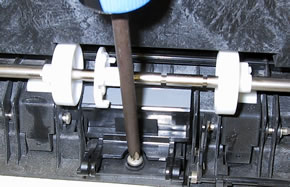
Press and hold the release tab on the outer edge of the left idler roller and begin sliding the idler roller away to the left. If the idler rollers catches on the separation pad beneath it, hold the separation pad down with one hand and slide the idler roller with the other hand. |
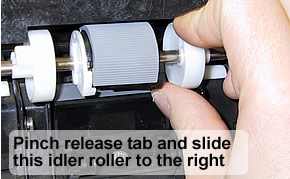
Press and hold the release tab on the out edge of the right idler roller and slide this one to the right. Again, hold down the separation pad if necessary. |
 |
 |
|
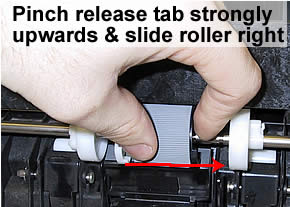
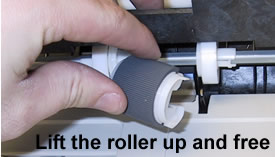
Strongly pinch the release tab on the right side of the pickup roller. You will have to use some force as you pinch the release tab upwards, and then slide the roller to the right. |
 |
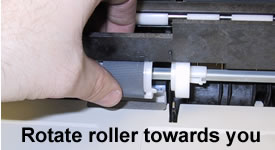
| Rotate the pickup roller on its shaft, rotating it towards you to free the roller | Lift the pickup roller off its metal shaft |
 |
 |
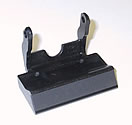
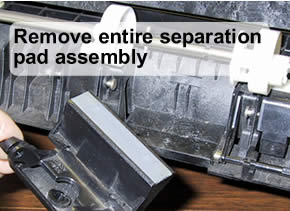
Before you install the new pickup roller, the separation pad which sits underneath it must be removed and replaced.
 |
 |
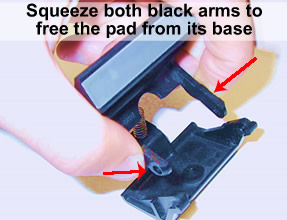
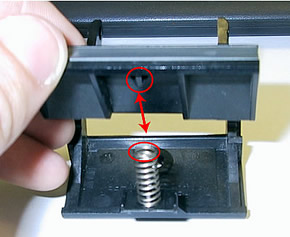
Squeeze both of the pad's arms inward and free the pad from its black base. Insert the new separation pad onto the base; be sure to line up the bump on the bottom of the new separation pad with the spring on the black base. Squeeze the pad's arms and lock the arms onto the base.
 |
 |
Reinstall the entire separation pad assembly and screw it down in place.
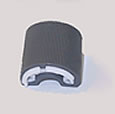
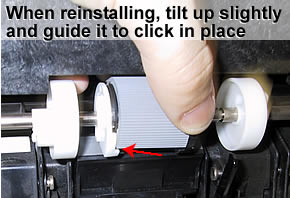
Now you can replace the pickup roller. Slide the roller to the left towards its white coupling. Rotate the roller slightly (try rotating both up and down) as you slide the roller to the left; keep rotating it and sliding it left until it clicks in place with the coupling. This will take some patience the first time you do it!
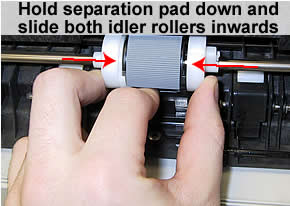
Next, hold the separation pad down with one finger and slide both idler rollers towards the pickup roller and lock them in place.
 |
 |
Other Steps in HP LaserJet 2200
- HP LaserJet 2200 transfer roller installation instructions
- HP LaserJet 2200 Tray 2 pickup roller installation instructions
- HP LaserJet 2200 Tray 2 separation pad installation instructions
- HP LaserJet 2200 Tray 1 Separation pad and pickup roller installation instructions
- HP LaserJet 2200 fuser installation instructions
Tech Support
Featured Articles

