
-
Home

-
Maintenance Kit Instructions
-
HP LaserJet 2400
- HP LaserJet 2400 transfer roller installation instructions
HP LaserJet 2400 transfer roller installation instructions

With the printer facing toward you, open the top cover and remove the toner cartridge. Pinch the tabs on the transfer roller bushing (you may have to use needle-nose pliers) and lift the transfer roller shaft up and away to the left.
![]()
When handling the replacement transfer roller be careful not to touch the black roller surface. Oils from your skin can adversely affect print quality. Some people recommend wearing latex gloves when handling the transfer roller but it isn't necessary if you are careful to only touch the ends. It is unlikely that you would ever notice poor print quality from accidentally touching the transfer roller's surface.
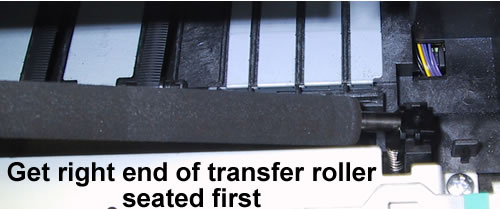
Insert the right end of the transfer roller first, securing the metal tip into its black retaining clip.
Now install the left end of the transfer roller. Now install the left end of the transfer roller, making sure the white plastic bushing is oriented with its spring facing down. Line up the grooves in the bushing with the ridges on its seating block, and push the white bushing down to lock it in place.
Other Steps in HP LaserJet 2400 2410 2420 2430
- HP LaserJet 2400 transfer roller installation instructions
- HP LaserJet 2400 Tray 2 Tray 3 Pickup roller installation instructions
- HP LaserJet 2400 fuser installation instructions
- HP LaserJet 2400 fuser drive gear installation instructions
- HP LaserJet 2400 Tray 1 Pickup roller , separation pad installation instructions
- HP LaserJet 2400 Tray 2 Tray 3 Separation pad installation instructions
- HP LaserJet 2400 Resetting the maintenance count
Tech Support
Featured Articles

