HP LaserJet 4050 Tray 1 separation pad installation instructions
Installing the Tray 1 separation pad.
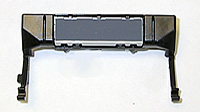
At this point you should have the Tray 1 pickup roller removed. If not, return to the previous step for instructions on removing the pickup roller.
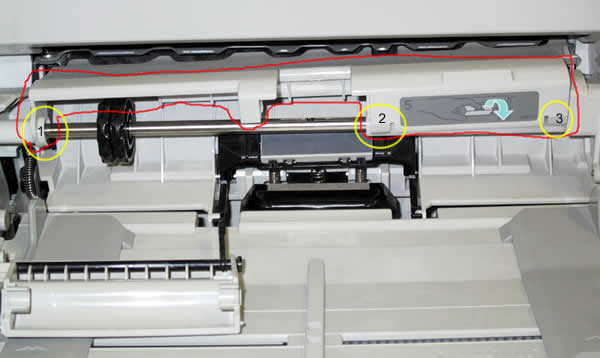
Next the plastic piece circled in red below needs to be unclipped. (Some of the older LaserJet 4000's do not unclip, see the second picture.) The picture below is of a LaserJet 4100 which is easier to photograph, but uses mostly the same parts. The unclipping procedure is the same on a LaserJet 4050 and newer revisions of the LaserJet 4000. Simply pull up at the three points circled in yellow where the plastic piece snaps onto the shaft.
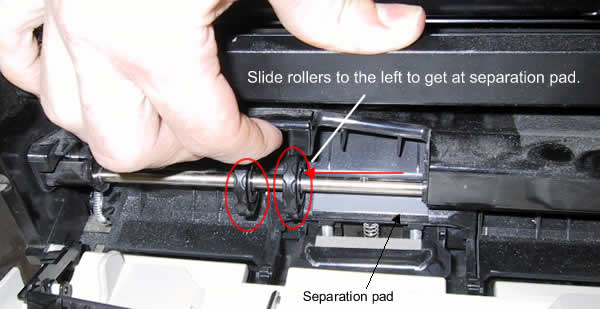
For older revisions of the LaserJet 4000 the plastic piece pictured above does not unclip. You need to bend the plastic up in order to slide the two black discs to the left. You need to use a little muscle to lift the plastic up, but it's the only way to slide the two discs to the left. Now you can get at the separation pad.
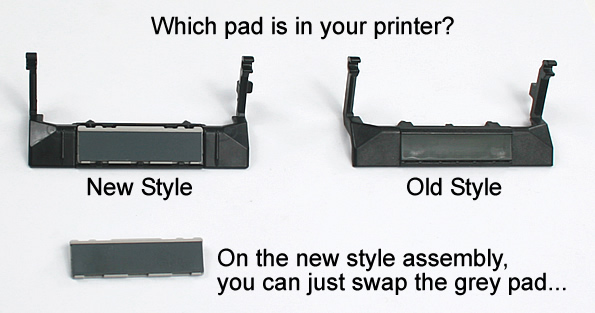
The next step is to actually replace the separation pad. The following picture shows the two styles of separation pads that are available: one is the old style, in which case you have to replace the whole assembly. But if you have the new style assembly in your printer, you can just swap the grey pads. The next few pictures will show you how to do it both ways.
If you have the Old-Style Separation Pad (the original LaserJet 4000 series) ...
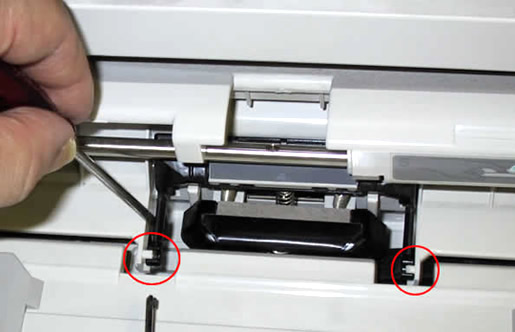
If the current separation pad you have installed in your machine is the "old style", you will need to replace the entire separation pad assembly. To remove the old assembly simply take a small flat head screwdriver and pop out the plastic arms circled in the picture below. This will free the separation pad. Remove it and save the springs. You will reuse the springs on the new separation pad assembly.
Or, if you have the New Style Separation Pad: (on the newer LaserJet 4000 series and the 4050 series)
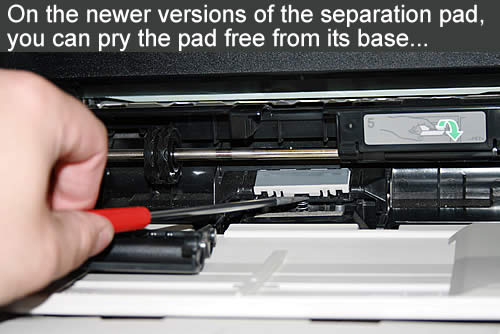
If you have the "new style" separation pad assembly in your machine all you need to do is swap the grey pads. First use a flatblade screwdriver to pry your old grey pad free.
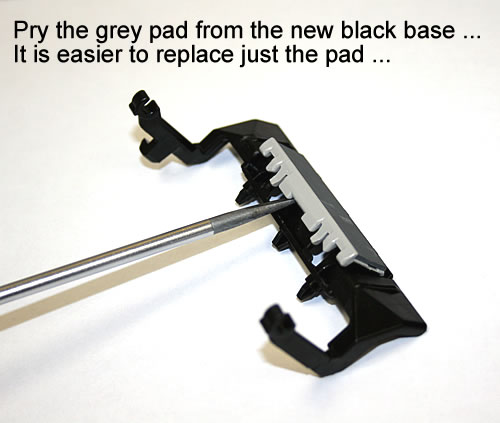
Pry the same grey pad free from the new separation pad assembly. You will install the pad only.
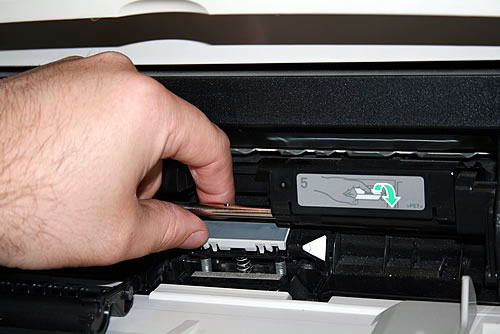
Insert the new grey pad (teeth of the pad pointing down) and lock it down firmly onto the black plastic assembly.
Once the new separation pad is installed, you can proceed to install the pickup roller.
Slide one of the black disks all the way to the right, then install the pickup roller. Slide the second black disc all the way back to the right, and follow the reverse procedures to re-assemble everything.
Other Steps in HP LaserJet 4050
- HP LaserJet 4050 fuser installation instructions
- HP LaserJet 4050 transfer roller installation instructions
- HP LaserJet 4050 Tray 1 pickup roller installation instructions
- HP LaserJet 4050 Tray 1 separation pad installation instructions
- HP LaserJet 4050 feed and separation roller installation instructions
- HP LaserJet 4050 D-shaped pickup rollers installation instructions
- HP LaserJet 4050 reset maintenance count instructions


