HP LaserJet 4300 transfer roller installation instructions
Installing the transfer roller.

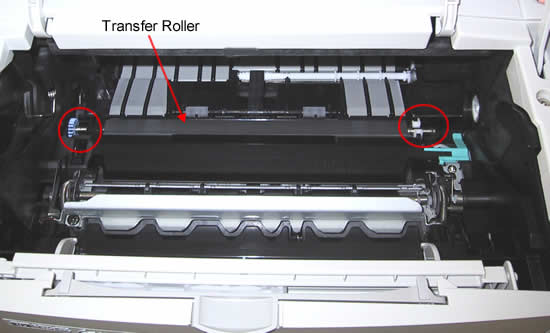
With the printer facing toward you, open the top cover and remove the toner cartridge.

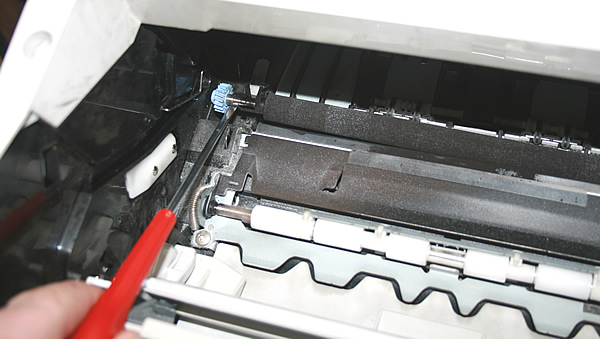
Carefully insert a flatblade screwdriver under the left-side metal shaft of the transfer roller (see picture), staying close to the blue gear. Lift the left end of transfer roller up, then slide the transfer roller to the left to remove it from the right collar.

When handling the replacement transfer roller be careful not to touch the black roller surface. Oils from your skin can adversely affect print quality. Some people recommend wearing latex gloves when handling the transfer roller but it isn't necessary if you are careful to only touch the ends. It is unlikely that you would ever notice poor print quality from accidentally touching the transfer roller's surface.
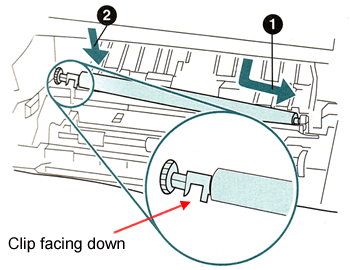
Insert the right end of the new transfer roller first. Follow with the left end, making sure the black plastic clip at the left end of the roller is oriented with the open end facing down. When the transfer roller is seated comfortably in its slot, press down on the black plastic clip to snap the clip in place.

Other Steps in HP LaserJet 4300
- HP LaserJet 4300 fuser installation instructions
- HP LaserJet 4300 transfer roller installation instructions
- HP LaserJet 4300 tray 1 pickup roller installation instructions
- HP LaserJet 4300 tray 1 separation pad installation instructions
- HP LaserJet 4300 cassette pickup, feed, and separation roller installation instructions
- HP LaserJet 4300 reset maintenance count instructions


