
-
Home

-
Other instructions
- Replacing the ADF Roller Kit HP LaserJet 4345 M4345 CM4730
Replacing the ADF Roller Kit HP LaserJet 4345 M4345 CM4730


Step 1: Replacing the Pickup Roller Assembly
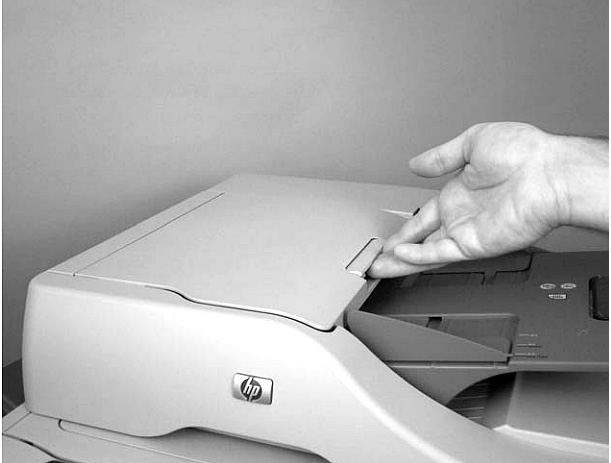
Open the ADF cover.
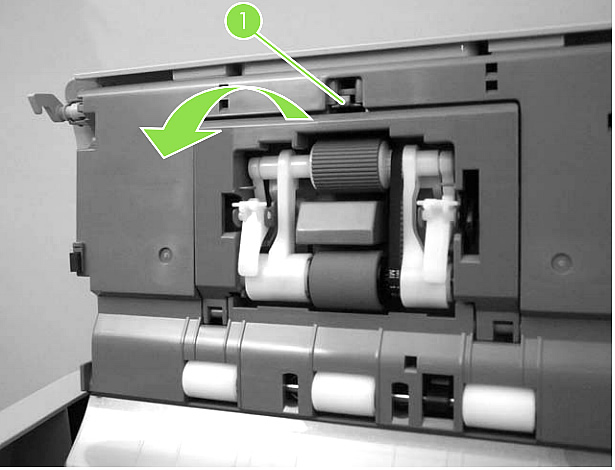
Push down on the little locking tab (see callout 1 in picture below) and rotate the plastic shield down and away.
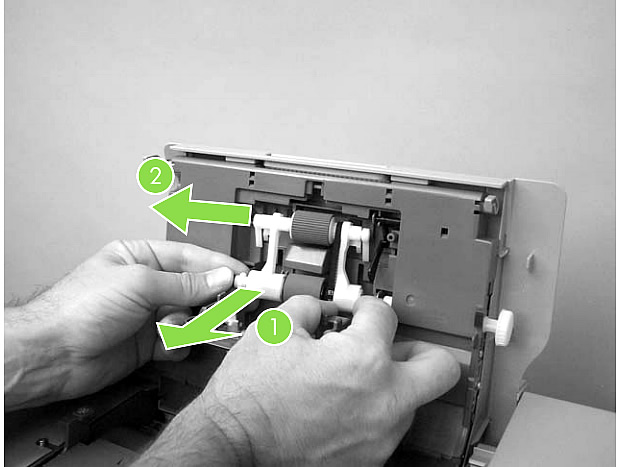
Gently pull outwards on the gear end of the roller's drive shaft, (callout 1 in picture below). When the gear assembly pops free then slide the roller assembly toward the front of the printer to remove it (callout 2 in picture below).
Insert the new roller assembly, make sure the gear side locks in last.
Step 2: Replacing the Separation Pad Assembly
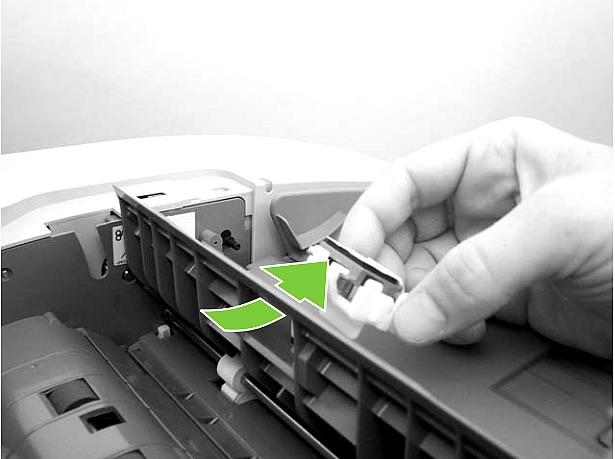
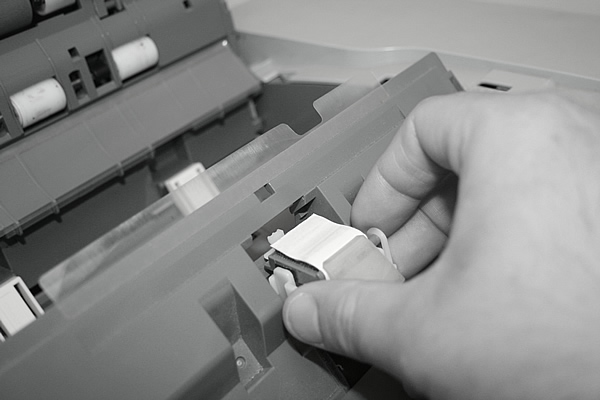
With the ADF cover still open, raise up the separation pad frame assembly (see picture below), and push the bottom edge of the separation pad away from the frame until it pops free.

Remove the separation pad assembly.
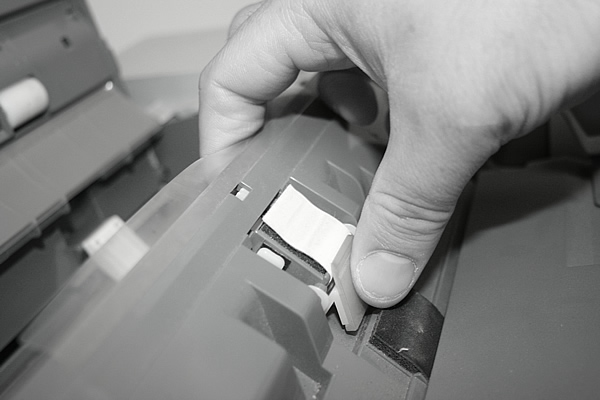
Insert the new separation pad as shown in the next picture.
Make sure the new separation pad clicks firmly in place (there are little locking tabs on the bottom of the pad assembly which must slide over a small locking bar and click in place.)
Step 3: Replacing the Mylar Sheet (Delivery Guide)
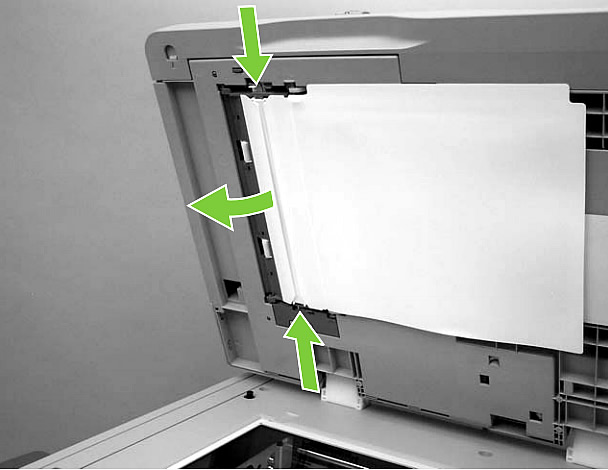
Open the lid to the scanner, on the bottom of the ADF assembly, release the 2 tabs which hold the cover for the mylar sheet. See picture below.
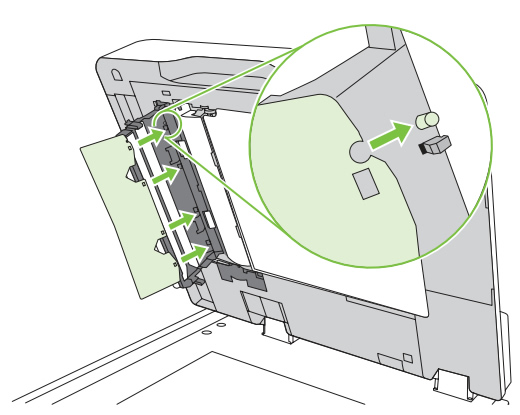
Carefully unhook the clear mylar sheet from the 4 tabs circled as callout 1 in picture below, then remove the mylar sheet.

Install a new mylar sheet. Notice that there is a small notch cut into the mylar, be sure to align that notch with the round pin that is on the mylar holder. See picture below.
To reset the ADF maintenance-kit count
1 Turn the MFP off and then on.
2 When the memory count appears on the control-panel display, press and hold 6 until all three LEDs flash once and then stay on. (This might take up to 20 seconds.)
3 Release 6 and then press 3 twice.
4 Press 6 to select NEW DOCUMENT FEEDER KIT.
5 The MFP completes its initialization sequence. The ADF maintenance-kit counter is automatically reset.
Tech Support
Featured Articles

