HP LaserJet 4 , 4Plus output assembly installation instructions - part 2
Top Panel Removal
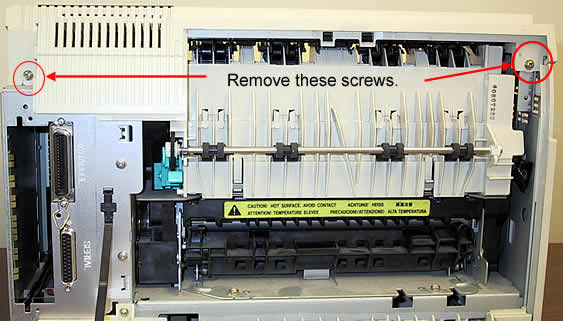
Facing the back of the printer lower the back panel and remove the two screws circled below.

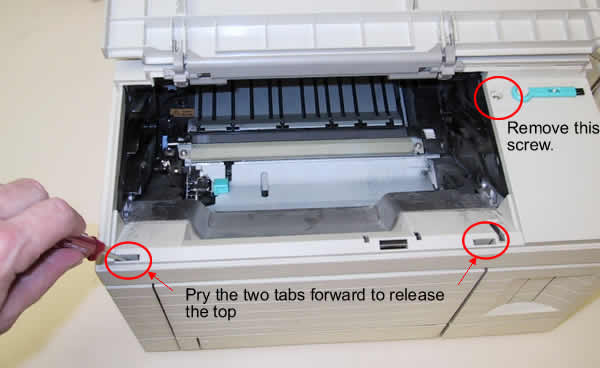
Turn the printer around and open the toner access door. Remove the screw circled below and use a small flathead screwdriver to carefully press the tabs forward as shown below.

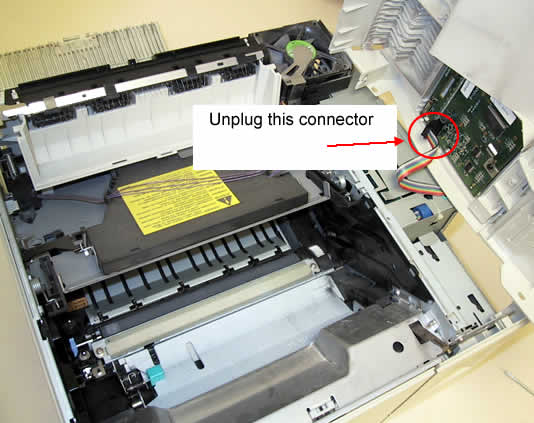
Carefully lift the left side of the panel up and the the right. Lift it as shown below below and unplug the ribbon cable which connects the display to the printer.

Remove the top cover.
Other Steps in HP LaserJet 4 , 4Plus output assembly
- HP LaserJet 4, 4Plus output assembly installation instructions , part 1
- HP LaserJet 4, 4Plus output assembly installation instructions , part 2
- HP LaserJet 4, 4Plus output assembly installation instructions , part 3
- HP LaserJet 4, 4Plus output assembly installation instructions , part 4


