HP LaserJet 5 output assembly installation instructions - part 3
Output Assembly Removal
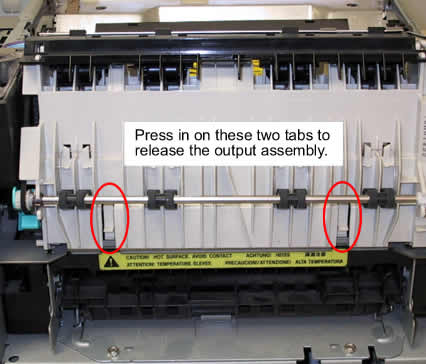
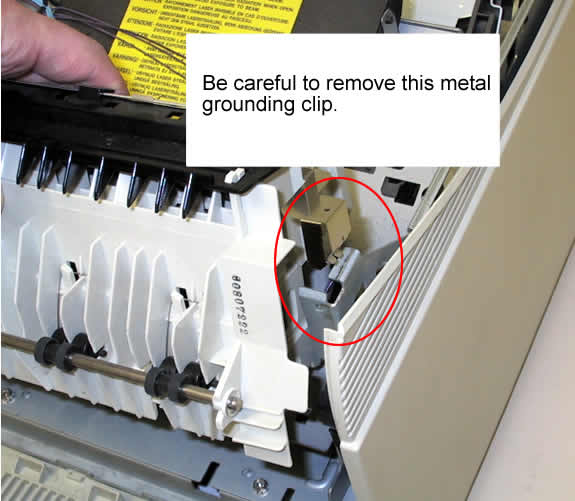
Facing the back of the printer lower the back panel and use your thumb or a screwdriver to press the two tabs circled below. This will release the output assembly, be careful of the grounding tab on the right side. It slides up and off of the frame. The assembly is easiest to remove by gently rocking the top of the assembly towards the front of the printer and lifting up.


Remove the output assembly.
Other Steps in HP LaserJet 5 output assembly
- HP LaserJet 5 output assembly installation instructions , part 1
- HP LaserJet 5 output assembly installation instructions , part 2
- HP LaserJet 5 output assembly installation instructions , part 3
- HP LaserJet 5 output assembly installation instructions , part 4


