51.01 51.1 Error HP LaserJet 4100 Laser scanner failure
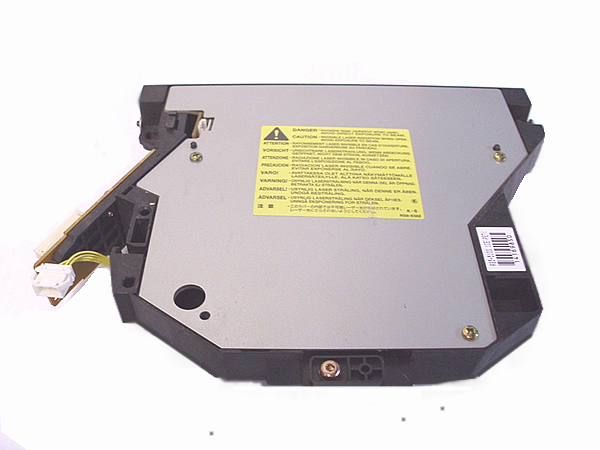
The 51.01 and 51.1 errors are fairly common error codes on the HP LaserJet 4100, 4100N, 4100TN, and 4100DTN series printers. This error indicates a failure with the laser scanner assembly, which is a high-failure part on these models. You can try turning the printer on and off; sometimes that will temporarily reset the error code and allow you to print a few more pages. Usually the error reappears, in which case you should replace the laser scanner. Fortunately, on this model replacing the laser scanner is not a difficult repair; see instructions below.
Click here to purchase the laser scanner assembly.
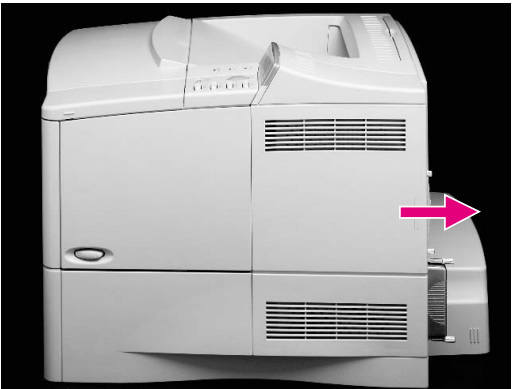
On the rear right side, grasp the formatter cover by its lip and pull it firmly toward the rear of the printer until it stop and comes free. See picture below.
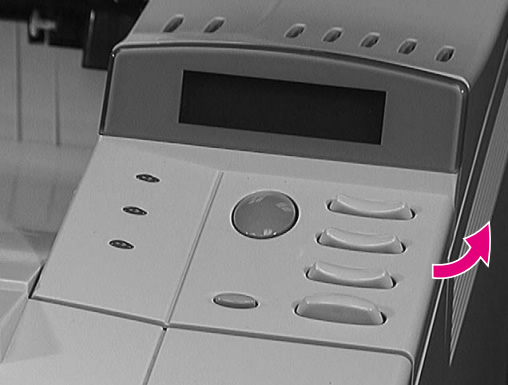
See picture below -- use a flat-blade screwdriver to gently pry the plastic overlay up and outward from the right side of the control panel. Free the plastic overlay from its tabs on the left and lift it up & off the printer.
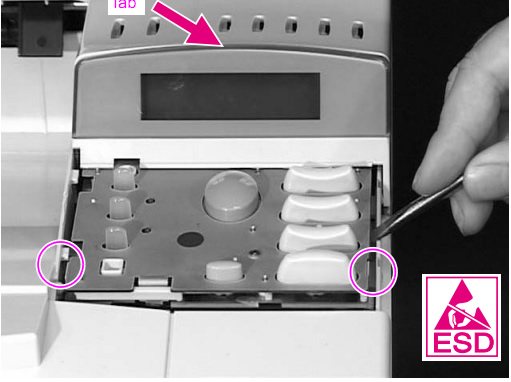
Once the control panel overlay is removed, use a flat-blade screwdriver as shown in picture below to release the retaining clip from each side of the control panel, then rotate the front of the control panel upward. There is a tab (see arrow in picture) hidden behind the top center of the control panel, rotating the control panel outwards clears that tab. Also, there will be a ribbon cable connected to the bottom of the control panel, disconnect that ribbon cable and completely remove the control panel.
Open the top cover and remove the toner cartridge.
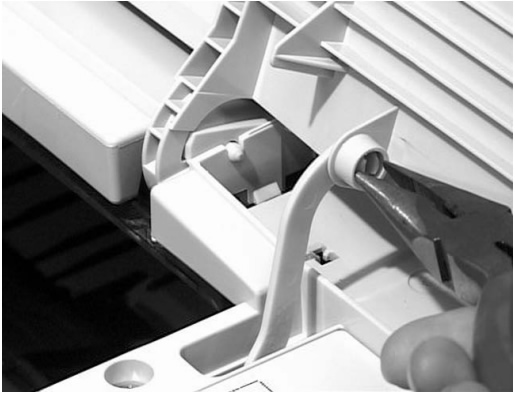
Disconnect the toner cartridge drive arm by using needle-nose pliers to squeeze the pin and push it back through its retaining hole on the top cover. See picture below.
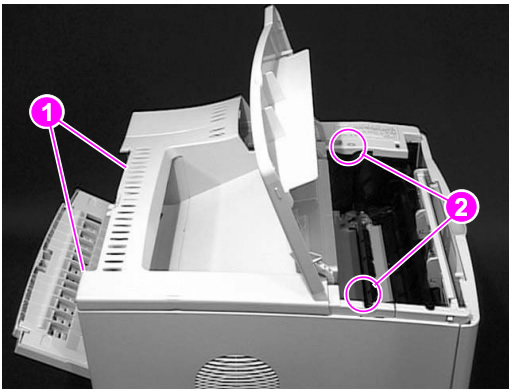
Fold down the rear output bin at the back of the printer, and remove 2 screws (see picture, screws circled as #1) hidden underneath the lip of the top rear of the printer. Next, remove 2 screws from the front of the top cover, circled as callout 2 in picture below.
See picture below -- squeeze the frame below the tab to release the top cover. It might be necessary to use a small flat-blade screwdriver to release the tab inside that small hole.
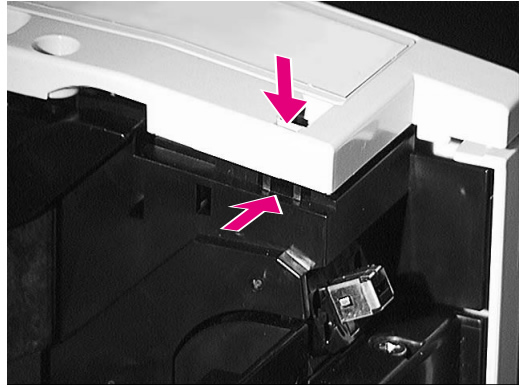
Hold the output assembly in place (located at the top toward the rear of the printer) while you wiggle, lift, and pull the top cover up and free from the printer.
See picture below. Unplug the 3 connectors circled as callout #1 in the picture below. Then remove the screw that holds the grounding cable in place, circled as callout 2 in picture below. Finally remove the 4 recessed screws (un-numbered circled in picture below) located around the edges of the laser scanner. NOTE: Don't remove the 3 screws on the top cover of the laser scanner, and don't loosen the Allen screw at the rear of the scanner assembly.

Lift the laser scanner straight up and away to remove it.
When you re-install the new laser scanner, be sure the black shutter interlock arm (circled as callout 3 in picture above) is resting on top of the metal shutter plate. If the metal shutter gets knocked out of place and doesn't open and close properly, it will block the laser beam and you'll get blank print.
Install the new laser scanner, reconnect plugs and re-install screws, reassemble cover panels and assemblies in reverse order of the previous steps.


