
-
Home

-
Maintenance Kit Instructions
-
HP LaserJet P4014, P4015, P4515
- HP LaserJet P4014 , P4015 Tray 1 pickup and feed roller installation instructions
HP LaserJet P4014 , P4015 Tray 1 pickup roller and feed roller installation instructions

Removing the rollers.
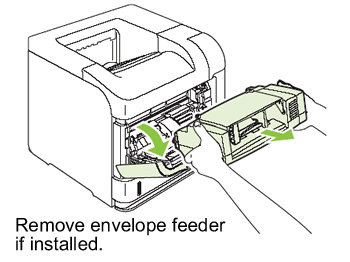
Open Tray 1 (flips down). If you have an envelope feeder installed, remove it.
If this thin plastic cover is installed (labeled "4", shown below), remove the cover from the envelope feeder slot by pulling it firmly out.

Remove the screw shown below.

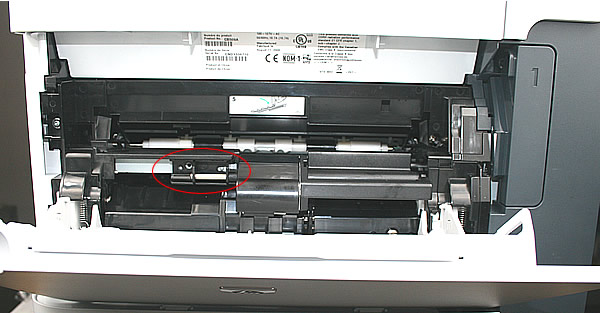
Next you will be removing this small plastic piece circled in red in the two following pictures. You can grab this piece and slide it free to the left.
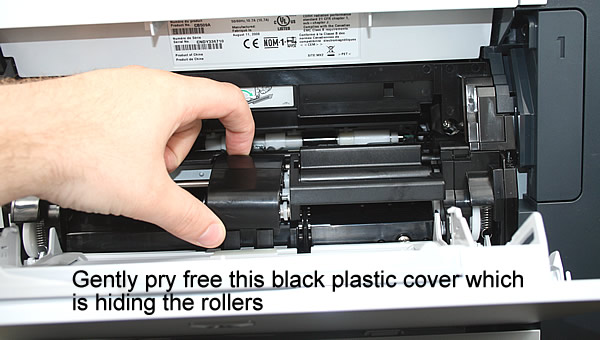
Next you will remove the plastic cover shown below (gently pry it free), which is hiding the manual feed rollers.
Slide the two grey/white rollers off their shafts.

On the left side of the manual feed area, you will find a rotating black plastic "door" (circled in red below) -- rotate this door downwards, so that you can access the blue roller behind it.The next series of pictures show how to rotate the door.

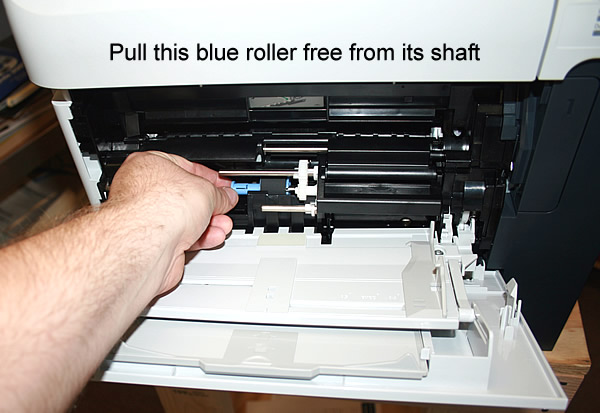
As you hold the black door open, pull this blue roller free from its shaft.
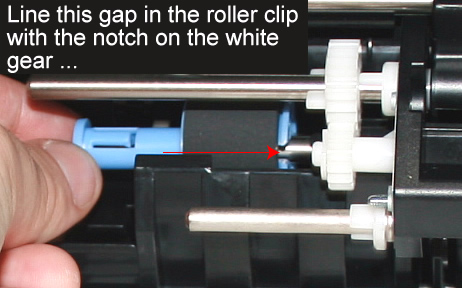
As you continue holding the black door open, install the new blue roller. Orient the gap on the end of the roller with the notch in the white gear so that the blue roller slides and locks properly onto the shaft.
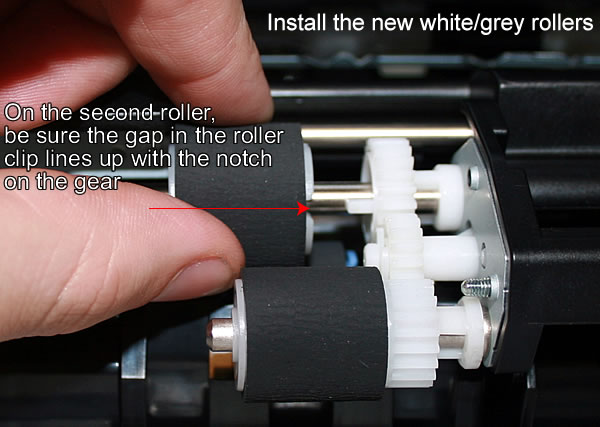
Next install the new white/grey rollers; for the second of these rollers, you will need to line up the gap on the end of the roller with the notch in the white gear so that the grey roller slides up to the notch of the gear.
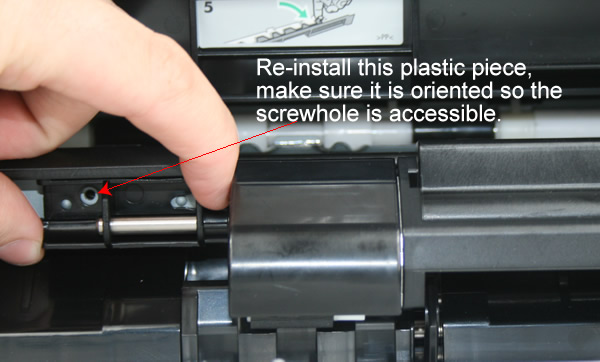
Re-install the black plastic cover which sits over the grey/white rollers. As you install the cover, make sure it is oriented so that the hole (pointed to below) slides over the metal roller shaft.
Other Steps in HP LaserJet P4014 , P4015, P4515
- HP LaserJet P4014 , P4015 fuser installation instructions
- HP LaserJet P4014 , P4015 transfer roller installation instructions
- HP LaserJet P4014 , P4015 cassette rollers installation instructions
- HP LaserJet P4014 , P4015 Reset the maintenance count instructions
- HP LaserJet P4014 , P4015 Tray 1 pickup and feed roller installation instructions
Tech Support
Featured Articles

