HP Color LaserJet M575 mfp fuser installation instructions
Installing the fuser.

Turn the printer off and unplug the power cord. The fuser might be hot if you have been using the printer. As a safety precaution wait 20 minutes for the fuser to cool before proceeding.
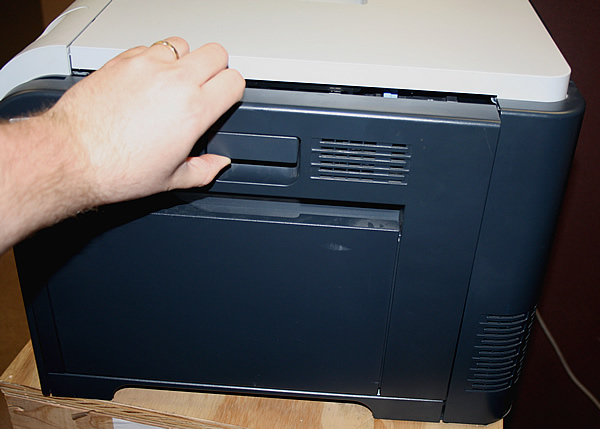
Open the right side cover (see picture below).

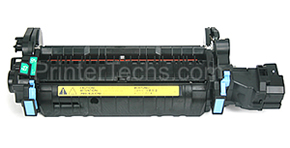
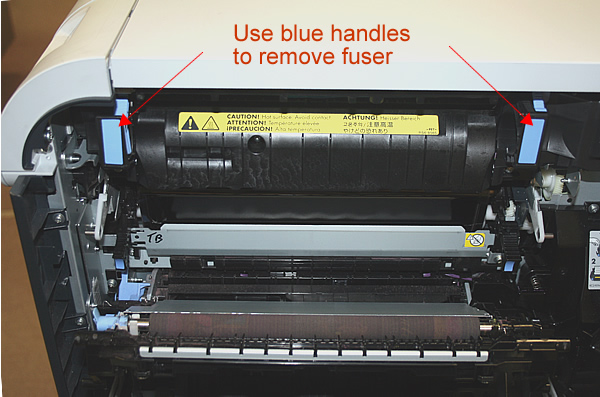
The fuser assembly has two blue handles (red arrows in picture below); hold those two handles as you pull the fuser straight out and remove it from the printer.

Install the new fuser in the same manner; make sure it is seated well, and then close the door. In the next step you will reset the fuser page count.
That's it for installing the fuser! Remember to send your old fuser back to us if you purchased your maintenance kit on exchange. Ship it back in the box we sent if you still have it.
For the HP Color LaserJet M575 series printers, there is an internal page count that should be reset whenever you replace the fuser. This will clear any messages about "Replace Fuser Kit" and will help you keep track of estimated fuser life, etc.
Now, we will reset the Counter for this ADF parts kit. From the printer's control panel --> Open the Administration menu, choose Manage Supplies, choose Reset Supplies, select New Fuser Kit, and choose Reset.
Other Steps in HP LaserJet M575 mfp
- Installing the Fuser HP Color LaserJet M575 mfp
- Installing the Standard Roller Kit HP Color LaserJet M575
- Installing ADF pickup roller and separation pad HP Color LaserJet M575mfp


