
-
Home

-
Maintenance Kit Instructions
-
HP LaserJet 2400
- HP LaserJet 2400 fuser installation instructions
HP LaserJet 2400 fuser installation instructions

Turn the power off and unplug the printer. Wait 20 minutes for the printer to cool.
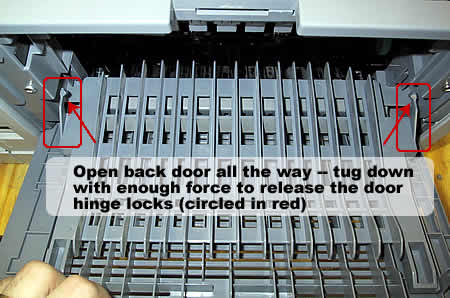
Open the back door of the printer, using enough force that the door opens completely and the hinge locks disengage, as shown below.
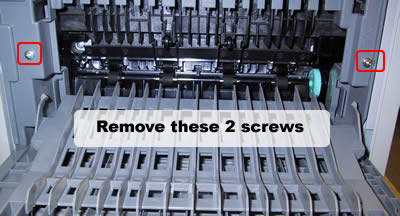
Remove the 2 screws circled in red below.
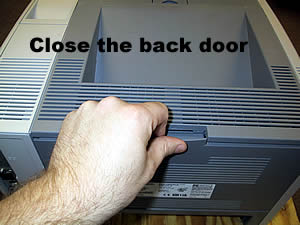
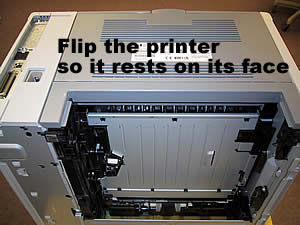
Close the back door, and then flip the printer so that it rests on its face.
 |
 |
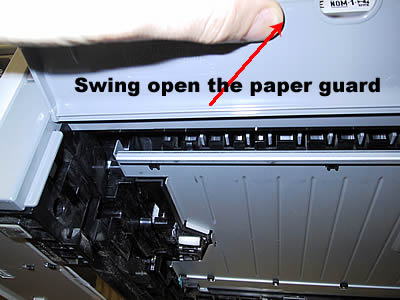
Next swing open the paper guard which shields the back of Tray 2 when it is installed.
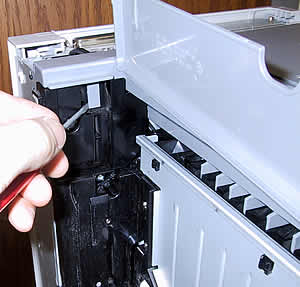
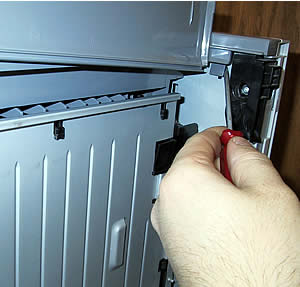
Looking inside the Tray 2 cavity, use a flatblade screwdriver to release the two tabs--one on each side of the rear cover.
 |
 |
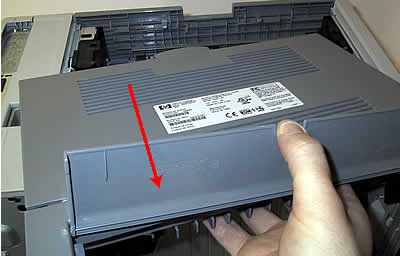
Next remove the rear cover from the printer by pulling down and away.
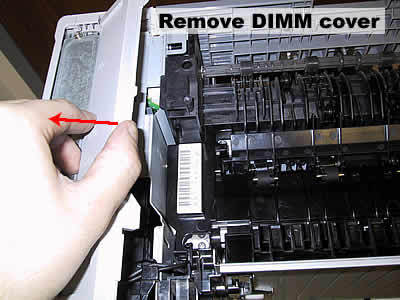
Pry the grey DIMM cover loose and remove it.
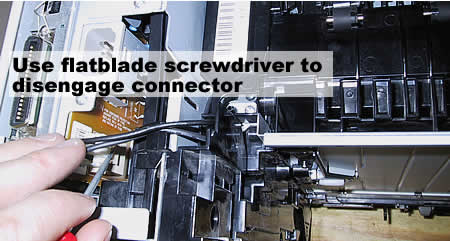
Use a small flatblade screwdriver to disengage the tab on the connector shown below and unplug the connector.
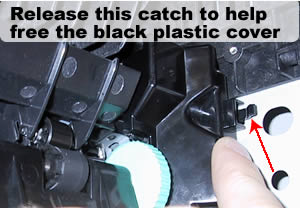
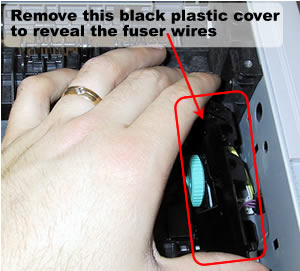
Next (on the right hand side) remove the small black plastic cover, located near the green fuser gear, which hides the other fuser wires
 |
 |
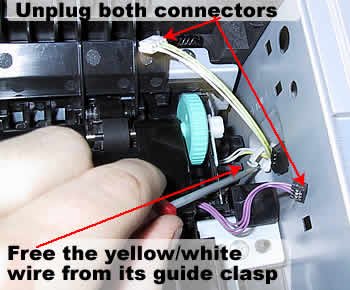
Then unplug the two connectors shown below and free the yellow/white wire from its guide clasp.
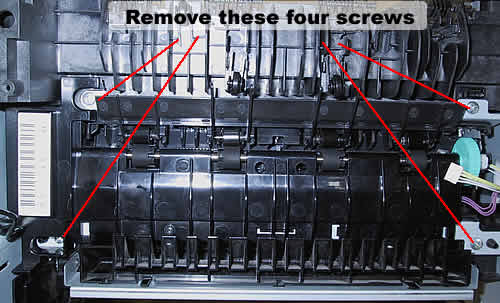
Now remove the four screws holding the fuser in place (shown below).
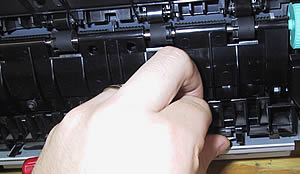
Now remove the black plastic piece shown below, the duplexer inlet guide. Gently pry the tabs on both ends loose and slide/rotate the guide back towards the fuser to release it.
 |
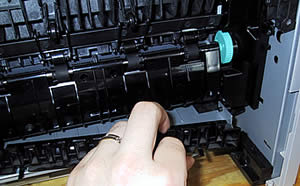 |
Now you can remove the fuser, just pull it straight out towards you.
NOTE: Don't install the new fuser yet, first replace the main motor gear, as shown in the next step.
Other Steps in HP LaserJet 2400 2410 2420 2430
- HP LaserJet 2400 transfer roller installation instructions
- HP LaserJet 2400 Tray 2 Tray 3 Pickup roller installation instructions
- HP LaserJet 2400 fuser installation instructions
- HP LaserJet 2400 fuser drive gear installation instructions
- HP LaserJet 2400 Tray 1 Pickup roller , separation pad installation instructions
- HP LaserJet 2400 Tray 2 Tray 3 Separation pad installation instructions
- HP LaserJet 2400 Resetting the maintenance count
Tech Support
Featured Articles

