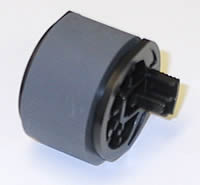
HP LaserJet 4, 4M Tray 1 (multi-purpose tray) pickup roller , separation pad installation instructions
Installing the Tray 1 pickup roller and separation pad.
|
|
 |
Open tray 1 (the multi-purpose tray).
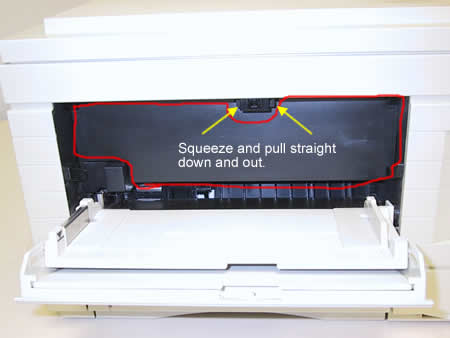
Remove the envelope feeder access cover (circled in red below). Squeeze the tabs where the arrows point. Pull straight down and out. Set the cover aside.
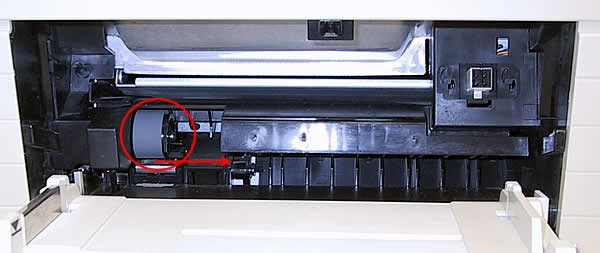
The pickup roller is circled in red below. With your right hand pinch the two tabs on the roller and use a finger on your left hand to slide the roller to the right.
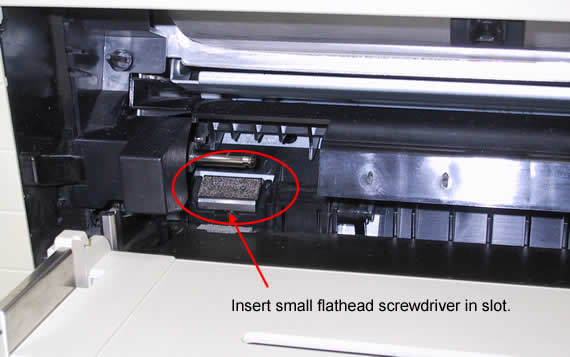
Before installing the new roller, you'll need to remove & replace the separation pad which sits below the roller assembly.
Insert a small flathead screwdriver in the slot under the separation pad circled below. Twist the screwdriver to loosen the pad. It might take a little effort but the pad will lift up and out.
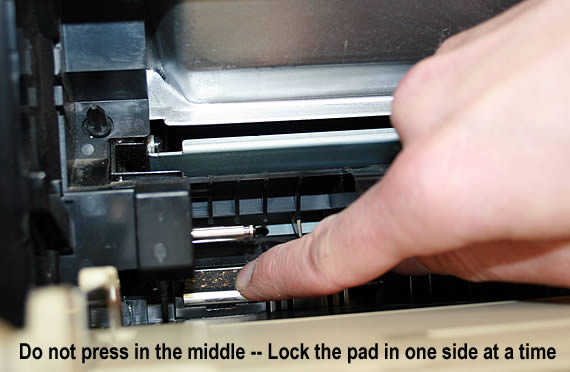
Insert the new pad making sure the shiny metal edge is pointing forward. The separation pad can be difficult to press into place. The trick is to not press down in the middle, that will make it very hard to lock down. Press down on either the left or right side to get one side of the pad locked in, then press on the other side.
Now you can install the new pickup roller. Slide the new roller onto the shaft until it clicks into place.
Reinstall the plastic envelope feeder access cover.
Other Steps in HP LaserJet 4, 4M
- HP LaserJet 4, 4m fuser installation instructions
- HP LaserJet 4, 4m transfer roller installation instructions
- HP LaserJet 4, 4m Tray 1 pickup roller , separation pad installation instructions
- HP LaserJet 4, 4m cassette pickup roller installation instructions
- HP LaserJet 4, 4m optional cassette pickup roller installation instructions


