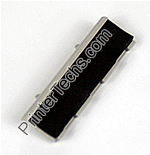
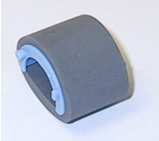
HP Color LaserJet 4700 , 4730mfp manual feed separation pad, pickup roller installation instructions
Installing the manual feed separation pad and pickup roller.
|
|
 |
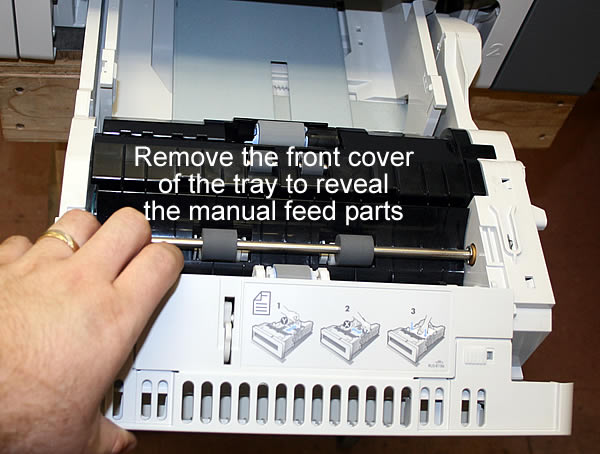
The roller and separation pad for the manual feed pickup are located inside the main paper tray.
Open the paper tray. At the front of the tray, you will find 2 small white plastic sliding locks (circled in red below). Push those locks inwards to release them.

With the sliding locks released, you can now gently rotate and remove the front cover of the tray. Gently rotate it forward & down until it comes free. Behind this cover you will find the manual feed pickup roller & separation pad.
To release & remove the manual feed roller, spread the tabs pictured below.
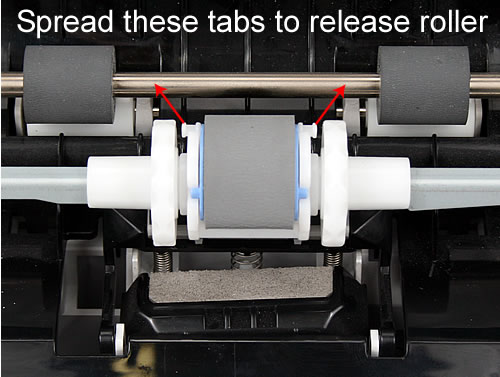
Don't install the new pickup roller yet. It will be easier to see & replace the separation pad beneath it with the roller removed.
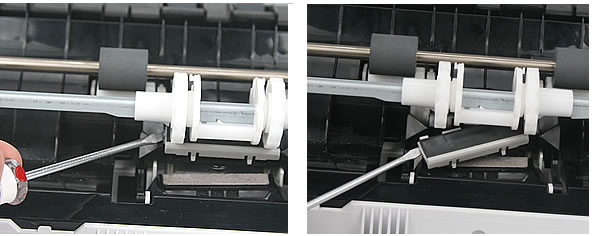
Next, take a small flatblade screwdriver and gently pry the side of the grey separation pad up and out to remove it. See pictures below.
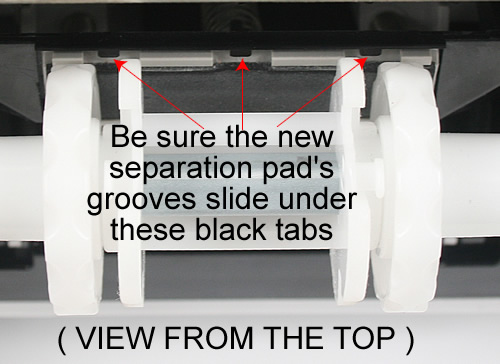
Install the new separation pad. Here's a good view from the top of the roller assembly (see picture below). As you install the new separation pad, be sure the grooves cut into the rear of the separation pad slide underneath the black tabs on the plastic pad assembly.
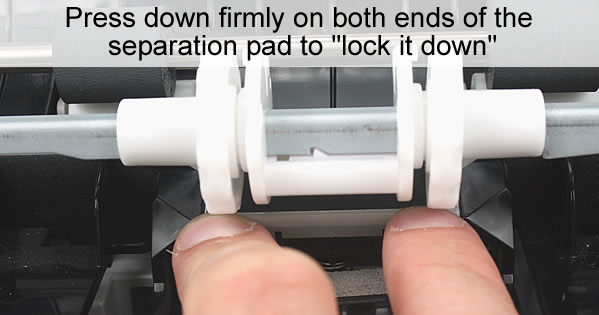
Once the separation pad is in place, press down firmly on both ends of the pad to lock it down; see picture below.
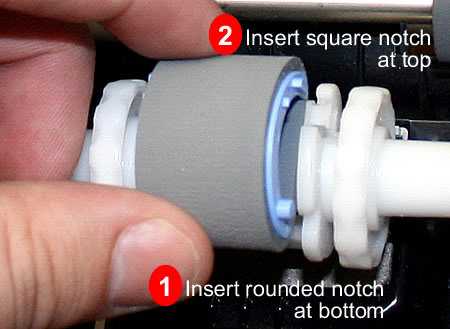
Now you can install the new pickup roller as shown below. The round notch inserts first, at the bottom of the plastic assembly, and the square notch locks in place second, at the top of the assembly.
Now you can reinstall the front cover for the paper tray and re-lock those white tabs.
Other Steps in HP LaserJet 4700, 4730mfp
- HP Color LaserJet 4700 4730mfp fuser installation instructions
- HP Color LaserJet 4700 manual feed parts installation instructions
- HP Color LaserJet 4700 cassette roller installation instructions
- HP Color LaserJet 4700 reset fuser page count instructions


