
-
Home

-
Maintenance Kit Instructions
-
HP LaserJet 5100
- HP LaserJet 5100 fuser installation instructions
HP LaserJet 5100 fuser installation instructions

Installing the fuser.
Turn the printer off and unplug the power cord. The fuser might be hot if you have been using the printer. As a safety precaution wait 20 minutes for the fuser to cool before proceeding.
With the back of the printer facing you, press the two tabs towards the center to open the rear door.
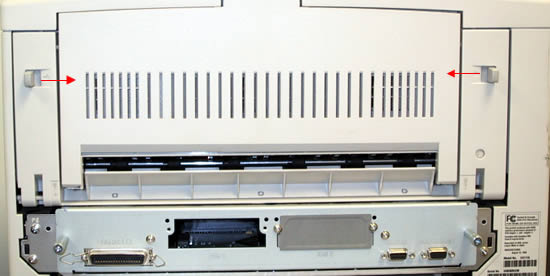
Pinch the plastic support strap located on the left side. Squeeze the tab while pulling up to remove the support strap. This will take a little wiggling and tugging to get the strap out.
Slide the door to the left to remove it. Remember that when you re-install the door to insert the pin on the left side of the cover first.
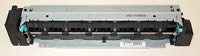
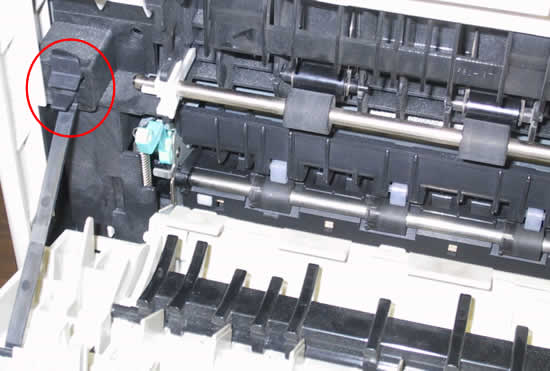
Remove the two screws circled in red below. Use a small flat blade screwdriver at the red rectangle (below) to slightly lift the fuser. This will disengage it from its seated position. Pull the fuser out by holding on to the two green handles. You will need to tug harder on the left side because the fuser's power connection is located on its far left.

Be very careful when handling the replacement fuser. The LaserJet 5000 fuser has a long ceramic heating element that will crack if you bang the fuser around or twist its frame.
Install the replacement fuser and reassemble the back panel.
That's it for the fuser! Remember to send your used fuser back to us if you purchased your maintenance kit on exchange. Ship it back in the box we sent if you still have it.
Other Steps in HP LaserJet 5100
- HP LaserJet 5100 fuser installation instructions
- HP LaserJet 5100 transfer roller installation instructions
- HP LaserJet 5100 Tray 1 pickup roller and separation pad installation instructions
- HP LaserJet 5100 250-sheet tray pickup roller and separation pad installation instructions
- HP LaserJet 5100 500-sheet optional cassette pickup roller , feed roller , and separation roller installation instructions
- HP LaserJet 5100 Reset maintenance count
Tech Support
Featured Articles

