HP Color LaserJet 5550 fuser installation instructions
Installing the fuser.
Turn the printer off and unplug the power cord. The fuser might be hot if you have been using the printer. As a safety precaution wait 20 minutes for the fuser to cool before proceeding.
1. Turn the printer off and unplug the power cord. The fuser might be hot if you have been using the printer. As a safety precaution wait 20 minutes for the fuser to cool before proceeding.
2. Using the side handles, open the top cover.
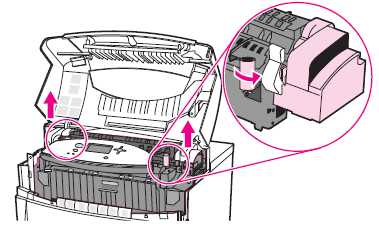
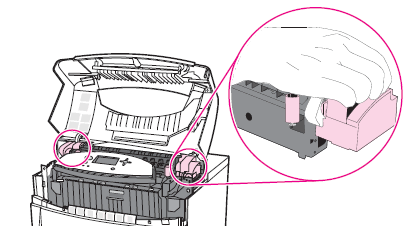
3. Completely loosen the blue thumb screws on either side of the fuser.

4. Grasp the ends and pull straight up to remove the fuser.

5. Remove the new fuser from the bag.
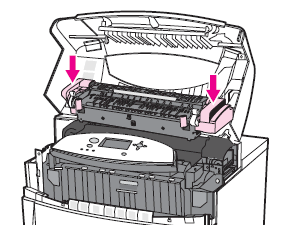
6. Grasp the sides of the fuser and lower it into the printer. Press firmly to seat it in position.

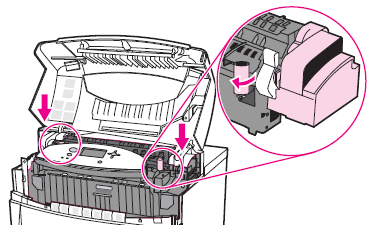
7. Tighten the blue thumb screws.

That's it for the fuser! Remember to send your fuser back to us if you purchased your maintenance kit on exchange. Ship it back in the box we sent if you still have it.
Other Steps in HP LaserJet 5550
- HP Color LaserJet 5550 fuser installation instructions
- HP Color LaserJet 5550 manual feed pickup roller and separation pad installation instructions
- HP Color LaserJet 5550 cassette pickup roller , feed roller, separation roller installation instructions
- HP Color LaserJet 5550 Reset the fuser page count


