
-
Home

-
Maintenance Kit Instructions
-
HP LaserJet P3005
- HP LaserJet P3005 fuser installation instructions
HP LaserJet P3005 fuser installation instructions

Installing the fuser.
Turn the power off and unplug the printer. Wait 20 minutes for the printer to cool.
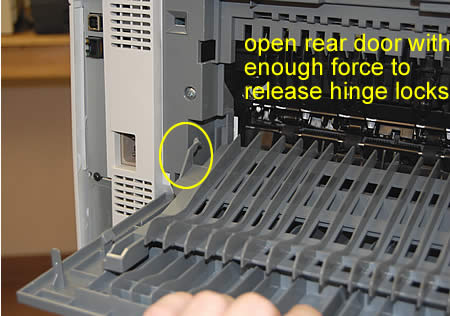
Open the back door of the printer, using enough force that the door opens completely and the hinge locks disengage, as shown below.
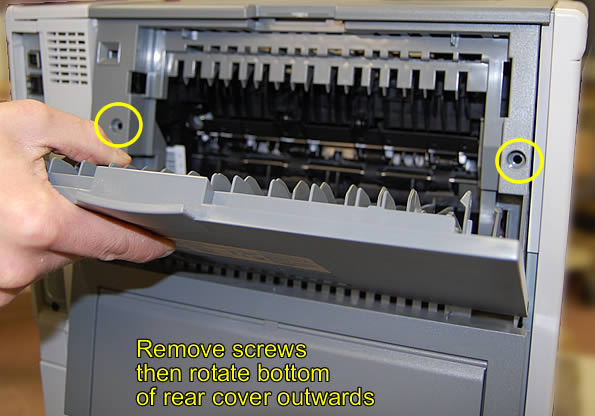
Remove the 2 screws (holes circled in yellow below) which hold the rear cover in place. Rotate the bottom of the rear cover outwards to free & remove the panel.
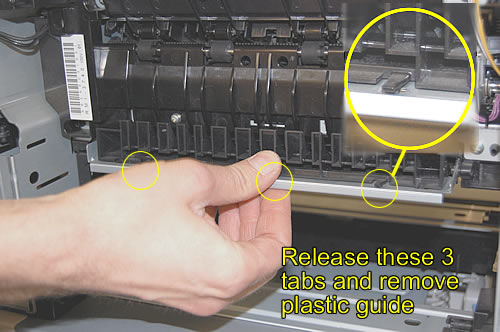
Next you can remove the duplexer inlet guide. Release the holding tabs upwards as shown below.
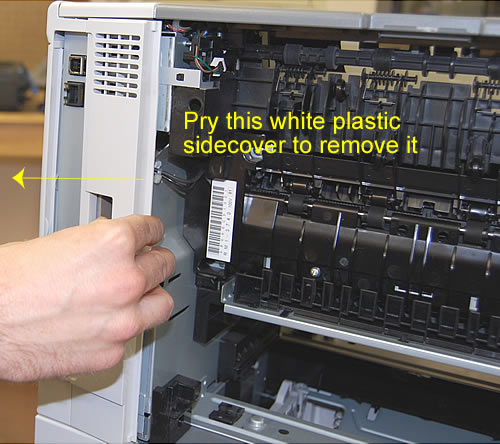
Pry off the white plastic sidecover to the left to remove it.
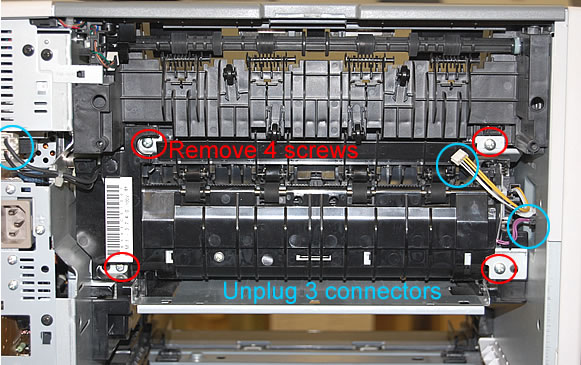
With the rear cover and side cover removed, you can unplug the 3 fuser connectors circled in blue below. Also , remove the 4 metal screws circled in red below.
Next remove the fuser. Often you have to wiggle the fuser a bit from side to side to remove it.
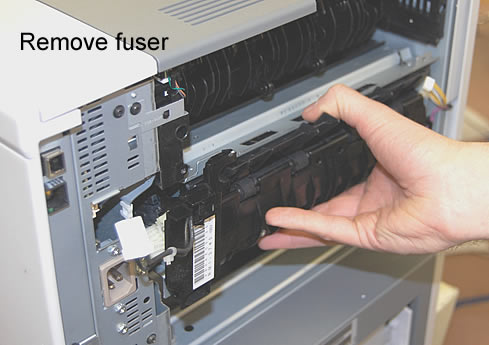
You can insert the new fuser , replug all 3 wires and reinstall the 4 screws.
Reinstall the duplexer paper guide, the small white side cover, and the rear cover.
That's it for the fuser! Remember to send your old fuser back to us if you purchased your maintenance kit on exchange. Ship it back in the box we sent if you still have it.
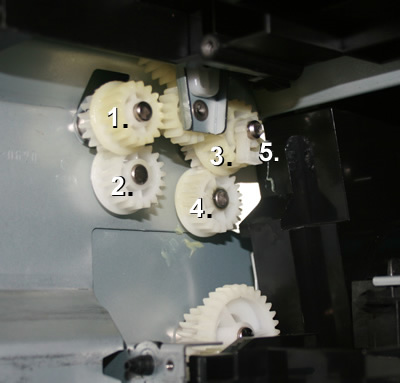
These 4 drive gears (labeled “1”, “2”, “3” and “4”) are not included with a standard maintenance kit. These gears sit just behind the fuser, at the back of the printer.
If you replace the P3005 fuser and you hear a gear noise, you probably need to replace these gears. The new gears on the fuser may not mesh well with the worn gears in your printer. These gears wear out fairly quickly in the P3005 series printers. Click here to order the set of gears or you can call us at 866-352-7108.
Other Steps in HP LaserJet P3005
- HP LaserJet P3005 transfer roller installation instructions
- HP LaserJet P3005 Tray 2 Pickup roller installation instructions
- HP LaserJet P3005 Tray 2 separation pad installation instructions
- HP LaserJet P3005 Tray 1 pickup roller , separation pad installation instructions
- HP LaserJet P3005 fuser installation instructions
- HP LaserJet P3005 fuser drive gear installation instructions
- HP LaserJet P3005 Resetting the maintenance count
Tech Support
Featured Articles

