HP LaserJet P3005 Tray 2 pickup roller installation instructions
Remove Tray 2. Place the printer so that it rests on its rear cover and so you can easily see and access the tray 2 pickup roller.
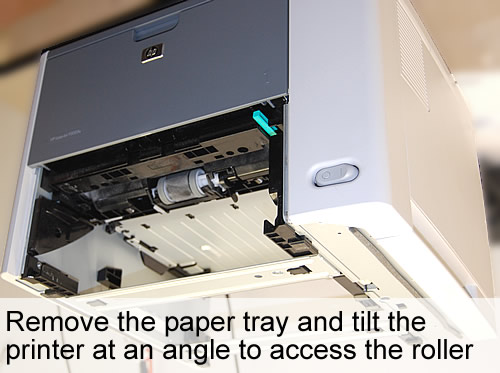
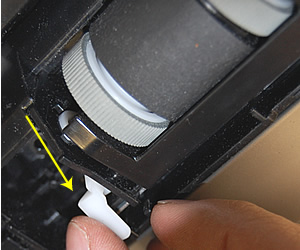
Use your finger or a flatblade screwdriver to gently pry and release the white plastic lever on the left side of the pickup roller, and then rotate the white plastic lever outwards.
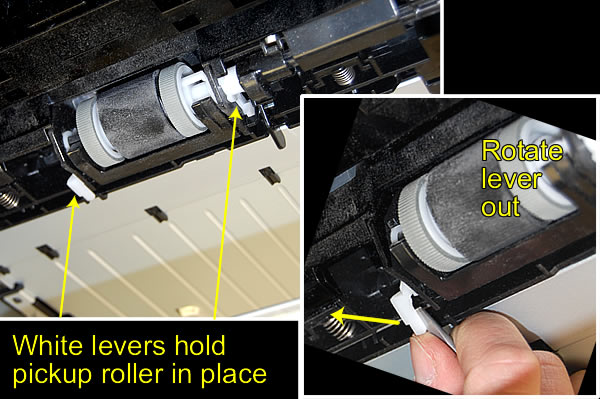
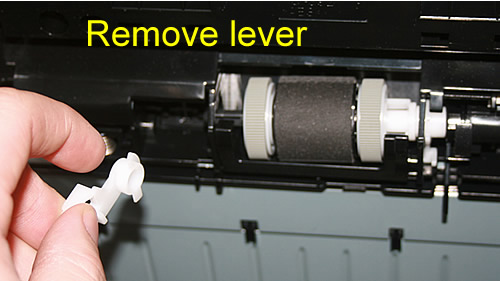
Slide the lever out to the left and remove it.
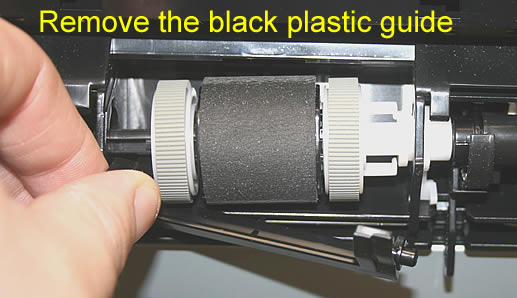
Next remove the black plastic guide which sits just below the roller, blocking access.
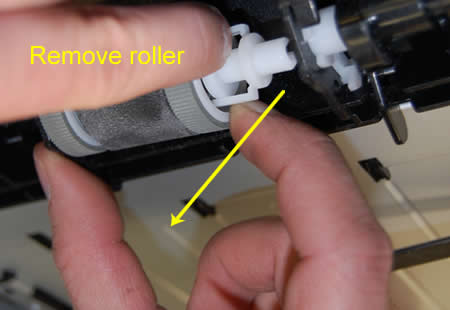
Now you can remove the roller. Rotate right side of roller down and free.
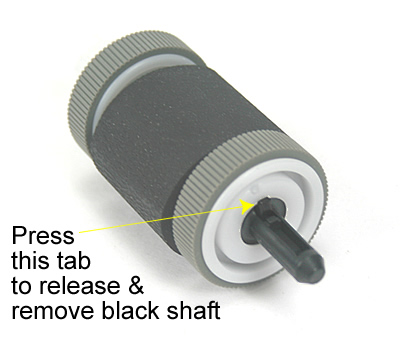
With the shaft removed, tilt the roller so the spring falls out as pictured below.
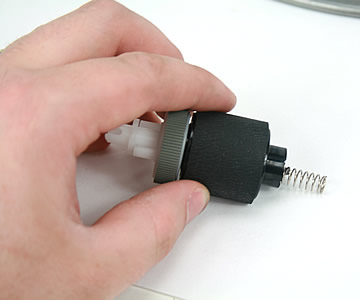
Reassemble the roller assembly as shown below, inserting the new roller in place of the old roller.

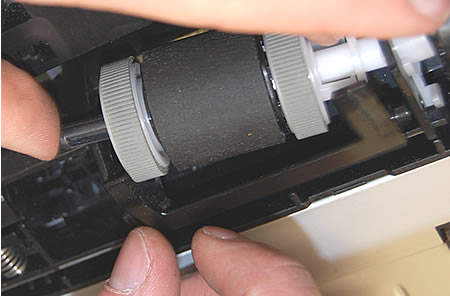
Reinstall the newly assembled roller, plastic guide, and white lever clips.
Other Steps in HP LaserJet P3005
- HP LaserJet P3005 transfer roller installation instructions
- HP LaserJet P3005 Tray 2 Pickup roller installation instructions
- HP LaserJet P3005 Tray 2 separation pad installation instructions
- HP LaserJet P3005 Tray 1 pickup roller , separation pad installation instructions
- HP LaserJet P3005 fuser installation instructions
- HP LaserJet P3005 fuser drive gear installation instructions
- HP LaserJet P3005 Resetting the maintenance count


