
-
Home

-
Other instructions
-
Replacing the Swing Plate Assembly - Long Method
- Install the PrinterTechs metal gear into the New Assembly
Step 1: Install the PrinterTechs metal gear into the New Assembly
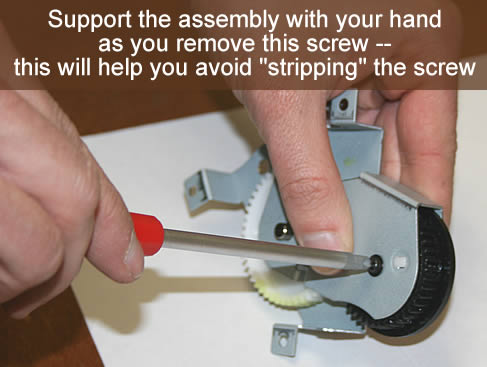
Carefully remove the screw pictured below.
There is a small white plastic "clip" on the assembly; pry this clip up and you can throw it away -- you won't need it with the new PrinterTechs metal gear.
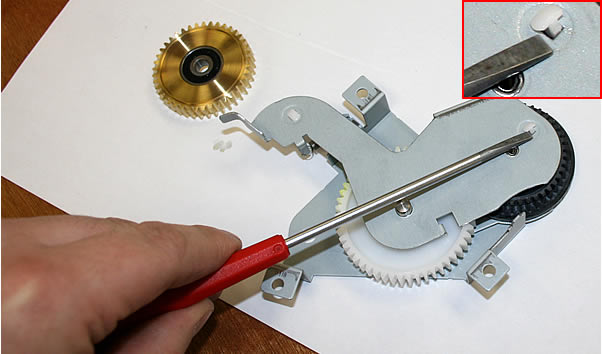
Flip the assembly over and remove the metal pin.
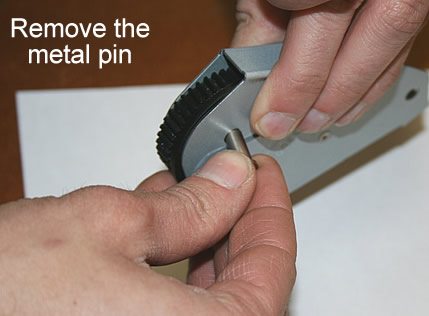
Remove the black gear and spacer from the assembly.
Save the spacer -- it will be used with the new metal gear.
![]()
Reinstall the black spacer. One side of the spacer has a slightly raised circular rim. Install as shown below with the raised rim facing down, flat side facing up.
![]()
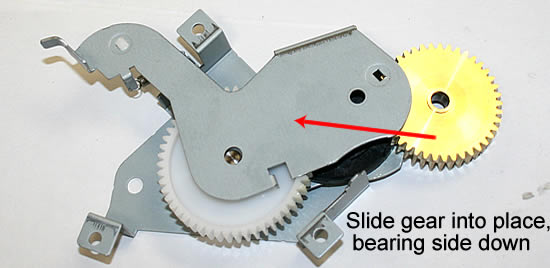
One side of the metal gear has a bearing in the middle. With the bearing facing down, slide the gear in on top of the spacer.
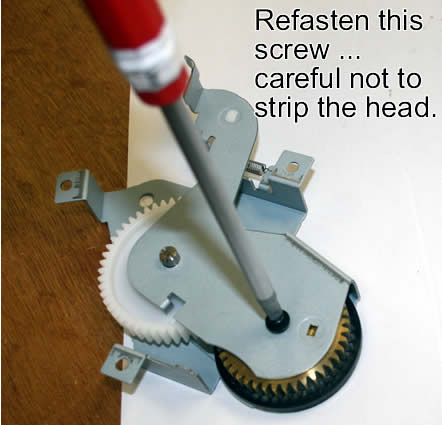
Insert the pin through the hole in the spacer and in the gear, to hold them in place. When the head of the pin rests flush against the metal plate, you can attach the screw into the other side of the pin, as shown below.

Now refasten this screw, and you've finished assembling the new swing plate assembly.
Other Steps in Replacing the Swing Plate Assembly - Long Method
- Install the PrinterTechs metal gear into the New Assembly
- Removing the panels and formatter
- Removing the power supply
- Accessing the old swing plate assembly
- Installing the new swing plate assembly
- Re-assembly of parts
- Replacing the fuser gear
Tech Support
Featured Articles

