
-
Home

-
Other instructions
-
Replacing the Swing Plate Assembly - Long Method
- Re-assembly of parts
Step 6: Re-assembly of parts
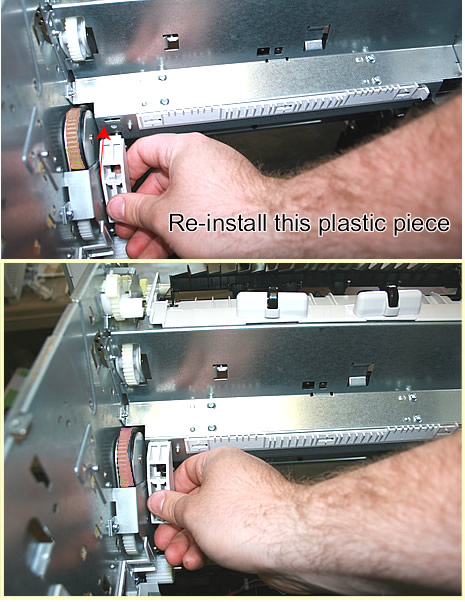
Now you can reinstall the plastic piece. It will be easiest if you again "tilt" the printer back for easier access.
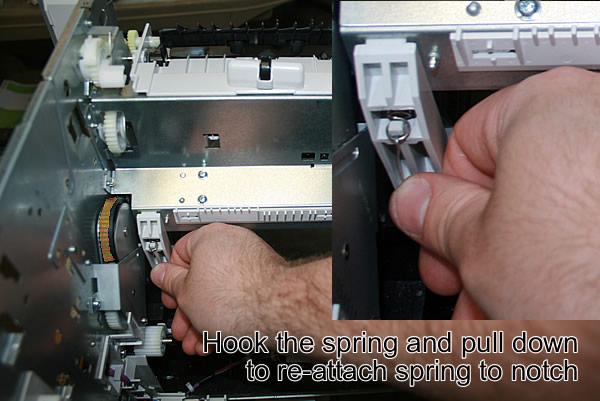
Hook the spring again with a strong paperclip or a hook tool, and then pull the spring down through the opening on the plastic guide to re-attach the spring to its notch. Re-attaching the spring onto the plastic notch may take a few tries, and will probably require both hands.
Reinstall the gear you removed earlier.
Relock the "plastic window" in place.
Reinstall the plastic power supply guide, with its single screw.
Slide the power supply back in place; re-feed the cables through and replug the cables into the DC controller.
Replug the fan connectors.
Replace the metal cover over the fan connectors.
Refasten the screws for the power supply on both sides of the printer.
Re-install the tray guide.
Replace all covers.
Reinstall the formatter with its support screws.
Replace the plastic side cover which hides the formatter.
Other Steps in Replacing the Swing Plate Assembly - Long Method
Tech Support
Featured Articles

