
-
Home

-
Other instructions
-
Replacing the Swing Plate Assembly - Long Method
- Installing the new swing plate assembly
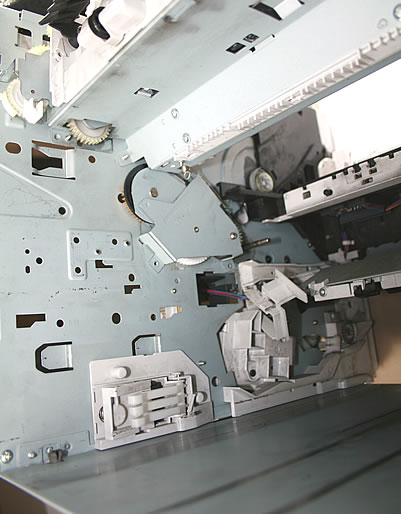
Step 5: Installing the new swing plate assembly
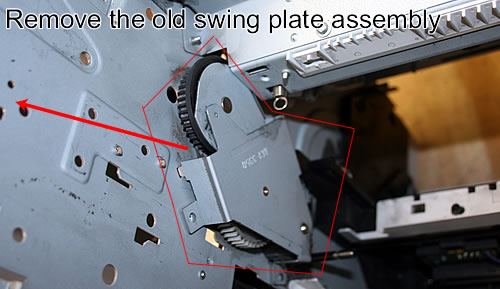
Now you can remove the old swing plate assembly (it helps if you rotate the assembly a bit as you remove).
Install the new swing plate assembly with the metal gear.
This is tricky and will take a few tries to get it fully aligned properly.
Begin by guiding the curved tip of the assembly into the opening in the side (opening is located just past the thick white gear in the machine.) See pictures below.
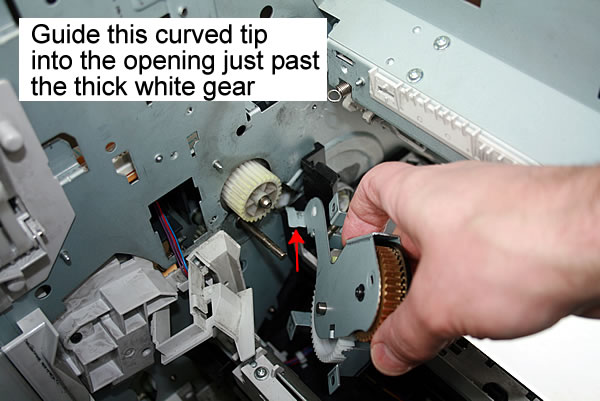
Here is a close up of the opening where this curved tip should be inserted.

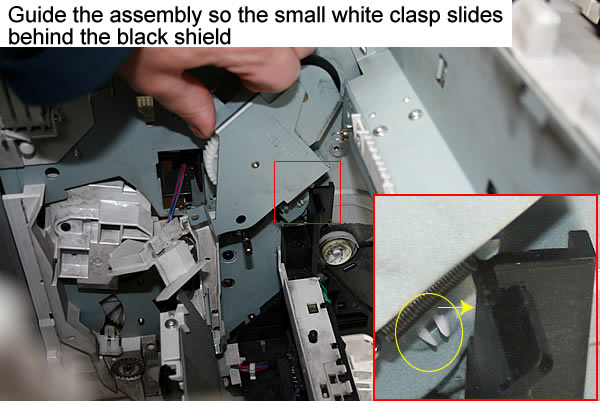
Rotate the swing plate flush with the wall and slide it into place. This is tricky, look closely at the enlargement in the lower right corner of the picture below. Guide the swing plate so that the small white clasp (circled in yellow below, near the spring) slides behind the black plastic shield.
You will need to maneuver the assembly so that the metal hook lines up with its opening in the sidewall (pictured as #1 below) , and the gear drive shaft slide through its corresponding hole in the assembly (pictured as #2 below).
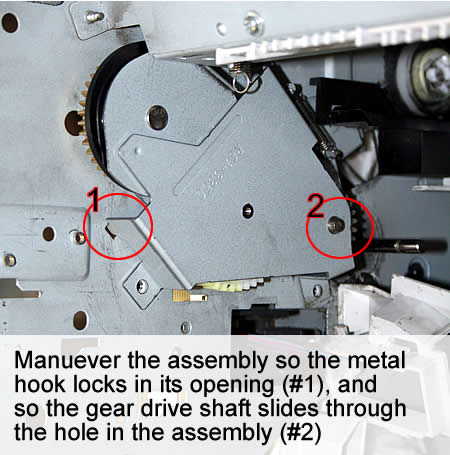
When the assembly is installed correctly, it will rest flush with the sidewall, and the three screw holes will be lined up.
Refasten the three screws for the swing plate (two visible from this angle, and one from the toner cavity angle ) -- again, be careful not to strip the screw heads.
Other Steps in Replacing the Swing Plate Assembly - Long Method
Tech Support
Featured Articles

