
-
Home

-
Maintenance Kit Instructions
-
HP LaserJet 4550
- HP LaserJet 4550 cassette rollers installation instructions
HP Color LaserJet 4550 cassette rollers installation instructions

Replacing the cassette rollers.
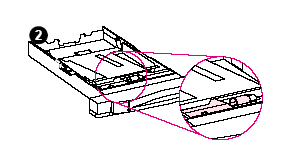
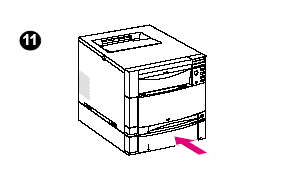
| Step 1 - Remove Tray 2 from the front of the printer. | Step 2 - On Tray 2, locate the blue/gray paper roller and the cover next to the roller. |
 |
 |
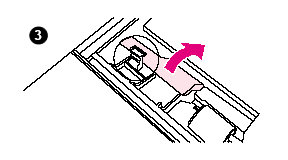
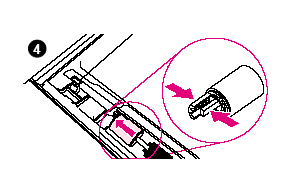
| Step 3 - Squeeze the cover release lever and open the cover. | Step 4 - Remove the old paper roller from Tray 2 by squeezing together the blue tabs and then sliding the roller off its spindle. |
 |
 |
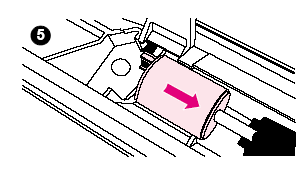
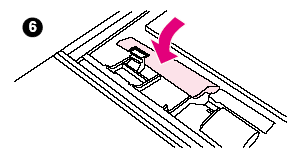
| Step 5 - Install a new paper roller on Tray 2. Slide the new roller onto the spindle until the roller clicks in place. | Step 6 - Close the cover. |
 |
 |
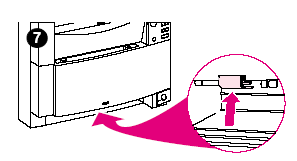
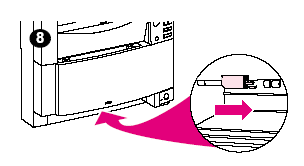
| Step 7 - Inside the tray cavity on your printer, locate the white/gray paper roller in the top of the tray cavity. | Step 8 - Squeeze the tabs on the roller and remove the paper roller from the tray cavity. |
 |
 |
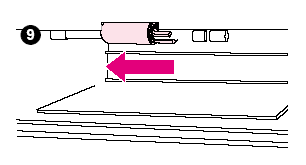
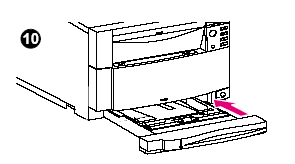
| Step 9 - Install a new paper roller in the tray cavity. Slide the new roller onto the spindle until the roller clicks into place. | Step 10 - Replace Tray 2. |
 |
 |
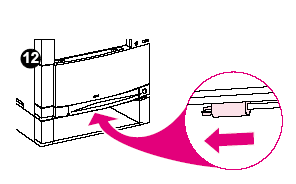
| Step 11 - If you have the optional 500-sheet paper feeder (Tray 3), repeat steps 3 through 9 to replace the two paper rollers for Tray 3. | Step 12 - NOTE: The paper roller in the Tray 3 cavity slides off its spindle in the opposite direction of the roller that was in the Tray 2 cavity. |
 |
 |
Other Steps in HP LaserJet 4550
- HP LaserJet 4550 fuser installation instructions
- HP LaserJet 4550 cassette rollers installation instructions
- HP LaserJet 4550 changing the air filters instructions
Tech Support
Featured Articles

