
-
Home

-
Maintenance Kit Instructions
-
HP LaserJet 5100
- HP LaserJet 5100 Tray 1 pickup roller and separation pad installation instructions
HP LaserJet 5100 Tray 1 pickup roller and separation pad installation instructions

Installing the Tray 1 pickup roller and separation pad.
 |
 |
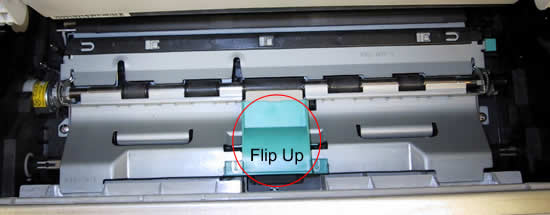
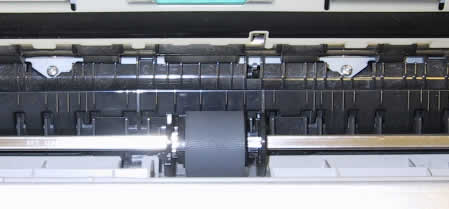
Open the top cover and remove the toner cartridge. Flip up the green handle of the registration assembly pictured below.
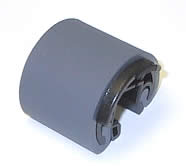
Squeeze the black tab on the right side of the pick-up roller to release the roller, and slide the roller to the right.
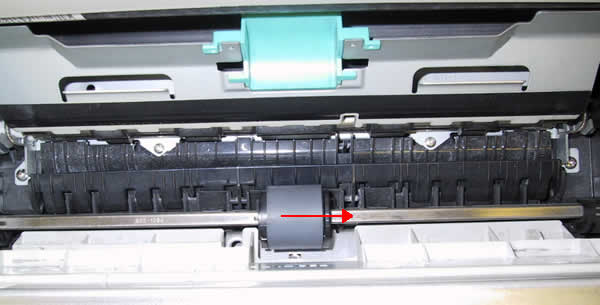
The roller is sandwiched between two black discs. Slide the roller back to the left so it is centered between the discs and pull the roller straight up and out.
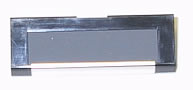
Before installing the new pickup roller, replace the separation pad as shown below.
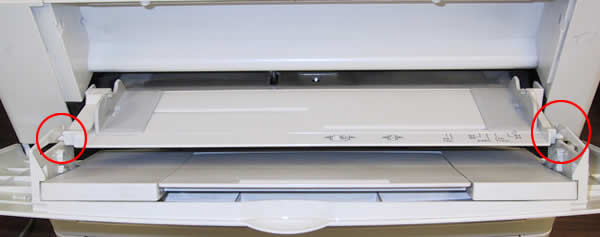
Remove the front tray to make getting at the separation pad easier. Fold down the front tray and unclip it at the two points circled below.
Flip the inner tray up and the outer tray will come off by sliding it to the right. Remove the inner tray by letting it rotate all of the way down. It should fall right out of its pivot/hinge.
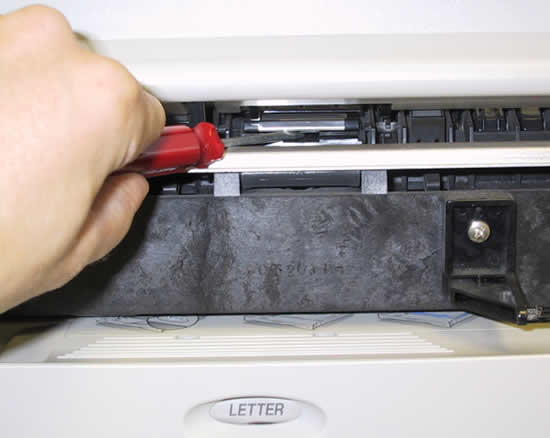
Use a small flathead screwdriver to pry out the separation pad. With your other hand inside the printer, remove the pad.
Firmly press the new separation pad (silver edge forward) in its holder and press down until it clicks into place.
Install the new pick-up roller by making sure the thumb grip is on the left. You can only install the roller one way, so flip it around if you think you have it backwards. Slide the roller to the right until it is seated against the right black plastic disc. You might have to slightly lift and wiggle the roller to get it seated. Now slide the right disc and the roller all of the way to the left until it clicks into place.
Other Steps in HP LaserJet 5100
- HP LaserJet 5100 fuser installation instructions
- HP LaserJet 5100 transfer roller installation instructions
- HP LaserJet 5100 Tray 1 pickup roller and separation pad installation instructions
- HP LaserJet 5100 250-sheet tray pickup roller and separation pad installation instructions
- HP LaserJet 5100 500-sheet optional cassette pickup roller , feed roller , and separation roller installation instructions
- HP LaserJet 5100 Reset maintenance count
Tech Support
Featured Articles

