
-
Home

-
Other instructions
-
Printer Pooling Tutorial
- Printer Pooling Tutorial - part 2
Part 2, Printer Pooling Tutorial
Software Setup for the Printer Pool
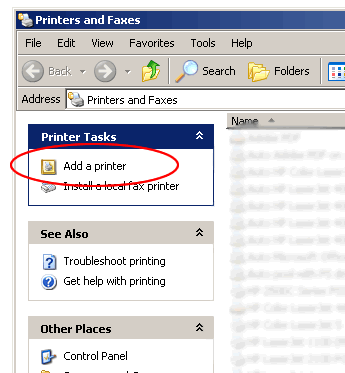
The following example uses Windows XP: you will want to select "Add a Printer" from the Printers & Faxes section of the Control Panel. This will open the Add Printer Wizard.
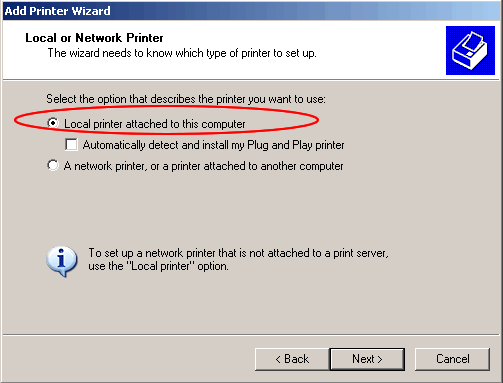
In the Add a Printer Wizard choose "Local printer attached to this computer.
Select "Create a new port" and -- assuming you're pooling using JetDirect cards like we did in our example above -- choose "Standard TCP/IP port" or "HP Standard TCP/IP Port".
![]()
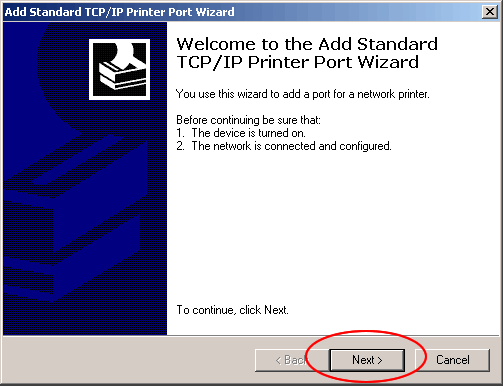
A new wizard starts "Add TCP/IP Printer Port".
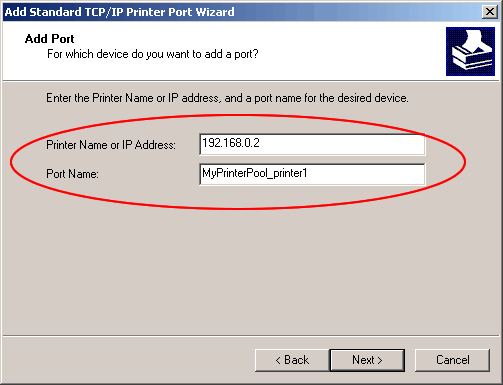
Enter the IP address of one of the printers in your pool, and give this port a unique name. (If printer networking is new to you, a detailed discussion can be found in our printer networking tutorial.)
Finish the rest of the "Add New Port" wizard.
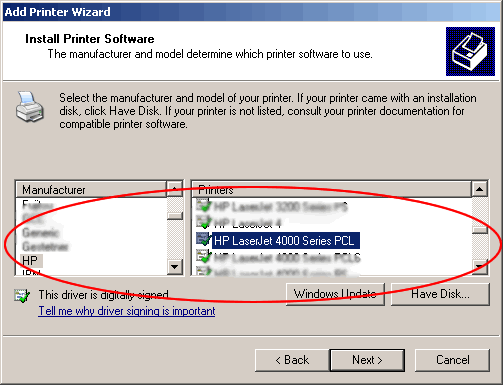
Back to the Add Printer Wizard, choose a printer driver that will be compatible with all the printers in your printer pool. Many of HP's drivers are generic enough to work with many different models. For example the Laserjet 4 driver and Laserjet 4000 driver work with many monochrome Laserjets.
If asked, you can keep your existing driver.
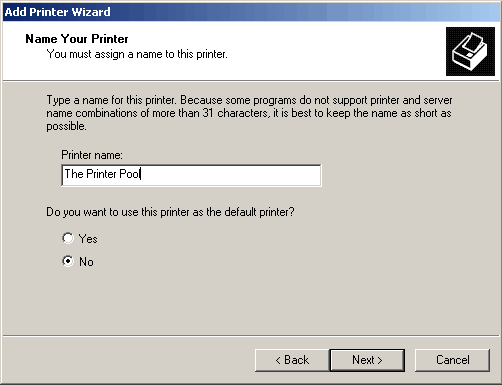
Assign a name to your new printer pool; this is the name your computer will assign to the printer pool. If you want this to become the default printer on your local computer, choose Yes.
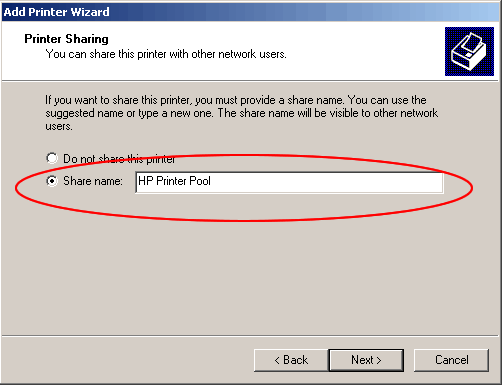
You will probably want to share this printer so that other users can see it in their list of available printers. Now assign a network name to your new printer pool that will be recognizable to all users on the network.
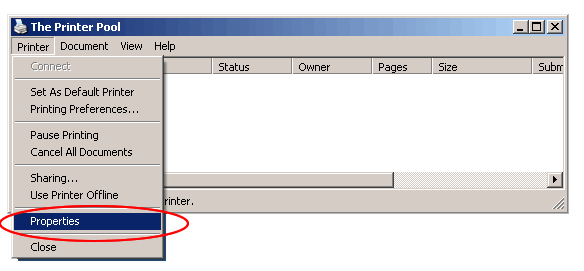
Now open up the Control Panel, Printers & Faxes folder, and find your new printer pool. View its Properties. (right click or double left-click and choose properties)
Open the "Ports" tab.
Checkmark the "Enable printer pooling" option.
Then click "Add Port..."

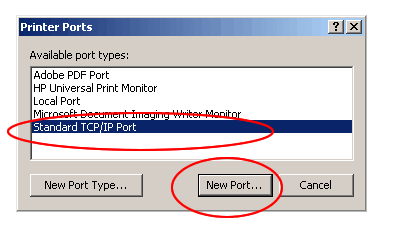
From the available types, choose "Standard TCP/IP Port" or "HP Standard TCP/IP Port", then choose "New Port..."
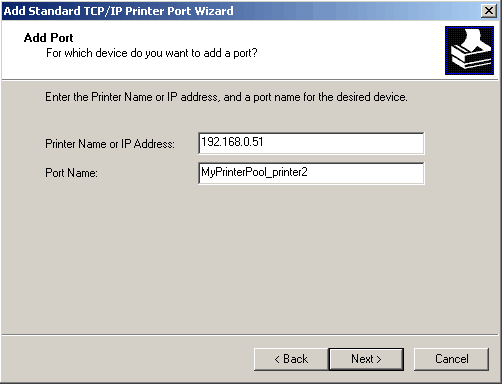
The "Add Printer Port Wizard" starts up, enter the IP address and port name of the second printer you want to use in the pool.
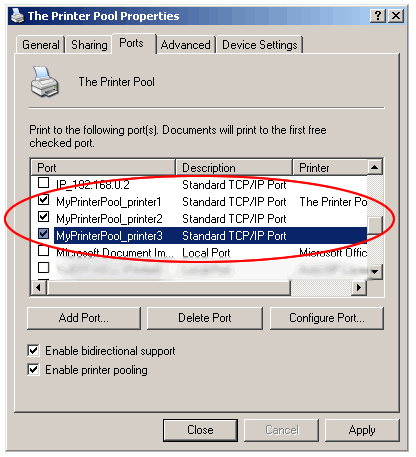
Finish this wizard as you did previously; and continue clicking "Add Port" under the Properties of the Printer Pool and continue adding the IP address and port name for each of the other printers you want to use in the pool.
Finally, when you've added all the printer ports you wish to use in the pool (in our example three), checkmark each one of those ports and then click Apply/Close.
Now you are ready to begin using the pool. Here's a good test to see if your pool is working: open up a large file and hit CTL+P several times to repeatedly print the file. You should notice that when several large jobs are sent to the printer pool at nearly the same time, the print jobs will be divided up among the available printers.
Other Steps in Printer Pooling Tutorial
- Printer Pooling Tutorial - part 1
- Printer Pooling Tutorial - part 2
Tech Support
Featured Articles

