
-
Home

-
Other instructions
-
Replacing the Swing Plate Gear - Short Method (Recommended)
- Remove the old black plastic gear and spacer
Step 2: Remove the old black plastic gear and spacer
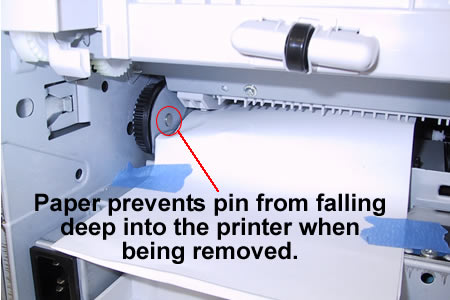
Removing the pin:
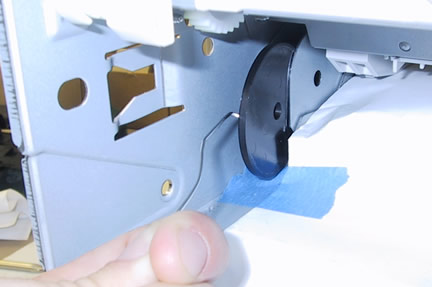
IMPORTANT SAFEGUARD: Tape a half-sheet of paper in place as shown below; this will serve as a net to catch the pin circled below when it falls loose. If you don't have something in place to catch the pin when it falls it can easily drop deep into the printer onto the power supply. If it drops onto the power supply you will have a big challenge trying to retrieve it without disassembling the printer to remove the power supply. You will want to retrieve the pin if it falls on the power supply. If you try to power up the printer with a metal pin resting on a couple of leads on the power supply you might create a short. So please take the precaution of taping a piece of paper in place as shown below.
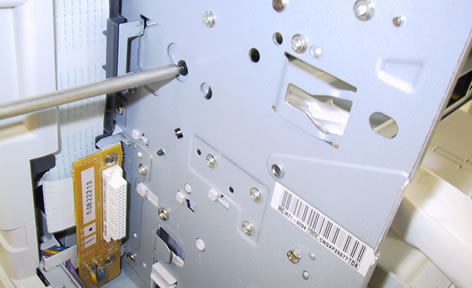
Next, remove the screw shown below which holds the black gear of the swing plate assembly in place.
Unbend a paperclip and slide it through the screw hole and push the pin free.
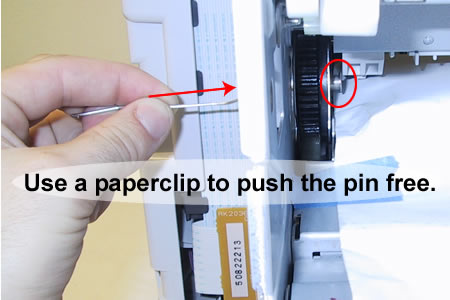
The pin will drop onto the paper safeguard rather than falling deep into the printer!
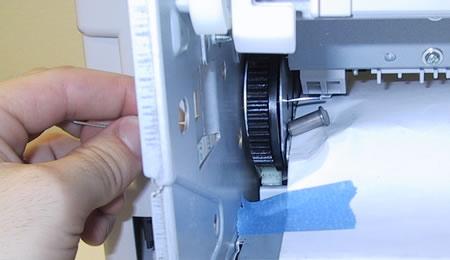
Removing the black plate and black gear:
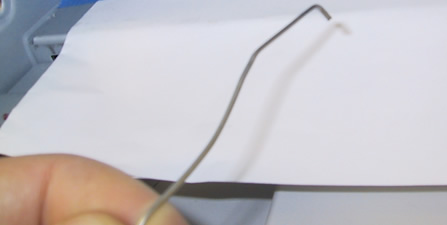
Bend a crook in the paperclip to be useful as a "hook".
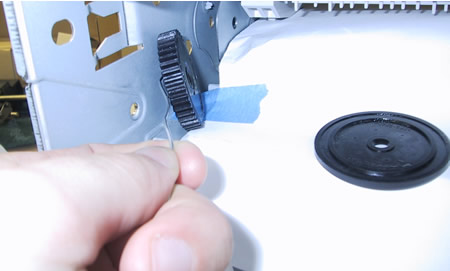
Using your paperclip hook, first grab the thin black disc which sits to the right of the black gear and remove it. (NOTE: some printers will not have this black spacer disc. Make sure you use the disc that came in the replacement swing plate assembly. You should not install the replacement gear without the black disc. The disc helps prevent the gear from moving side to side.)
Next grab the black gear and remove it.
Other Steps in Replacing the Swing Plate Gear - Short Method
- Take the spacer from the New Assembly and Remove Formatter
- Remove the old black plastic gear and spacer
- Install the new metal gear and black spacer disc
- Replace the fuser gear
Tech Support
Featured Articles

